11
OrionWelders.com
ch
.
1
FOCUS THE BASE MICROSCOPE
1 . Move the microscope head up or down to a comfortable height .
2 . Adjust the stylus rod so the stylus is at a 45-degree angle .
3 . Adjust the stylus rod holder up and down to a height that gives the user room to position their
hands underneath the stylus and lift the work piece upward to the stylus .
4 . Twist the Microscope Focus knob to focus the microscope .
When adjusting the microscope focus, place your finger at the tip of the
welding stylus to help judge the correct focus location . Focus the microscope
till the texture on the skin of your finger is clearly visible .
Microscope Arm Setup
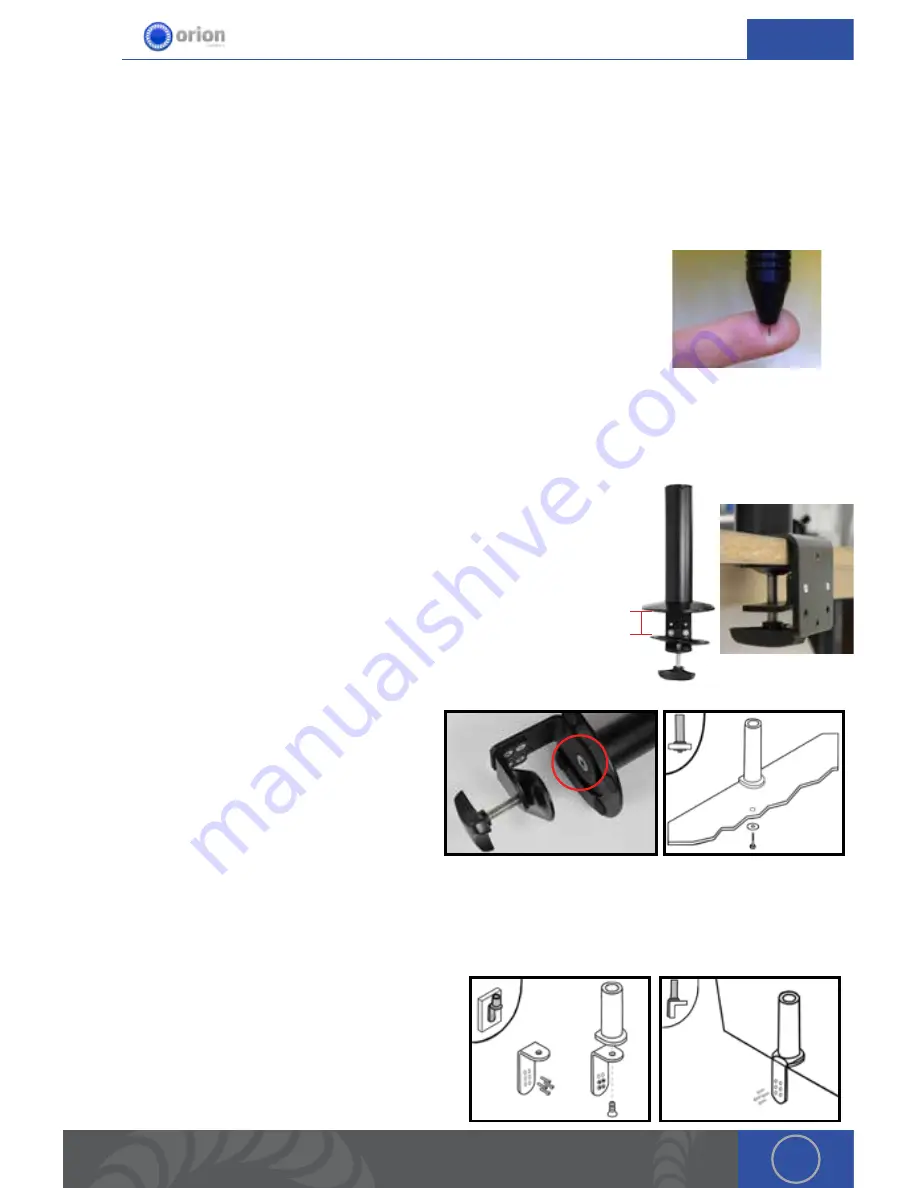
MICROSCOPE ARM MOUNTING OPTIONS
A video explanation of the 3 different mounting options can be found at
http://www .orionwelders .com/resources/orion-c-series-resources/
Mounting Option 1 - Clamp to table
1 . Determine the height of the tabletop . *If it is thicker than 2-3/4’
(7cm), follow arm base mounting options 2 or 3 .
2 . Position the microscope arm clamp under the tabletop .
3 . Turn the clamp knob clockwise until the clamp is very snug .
Mounting Option 2 - Bolt through table
1 . Using the provided allen wrench, unscrew
the 10m x 1 .5 allen bolt underneath the
arm base .
2 . Drill a 3/8’ (10mm) hole through the
tabletop .
3 . Place a washer on the 10m x 1 .5 bolt
(length will depend on tabletop thickness)
and run it up through the tabletop into the arm base .
4 . Tighten the bolt until it is very snug .
Mounting Option 3 - Bolt to table
1 . Position the base against the table .
2 . Trace drill holes with a pen or marker .
3 . Drill 1/4’ holes in the tabletop .
4 . Run screws through the base into the drilled
holes .
23/4”


