7
Optical Axis Adjustment
These adjustments will require a 3mm and 2.5mm hex key.
There are three sets of “push-pull” screws on the back-end
of the optical tube where the focuser attaches (Figure 8). The
optical axis is denoted by a thin outline of light around the
perimeter of the view through the collimating eyepiece. Each
set consists of a smaller black screw and a larger chrome
screw; these must be adjusted in tandem. Loosen one and
tighten the other to make changes to the optical axis. This
will adjust the tilt of the optical axis in relation to the second-
ary mirror. If the optical axis is not aligned, the entire image
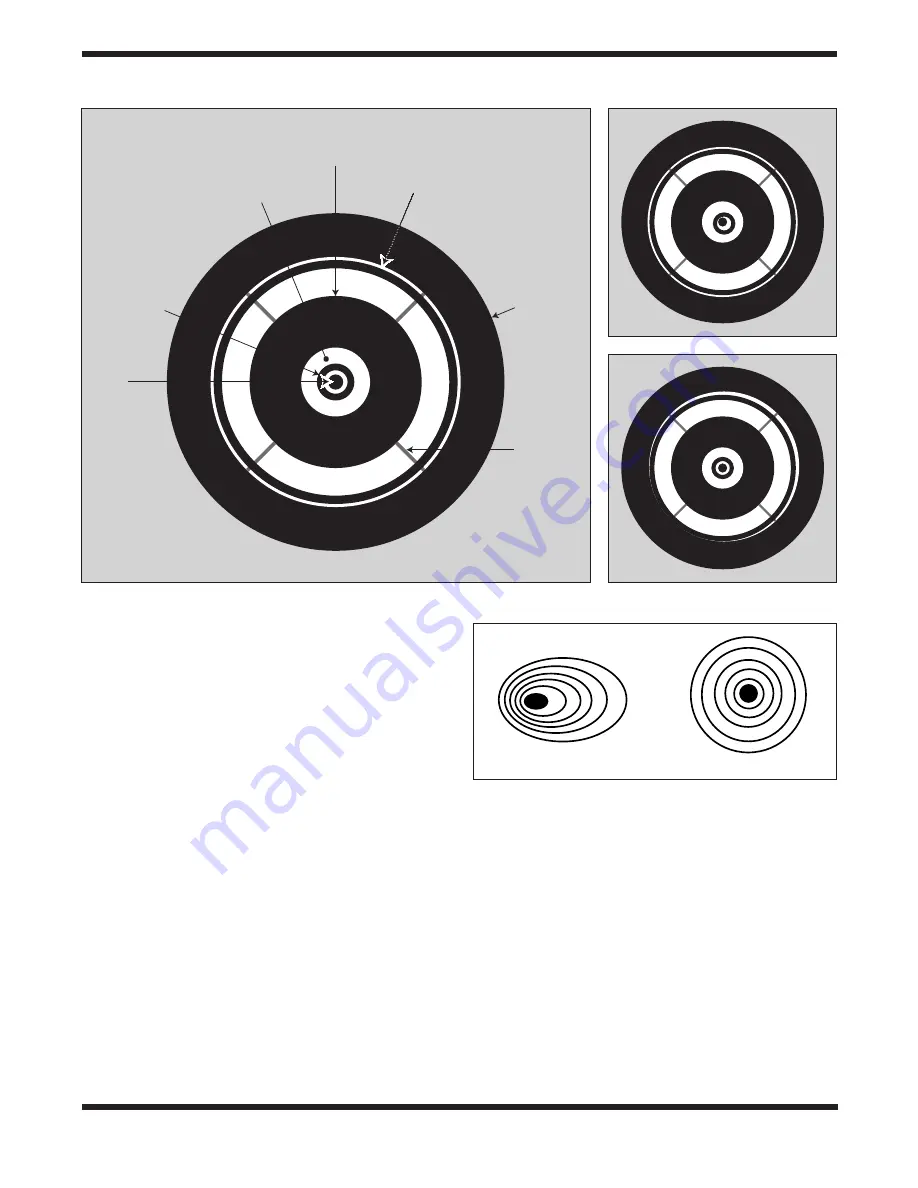
through the collimating eyepiece will appear as if it is tilted to
one side (Figure 9c). When properly aligned you will see a
very thin concentric outer white circle around the perimeter
of your view through the collimation eyepiece. This procedure
will require only micro-adjustments, if any.
Star Testing
An optional star test can be performed to confirm the collima-
tion accuracy of the telescope. The adjustment procedure on
the telescope is the same as using the Collimation eyepiece;
testing, however, will be done in the night sky. This method is
more difficult as you will need to keep your target star cen-
tered in your field of view. Furthermore, seeing conditions will
affect the end result. Keeping the star precisely centered in
the field of view is critical to avoid false negatives. It is sug-
gested that you choose a star close to the zenith (straight
overhead) rather than at the horizon to minimize atmospheric
distortions. Using Polaris as your target star can be helpful as
minimal drift adjustments will be required.
Center a bright star in your field of view using moderate to
high magnification. Place your eyepiece directly into the fo-
cuser. Do not use a star diagonal while performing this proce-
dure. In a well collimated telescope, a defocused star image
should appear symmetrical, with the dark central obstruction
centered in the star’s ring pattern (Figure 10).
Figure 9a-c:
The view through the collimating eyepiece (not to scale). Figure 9a shows the Ritchey-Chrétien aligned with all components
identified. Figure 9b shows the secondary out of alignment. Figure 9c shows the optical axis out of alignment.
Figure 10:
An unfocused view of a bright star through
the eyepiece. Proper collimation will show a symmetrical
diffraction pattern such as the one on the right. If the circles are
unsymmetrical the scope needs collimation.
Collimation
eyepiece
mark
Secondary mirror
center mark
Secondary
mirror holder
Reflective surface of
collimating eyepiece
Spider
vanes
Optical
axis
Border
9a
9c
9b
Out of collimation
Collimated


