10
11
Dark Frame Correction
All CCD and CMOS cameras have
inherent noise which becomes more
apparent with longer exposure images.
If you require taking longer exposures
(typically longer than 3 seconds) you
may start to see background noise,
vertical lines and bright dots (hot
pixels).
To automatically remove the noise and
hot pixels, dark frames are used to
subtract the noise and hot pixels from
the live images. Best results are accomplished by capturing many dark frames
and averaging them (Median Combine) into one resultant frame.
In order to create dark frames the camera must be covered so that light is blocked
from passing into the sensor. If using a telescope this can easily be accomplished
by placing the lens cap on the telescope.
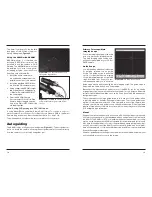
In order to first capture dark frames select Automatic (
Figure 13), Next select the
number of images to take (Dark Frame Quantity) and finally select the Capture
Dark Field checkbox. The user will now be prompted to cover their telescope and
recording will begin.
When all dark frames have been recorded according to the value in Dark Frame
Quantity, the user will be prompted to remove the lens cap.
The user can now select either:
• Enable Dark Correction – This will now subtract the averaged dark frames
from the live image to produce a cleaner image.
• SaveDark button to save the averaged dark frames as a DAT file.
Once the dark frames have been saved they can be reused at any time by first
selecting Manual Load, then clicking Load Darks to open file load window in order
to select the previously saved Dark frame DAT file and finally selecting Enable
Dark Correction.
Users may choose to record many DAT files at a variety of different exposures
to save time later in the field. It is important to note that noise and hot pixels will
change according to the temperature so this should also be taken into consid-
eration.
Note: Dark frames must match the live image exposure and gain values in order
to work correctly.
To test your darks frames keep the lens cap on and view the noise and hotpixels
in the live image. Now select the checkbox Enable Dark Correction.
live Broadcast
Included with the software is a WDM
driver. This driver enables the SSAIO
camera to be able to broadcast video
over the internet via software such
as Orion HandyAVI Lite (Included
with FishEye accessory) or inter-
net broadcasting services such as
NightSkiesNetwork.com and Skype.
Select Live Broadcast from the tools
menu within Orion AstroCap then
Select Orion Camera (WDM) from
within the broadcasting software.
Overlay
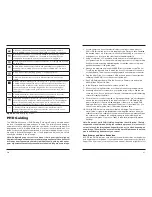
Select Overlay to see an image overlaid on top of the live video. The default
Image is the Orion Logo (
Figure 14).
Users can add their own overlay by modifying the file “overlay.jpg”
Black will be the transparent color. Please keep resolution size same as the
default file at 1280 x 1024 pixels.
reticle
Two reticules are included for use in centering targets and to use as a Digital
Video Finder when used in combination with the finder bracket and 8mm lens
(
Figure 14).
Screen Zoom
Zoom is useful for aiding in manual focusing.
Zoom in on the live image and then pan around to find a target to focus on.
Focus and then zoom back out.
time Stamp
When set overlays a timestamp on each recorded frame.
High Priority Disk write
This features reduces the display speed in order to free CPU cycles for the
disk write.
When active this feature adds ~ 300ms delay between frames to make sure the
display and hard drive are in sync. This can be beneficial for slower hard drives.
Quality Filter Setting
The quality filter setting is a software filter that helps reduce atmospheric jitter by
filtering out the out of focus image.
Figure 13.
Dark Frame Correction
interface
.
Figure 14.
Overlay and Reticule
activated
.

