Installation Steps
1 - Attach the DROP DOWN FLUSH SOLAR
PANEL BRACKETS to the bottom of the solar
panel using (1) 3/4" SCREW, (2) 1/4” WASHERs,
and (1) 1/4-20 NYLON LOCKNUT per connection
(Apply ANTI SEIZE).
2 - Position two crossbars so the solar panel with
the brackets attached fit between the crossbars
with the edges of the brackets resting on each
crossbar.
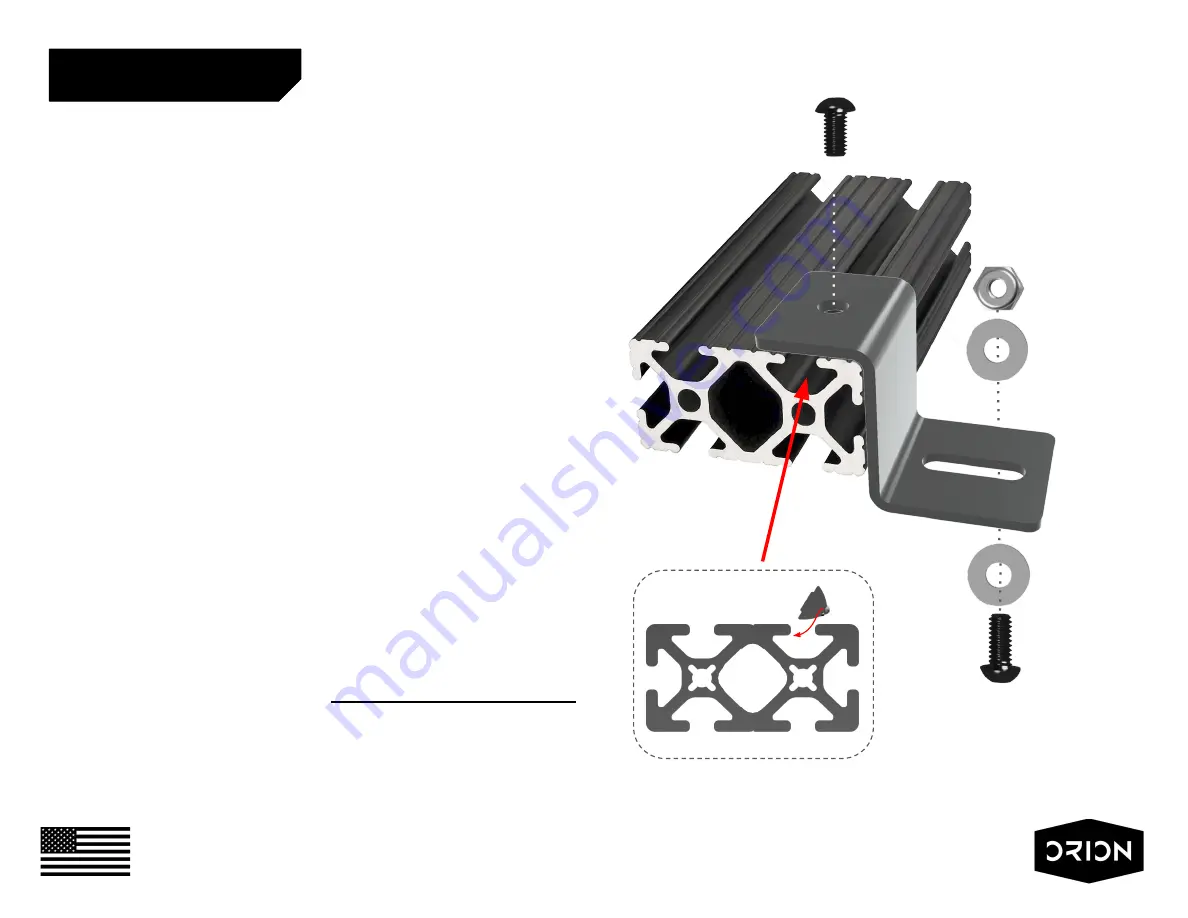
3 -
Roll (4) T-NUTs into 8020 crossbars where
appropriate to line up with solar brackets
mounting holes (
Fig. 3
).
4 - Place solar panel with attached Solar Brackets
on the crossbars so it aligns with the T-NUTS
placed in Step 3.
5 - Insert 3/8" (4) SCREWs through Solar
Brackets into T-NUTs and tighten all connections
(Apply THREADLOCKER).
Fig. 3
3/4" SCREW, WASHER,
BRACKET, SOLAR PANEL,
WASHER, NYLON LOCK NUT
(1/4 - 20)
APPLY ANTI-SEIZE
3/8" SCREW
10S TNUT (1/4-20)
APPLY THREADLOCKER
SOLAR PANEL GOES
BETWEEN BRACKET
AND NUT
ORION VAN GEAR PRODUCTS
ARE PROUDLY MADE IN THE USA.


