background image

Lighting and Electrical

Page 49

Stoplights

Four stoplights, two on each side on 
the rear of the vehicle, illuminate 
when the brakes are applied. 

A third stop light is included, located 
below the upper centre line above 
the rear engine door.

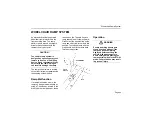
Hazard Warning Lights

A switch, located on the lower right 
side of the driver’s front instrument 
panel, activates the hazard warning 
lights.

Engine Compartment Lights

These lights are controlled by a 
toggle switch located on the engine 
panel box in the rear engine 
compartment.

Batteries

Four 12-volt, heavy duty batteries 
are installed on a battery tray 
located on the curbside, behind the 
rear axle.

A booster jumper cable connector is 
located in the rear engine 
compartment directly below the 
engine panel and a second jumper 
cable is located in the curbside 
engine compartment.

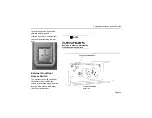
Disconnection of 
Electrical System

This vehicle is equipped with a 
24 volt electrical system located on 
the battery tray and is accessible 
through the manual shut-off door.

WARNING

Do not contact the positive 
battery pole with the vehicle 
body, either directly or through 
any metal conductors. Such 
contact can produce a short 
circuit resulting in possible 
injury. Keep fire or electrical 
sparks away from batteries as 
they emit highly combustible 
hydrogen gas. Wear eye 
protection while working with 
batteries. If battery fluid comes 
in contact with eyes, immediately 
flush eyes thoroughly with water.

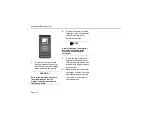
NOTE

Placing the battery isolator 
switch in the OFF position while 
engine is running will shutdown 
the engine and all safety systems 
with the exception of the fire 
suppression system which is 
directly wired to the batteries.

Summary of Contents for VII EPA10

Page 1: ...OPERATOR S MANUAL ORION VII HYBRID VEHICLE ACADEMY EXPRESS HYBRID 1368A Printed December 21 2010 ...

Page 2: ...ses North America 350 Hazelhurst Road Mississauga Ontario Canada L5J 4T8 Telephone 905 403 1111 Daimler Buses North America 165 Base Road PO Box 748 Oriskany New York USA 13424 Telephone 315 223 5100 2010 DAIMLER BUSES NORTH AMERICA ...

Page 3: ...ER S SIDE CONTROL PANEL 19 MASTER SWITCH 25 Engine Stop Position 25 Day Run Position 25 Night Run Position 25 Park Position 25 DESTINATION SIGNS 26 Electronic Destination Sign 26 Operator s Display and Keyboard ODK 26 Destination Sign Dimming Feature 28 DRIVER S SEAT 29 USSC Q91 Driver s Seat 30 Driver s Seat Belt 31 AIR BRAKE SYSTEM OPERATION 32 Loss of Air Pressure 32 Wet Weather Operation 33 Em...

Page 4: ...Panel 39 Engine Protection System Electronically Controlled Engines Cummins ISB 39 B A E HYBRID PROPULSION SYSTEM 41 Hybrid Electric Vehicle HEV Propulsion System Operation 41 Propulsion Control System PCS 41 Alternating Current Traction Generator ACTG 41 Alternating Current Traction Motor ACTM 42 Motor Speed Warning Indicator 42 Electric Alternator System EAS 42 Propulsion Control System Emergenc...

Page 5: ...Climate Control System 52 Climate Control System Switch 52 Driver s Booster Blower Switch 52 Fresh Air Ventilation 53 Driver s Fan 53 IntelligAIRE Climate Control System 54 PASSENGER ENTRANCE AND EXIT DOORS 56 Accelerator Interlock 56 Door System Operation 56 Pull Cord Stop Request 57 Speed Sensing Interlock 57 Malfunction in Opening and Closing Front Door 57 Door Master Switch 58 Malfunction in O...

Page 6: ...lity Device Securement Instructions 65 ENGINE COOLING SYSTEM 67 Checking and Replenishing Engine Coolant 67 High Coolant Temperature 68 Low Engine Coolant Level 68 Modular Traction System MTS Coolant 69 AMEREX FIRE SUPPRESSION SYSTEM 70 Fire Suppression System 71 Automatic Operation 72 Manual Operation 72 EXTERIOR COMPARTMENT AND SERVICE ACCESS DOORS 74 GENERAL DATA AND TECHNICAL INFORMATION 77 Re...

Page 7: ...d safety equipment of the Orion VII EPA10 Hybrid Vehicle All personnel involved in the operation of this vehicle should read this manual before providing any public service For additional information or assistance refer to the contact information located at the back of this manual ...

Page 8: ...attaching and securing restraining belts and to provide assistance when leaving the vehicle Special features of the vehicle fulfill passenger needs in the following areas Kneeling and wheelchair ramp features allow coach floor to street level access for the wheelchair bound individual Restraining belts and securement devices are located at all wheelchair positions Pull cords and push buttons alert...

Page 9: ...mediately be brought to the attention of qualified service personnel For further information on the HEV system refer to BAE Systems maintenance manual DANGER Use extreme caution if any work has to be performed on the engine while it is running High voltage is present at the generator terminals traction motor terminals and all high voltage cabling connecting the generator and traction motor to the ...

Page 10: ...s Booster Blower Vent 5 Driver s Pull Down Sunvisors 6 Door Master Switch 7 Exhaust Regeneration Override Switch 8 Regenerative Braking Switch 9 Gooseneck Microphone 10 Horn Button 11 Front Instrument Panel 12 Brake Pedal 13 Accelerator Pedal 14 Directional Signal Foot Control Switches 15 Driver s Seat 16 Headlight Dimmer Foot Control Switch 17 Side Control Panel ...

Page 11: ...he operator s area with additional climate control See Fresh Air Ventilation on page 53 5 Driver s Pull Down Sunvisors These adjustable pull down mechanisms located above the operator windshield and operator s side window prevents eye exposure to sunlight A scissor type reinforcement retains the shades rigidity and prevents the shade from excessive swaying 6 Door Master Switch The Door Master swit...

Page 12: ...ing various vehicle systems See Front Instrument Panel on page 9 12 Brake Pedal This foot operated treadle valve located on the compartment floor to the immediate right of the steering wheel applies the vehicle service brakes 13 Accelerator Pedal This foot operated pedal remotely controls the engine fuel governor control which in turn controls the speed of the vehicle This pedal is located on the ...

Page 13: ...rides the air system to allow front doors to be opened manually See Malfunction in Opening and Closing Front Door on page 57 20 Driver s Door Control Push Buttons The rear and front door controller push buttons allow the operator to activate the front and or rear doors Press once to open and press again to close the doors 21 Tilt Telescopic Steering Column Lever The steering column is equipped wit...

Page 14: ...Operator s Compartment Page 8 c Push down slightly on the lever and gently articulate the wheel until the column locks in place ...

Page 15: ...Front Instrument Panel Page 9 FRONT INSTRUMENT PANEL ...

Page 16: ...h conditions removed the vehicle from service immediately A flashing red light indicates a critical warning level of 11 under such conditions immediately move the vehicle to a safe location and shutdown the engine 4 Air System Pressure Gauge This dual indicator gauge monitors brake circuit air pressure for both primary and secondary air circuits Normal air system pressure should not register below...

Page 17: ...light on the gauge illuminates An EMPTY reading indicates 11 7 gallons of fuel remaining in the fuel tank 7 LED Warning Lights and Indicator Panel The vehicle is equipped with a visual and audible signal system that is designed to indicate the various warnings and normal operating conditions during vehicle operation See Warning Lights and Indicators on page 13 8 Speedometer Odometer Gauge This com...

Page 18: ...f air remaining in the front accessory air tank 14 Windshield Wiper Washer Control Valve This rotary knob controls the left and right windshield wiper and has a built in washer control Push in and hold to dispense washer fluid 15 Driver s Temperature Control This rotary control knob enables the operator to regulate the temperature in the operator s area compartment See Heating Air Conditioning and...

Page 19: ...Warning Lights and Indicators Page 13 WARNING LIGHTS AND INDICATORS ...

Page 20: ...ation and shutdown the engine Report the fault to service maintenance personnel immediately LEGEND 1 Stop Engine Indicator 2 Left Turn Signal Indicator 3 Alternator Indicator 4 Low Air Pressure Indicator 5 Brake ON Indicator 6 Parking Brake Applied Indicator 7 Check Hybrid Electric Vehicle HEV Indicator 8 High Beam Indicator 9 Kneeling Indicator 10 Next Stop Indicator 11 Wheelchair Stop Indicator ...

Page 21: ...t to service maintenance personnel immediately 5 Brake ON Indicator This red indicator illuminates when a service brake application is made due to an application of the brake treadle valve an application of the parking brake or the activation of the brake interlock system 6 Parking Brake Applied Indicator This red indicator illuminates when parking brakes are applied 7 Check Hybrid Electric Vehicl...

Page 22: ... the rear door sensitive edge detects an obstruction which is preventing the door panels from closing completely 13 Right Turn Signal Indicator This green indicator flashes ON OFF when the curbside directional signals are operating 14 Wheelchair Ramp Indicator This red indicator illuminates and an exterior audible alarm and amber flashing light is activated when the ramp is deployed See Wheelchair...

Page 23: ...ndicator This red indicator illuminates when a fault has been detected with the rear door Contact less Acoustic Sensing System The class error fault will not prohibit operation of the rear doors 22 Regenerative Braking Applied Indicator This red indicator illuminates when regenerative braking is occurring in the hybrid propulsion system 23 Regenerative Braking OFF Indicator This red indicator illu...

Page 24: ...ient temperature 4 4 C 40 F for start up Once the operating temperature has been reached the indicator lamp will turn OFF and the engine will be ready for start up 27 Anti Lock Braking System ABS ON Indicator This amber indicator illuminates momentarily for a bulb check only when the ABS is initially activated The indicator illuminates and remains illuminated when a fault is detected in the ABS sy...

Page 25: ...Driver s Side Control Panel Page 19 DRIVER S SIDE CONTROL PANEL ...

Page 26: ... the operator to increase or decrease the intensity of the operator s light located directly above the operator 5 Roadside Mirror Control This four way push button control remotely adjusts the exterior roadside mirror to the operator s individual needs The operator can adjust the position of the mirror by pushing the knob either UP DOWN LEFT or RIGHT 6 Alternating Current Traction Motor ACTM Gear ...

Page 27: ...tes the brake interlock circuit to prevent the vehicle from rolling when on an inclined surface 10 PCS Emergency Override Switch This rocker switch will override the HybriDrive protection system This will allow the propulsion system to operate with known faults for as long as the switch is depressed To activate the PCS Emergency Override switch release the locking tab by pushing and NOTE When the ...

Page 28: ...limate control system 13 Farebox Light Switch This two position ON OFF rocker switch when in the ON position illuminates the overhead farebox light When the Master Switch is in the NIGHT RUN PARK or DAY RUN position and the Farebox switch is left in the OFF position the farebox light will illuminate whenever the front door is opened 14 Interior Light Switch This three position rocker switch ON NOR...

Page 29: ...vels on the operator s front instrument panel and side control panel 19 Hazard Switch All exterior signal lights will flash simultaneously and the front dash indicator lights will also flash when this rocker switch is engaged 20 Foot Pedals Switch This IN OUT rocker switch allows the operator to adjust the distance between the operator and the brake and accelerator pedals The IN position moves the...

Page 30: ...l Panel Page 24 the ENGINE START switch to start the engine If the engine does not start within 14 seconds the starter interlock will not allow the operator to engage the starter until an additional 60 seconds have elapsed ...

Page 31: ... electrical control circuits are energized including the running lights and headlights When the interior light switch is placed in the NORMAL position running lights and headlights illuminate as the Master Switch is placed in the NIGHT RUN position The heater defroster and air conditioning blower motors only operate when the Master Switch is placed in the DAY RUN or NIGHT RUN position with the eng...

Page 32: ...ted on the upper left side of the operator s compartment Operator s Display and Keyboard ODK The operator uses the ODK to control and verify the sign system s message displays during normal operation Refer to the destination sign code list of your transit authority for programmed destination and public relations P R messages For further information on the ODK please refer to your Luminator display...

Page 33: ...y Route Key Press to allow route number entry This function is determined by the transit authority programming Public Relations P R Message This key is used to enable public relations message code entry This switch may not be enabled if public relation messages are not available DEST A and DEST B Keys These keys are used to set a destination or to change a destination display 0 through 9 Keys ...

Page 34: ...splay brightness levels The left and right keys are used to scroll through the route an selection menus ENTER Key This permanently enabled key is used to activate a selected message code It functions only if the code entry field reading on the message display after a destination or public relations code has been keyed in contains a code Destination Sign Dimming Feature An optical sensor on the fro...

Page 35: ...29 DRIVER S SEAT LEGEND 1 4 Way Adjustable Headrest Support 2 Back Inclination Handle 3 Seat Inclination Handle 4 Air Lumbar Adjustments 5 Auto Actuator Button 6 Suspension Limitor 7 Height Adjuster 8 Manual Slide Release ...

Page 36: ... the seat cushion angle to be adjusted from 1 to 9 4 Air Lumbar Adjustments Three rocker switches are used to adjust the air lumbar requirements Push switch forward to inflate and push switch rearward to deflate The switch next to the auto actuator button is for the bottom lumbar next is for the middle lumbar and then the top lumbar adjustments 5 Auto Actuator Button Pressing this button activates...

Page 37: ... complete with a retractable seat belt assembly The seat belt is fastened by slowly pulling the buckle over and across the lap and then engaging the buckle on the tongue A quick tug on the belt will lock the reel device The reel device is self adjusting The belt should be worn low and snug on the hips to prevent abdominal injuries during sudden stops Report defective seat belts to service maintena...

Page 38: ... procedure otherwise known as threshold braking will prevent the annoying jerking motion as the vehicle stops Stop lights on the rear of the vehicle along with the REGENERATIVE APPLIED indicator illuminate when the Regenerative Braking is activated by applying the brakes Air pressure must be above 70 psi before air brakes can develop their full effectiveness The operator should observe the air pre...

Page 39: ...Control Valve The parking brake control valve is located just below the side control panel and must be applied when the vehicle is parked To apply Pull the knob upwards pulling upwards on the knob applies the rear wheel spring brakes These brakes are designed to remain applied until released To release To release push the control knob all the way down CAUTION The emergency parking brake is not to ...

Page 40: ...nstrument panel An audible alarm will sound if the pressure drops below 70 psi When this circuit is activated safely stop the vehicle and report the loss of air to dispatch The vehicle should not be used for transit operation until the air loss is corrected In a situation where air leakage occurs the spring brakes apply automatically when the system air pressure drops below 70 psi The brakes apply...

Page 41: ...ll be disabled however the wheels will retain normal brake function The remaining unaffected wheel s will retain their ABS function After Servicing ABS System If the ABS light does not go out at ignition the vehicle must then be driven over 4 m p h 6 4 k p h before the light will extinguish Existing Fault If the ABS light illuminates and will not go out at ignition or if the light does not extingu...

Page 42: ... DAY RUN position The red STOP ENGINE and an amber CHECK ENGINE light located on the front instrument warning indicator panel will illuminate for approximately 10 seconds for a bulb check 3 Check all unnecessary lighting and other controls are switched OFF 4 Place the transmission selector in the NEUTRAL position 5 Wait for the WAIT TO START indicator light located on the front instrument panel to...

Page 43: ... promoting unnecessary wear If idling is unavoidable use the High Idle feature High Idle This feature increases engine idle speed from the normal 800 rpm to 1 100 rpm The High Idle switch located on the side control panel can be left in the ON position during normal vehicle operation The system operates when the High Idle switch is in the ON position the parking brakes are applied and the gear sel...

Page 44: ...GINE STOP position Starting Engine From Rear Control Panel DANGER Use extreme caution if any work has to be performed on the engine while it is running High voltage is present at the generator terminals traction motor terminals and all high voltage cabling connecting the generator and traction motor to the PCS CAUTION Ensure the gear selector is in neutral and the parking brake is applied before s...

Page 45: ...lled Engines Cummins ISB The ISB engine is equipped with an engine protection system This system monitors critical engine temperatures and pressures Engine protection features exist for Low Coolant Level The engine protection system is activated when the coolant level is at an unacceptable level An audible alarm and an amber CHECK ENGINE indicator light located on the front instrument panel will i...

Page 46: ...ed the CHECK ENGINE and or STOP ENGINE dash indicator lights will illuminate The Electronic Control Module ECM which activates the system immediately limits current available throttle to 80 of full throttle Power continues to be limited to a minimum of 40 throttle Thirty seconds after a fault is detected the fuel delivery is completely stopped NOTE The Engine Protection system will remain active u...

Page 47: ...ed in the ESS for later use Refer to your BAE service manual for further information on the HybriDrive system Propulsion Control System PCS The Hybrid Propulsion System has an electronic protection system that is activated whenever a fault is detected The Propulsion Control System PCS automatically protects the propulsion system from various fault conditions such as component over temperature over...

Page 48: ...e vehicle s speed exceeds 103 of the rated speed When this condition occurs the operator should apply the brakes in order to reduce vehicle speed ACTM rotor speed If the vehicle speed continues to increase the PCS will automatically reduce the torque applied to the rear wheels to zero in order to slow down the vehicle The indicator light will remain illuminated and an audible alarm will continue t...

Page 49: ...ctivated and sends a signal to the PCS which determines how much power is to be delivered to the rear axle via the ACTM and at what speed the engine will run When a brake pedal is depressed the pressure switch sends a signal to the PCS which in turn determines how much regenerative power is to be extracted from the rear brakes via the ACTM Gear Range Selector Position CAUTION Operation of the vehi...

Page 50: ...he hybrid propulsion system When this condition occurs the vehicle should be removed from service immediately Some possible causes 1 Neither Drive Neutral nor Reverse gear has been selected 2 Both Drive and Reverse gears have been selected 3 The front instrument panel gear selector switch has failed 4 The wiring connecting the gear selector switch to the PCS has failed or shorted 5 The PCS has fai...

Page 51: ... the foot dimmer switch to test both HI and LOW beams Exterior Inspection 1 Clean all windows mirrors and lights 2 Check and inspect tires for correct air pressure wear and damage 3 Inspect the vehicle body for loose or damaged panels 4 Inspect all vehicle hoses air lines etc for leaks 5 Ensure all service access doors are properly secured 6 Check all exterior lights for proper operation Interior ...

Page 52: ... maximize view of passengers 11 Check operation of front heater defroster unit passenger heaters and air conditioning unit 12 Ensure correct operation of the horn windshield wipers and washer 13 Activate hazard warning lights to verify proper operation 14 Check the destination sign P A system and voice annunciator for proper operation and initialization ...

Page 53: ... switch positions is explained Front Driver s Light Switch The driver s light switch works independantly of the Master Switch When the driver s light switch is placed in the ON position the light directly above the driver will illuminate A dimmer switch located above the Driver s Light switch allows the operator to adjust the driver light intensity Interior Light Switch Master Switch in DAY RUN Po...

Page 54: ... high beam indicator illuminates on the indicator panel located on the driver s front instrument panel when high beam headlamps are activated Compartment Lights There are two lights located inside the radio compartment and are controlled by two ON OFF toggle switches Another light is located in the rear electrical compartment and is controlled by a ON OFF push button switch Back Up Lights Back up ...

Page 55: ...y below the engine panel and a second jumper cable is located in the curbside engine compartment Disconnection of Electrical System This vehicle is equipped with a 24 volt electrical system located on the battery tray and is accessible through the manual shut off door WARNING Do not contact the positive battery pole with the vehicle body either directly or through any metal conductors Such contact...

Page 56: ...e in the OFF position disconnects power to all electrical circuits preventing possible personal injury and or damage to the vehicle If service is to be performed on the engine or electrical system Place the battery isolator switch to the OFF position ...

Page 57: ...front heater defroster ventilation unit has three individual outlets The first outlet allows air to be deflected against the windshield and operator s side window for defrosting The other two outlets allow air to be directed to the operator s compartment The unit draws 100 filtered fresh air into the vehicle on a continuous bases There are three rotary controls located on the left side of the driv...

Page 58: ...lets in the passenger area One adjustable outlet is also located in the operator s area above the side window For the system to operate effectively all windows driver s vents and hatches must be closed Climate Control System Switch This two position ON OFF rocker switch located on the side control panel allows the operator to activate the air conditioning heating throughout the vehicle The system ...

Page 59: ...of hatch can be positioned to gain desired effect Front Defroster Unit To draw fresh filtered air into the vehicle 1 Turn the TEMP control knob OFF 2 Place the front defroster control knob located to the left of the ventilation control knob on the front instrument panel in the HIGH or LOW position 3 Open diffusers Driver s Vents Five vents one located above the driver s windshield and the other fo...

Page 60: ...outlets are also located in the operator s area above the side window and through the outlet located in the front face of the heater defroster unit For the system to operate effectively all windows driver s vents and hatches must be kept closed as well as The master switch in the Day Run or Night Run position The engine running The side control panel climate control system switch activated Display...

Page 61: ...nit is first turned ON the display will default to INSIDE TEMP Alarm Indicator When illuminated this amber warning indicator notifies the operator that a fault has been detected in the heating air conditioning ventilation system Outside Temperature Indicator When illuminated the outside temperature will be displayed on the screen A red light to the left of this indicator notifies the operator that...

Page 62: ...passengers Front Door 1 Bring the vehicle to a complete STOP as close to the curb as possible 2 Press the door control F Front button 3 After passengers have entered or exited the vehicle press the door control FRONT button again 4 Check the curbside mirror to ensure passengers are a safe distance from the vehicle before proceeding Rear Door 1 Bring the vehicle to a complete STOP as close to the c...

Page 63: ...partment which faces the passengers also illuminates when a passenger requests a next stop Speed Sensing Interlock Front and rear doors will not open if the vehicle is moving in excess of 2 m p h Malfunction in Opening and Closing Front Door In the event of an entrance door malfunction or during an emergency the front door s can be manually opened for emergency exit This is accomplished by opening...

Page 64: ...wo position NORM DISABLE guarded toggle switch located inside the front destination sign compartment deactivates the brake interlocks The accelerator and brake interlocks will be released when the toggle switch is placed in the DISABLE position This switch may also be used to override a door malfunction that is activating the interlock system and preventing the service brakes from releasing Malfun...

Page 65: ...t by authorizing the rear door External Front Door Access Switch The front doors can be opened by the operator from outside the vehicle by activating a toggle switch located in the windshield washer filler door compartment NOTE The Master switch must be placed in the ENGINE STOP position in order to activate the front door access switch ...

Page 66: ...p and can be pushed out at the bottom for emergency egress Become familiar with the location of all egress windows and any other emergency exits before putting the vehicle into service To push out the windows 1 Pull the red handle down 2 Push the bottom of the window out Rear Roof Hatch To operate the rear roof hatch 1 Turn the red knob to the exit position 2 Push up on the red knob to swing the h...

Page 67: ...on Kneeling System Operating Procedure Lowering the vehicle 1 Bring the vehicle to a complete stop Push the front door control button to open the front doors NOTE The kneeling system will only operate when the doors are open NOTE Releasing the kneeling switch at any time during the lowering of the vehicle will stop the kneeling operation and retain the vehicle height in that position Release the k...

Page 68: ...essing and holding the kneeling switch in the DOWN position will cause the red front dash kneeling indicator light to illuminate and an audible alarm to sound the exterior kneeling ramp light will also flash CAUTION Boarding passengers must stand clear and wait until the vehicle has been completely lowered before entering the vehicle Allow passengers to board safely before placing the Kneeling Swi...

Page 69: ...t the hook on the T handle key into ramp channel and lift ramp upward Grab hold of the handle strap on the ramp and slowly lower the ramp into position To stow the ramp use the grab handle and lift the ramp back into the stow position Operation CAUTION The vehicle ramp system is designed as a passenger access feature and not as a load lifting device Do not attempt to lift any object with the ramp ...

Page 70: ...p press the lower part of the ramp switch until the ramp has stowed and returned to its original position in the vehicle 4 Raise the vehicle to its normal ride height close the front door and release the parking brake The vehicle is now ready for normal operation CAUTION Ensure the ramp deploy area is level Damage can result if weight is exerted unevenly on the ramp platform NOTE A warning beeper ...

Page 71: ...e instructions are also affixed to the bottom of the flip up seats at each wheelchair position Step 1 Secure Wheelchair 1 Center the wheelchair facing forward in the vehicle s securement position between the 2 front tie downs and two 2 rear tie downs 2 Secure two 2 front tie downs Pull hooks and attach to a solid frame member of the wheelchair Fig A1 WARNING Incorrect use of the securement devices...

Page 72: ...r belt tongue diagonally across the upper torso of the occupant s hip aisle side and fasten together Fig A2 Step 3 Release Wheelchair and Occupant 1 Carefully remove occupant s lap and shoulder belt 2 Release rear tie downs Press the red lever or pull cable release if available and remove the hooks from the wheelchair 3 Check belt locks by pulling firmly on each end after the passenger is secured ...

Page 73: ...agnetic fan clutch The clutch engages after the engine fan controller monitors both water and oil temperatures When both electro magnetic couplings are de energized the fan operates at between 200 to 300 rpm When coupling 1 engages the fan operates at 800 rpm Coupling 2 operates at 2200 rpm The engine coolant tank is located above the radiator compartment on the roadside of the vehicle As an addit...

Page 74: ...olant exceeds normal operating temperature Wait until boiling has stopped and the engine is cool before adding coolant Low Engine Coolant Level The vehicle is equipped with a warning system designed to indicate a low coolant level in the cooling system A loss of coolant or if the coolant level falls below the probe assembly in the surge tank the CHECK ENGINE indicator will illuminate and an audibl...

Page 75: ...tor light located on the front instrument panel will illuminate and an audible alarm will sound The operator should notify maintenance immediately If the HEV dash indicator light illuminates along with the HYBRID COOLANT LOW dash indicator light remove the vehicle from the road to a safe location and shutdown the engine NOTE Refer to the Engine Manual for recommended anti freeze and additives ...

Page 76: ...ectrical circuits are working properly LEGEND 1 Power Indicator 2 Trouble Indicator 3 Fire Indicator 4 Trace Gas Level Indicator 5 Significant Gas Level Indicator 6 Alarm Silence Indicator 7 System Test Button 8 Relay Reset Indicator 9 Manual Activator 10 Fluorescent Display Panel NOTE The methane detection system is not applicable to this vehicle ...

Page 77: ...when a dangerous gas concentration has been detected A light will illuminate in the zone in which the gas concentration has been identified Suspend all vehicle operations immediately and evacuate the bus See Fire Suppression System on page 71 6 Alarm Silence Indicator Push to silence audible alarm 7 System Test Button Tests LED s and all electrical circuits 8 Relay Reset Button Pushing this button...

Page 78: ... will begin the shutdown sequence again and the RELAY ENGAGED light will remain illuminated An internal diagnostic test button is also present but should be utilized by maintenance personnel only The vehicle may be moved after the fire suppression system automatically shuts down the engine and the extinguishing agent has been released Use the normal restart procedures to restart engine Automatic O...

Page 79: ...p the vehicle in a safe location 2 Shut off engine 3 Pull the ring pin on the manual actuator located on the front instrument panel This will activate the fire suppression system propelling dry chemical extinguishing agent throughout the engine compartment 4 Immediately evacuate the vehicle 5 Report problem to dispatch 6 Take the appropriate action recommended by the transit authority ...

Page 80: ...nergy Storage System Enclosure ESS 5 Thermo King Air Conditioning Unit 6 Rear Upper Compartment Access Door 7 Rear Engine Compartment Access Door 8 Engine Oil Filler Access Door 9 Rear Roof Hatch 10 EAS Access Door 11 Air Rail Access Door 12 Fuel Level Sensor Access Door 13 Air Dryer Access Door 14 Radiator Compartment Door 15 Surge MTS Tank Filler Door 16 Air Cleaner Access Door 17 Webasto Heater...

Page 81: ...s door 7 Rear Engine Compartment Access Door Complete access to engine belts A C compressor jumper cable and other components are available through this door 8 Engine Oil Filler Access Door 9 Rear Roof Hatch 10 Surge and MTS Tank Filler Door HEV maintenace test button and Diesel Particulate Filter DPF service test buttons are also accessible through this door 18 DEF Filler Access Door 19 Battery C...

Page 82: ...ccess Door 16 Air Cleaner Access Door 17 Webasto Heater Compartment Door Webasto heater fuel filter air conditioning compressor power steering pump reservoir and diesel exhaust fuel tank are also accessible through this door 18 Diesel Emission Fluid DEF Filler Access Door 19 Battery Compartment Door 20 Battery Shut Off Access Door Quick access to battery shut off switch 21 Fuel Filler Door ...

Page 83: ...Axle Meritor 71163 Tire Size Bridgestone 305 70R22 5 Rating H Model R192FZ Wheel Size FIRESTONE White steel 8 25 X 22 5 Engine Cummins ISB EPA10 Hybrid 260 hp HybriDrive Alternating Current Traction Motor ACTM B A E Systems HybridDrive Alternating Current Traction Generator ACTG B A E 120 kW 140 kW available temporarily Batteries 96 Lithium Ion cells FLUID CAPACITIES US GAL LITRES Engine Oil 7 26 ...

Page 84: ...d remedy campaign However NHTSA cannot become involved in individual problems between you your dealer or Daimler Buses North America To contact NHTSA you may either call the Auto Safety Hotline toll free at 1 800 424 9393 or 366 0123 in Washington DC area or write to NHTSA U S Department of Transportation Washington DC 20590 You can also obtain other information about motor vehicle safety from the...

Page 85: ...r blower vent driver s 5 brake pedal 6 C climate control system 52 53 cooling system 67 anti freeze chart 69 high coolant temperature 68 low coolant level 68 D destination sign 26 0 through 9 keys 27 alpha a f keys 28 arrow keys 28 console unit 26 dest a and dest b keys 27 dimming feature 28 enter key 28 keypad 5 menu key 27 public relations message 27 route key 27 select key 27 directional signal...

Page 86: ...y escape exits 60 push out egress windows 60 engine check replenish coolant 67 engine inspection pre start up 36 low coolant level 39 low oil pressure 39 operation 36 starting an electronic controlled engine 36 engine operation hgh idle 37 operating the engine 37 protection system 39 starting from rear control panel 38 stopping 38 stopping from rear control panel 39 warm up 37 exterior compartment...

Page 87: ...ater defroster control 12 kneeling system switch 11 parking emergency brake 10 temperature control 12 warning indicator lights 11 wheelchair ramp switch 11 windshield wiper washer control 12 wiper control lamp 10 G gauge water temperature 11 gauges air system 10 speedometer odometer 11 gooseneck microphone 6 H hatch roof 60 headlight dimmer switch 7 heating 51 heating air conditioning ventilation ...

Page 88: ...it door area flood lamps 48 exit door authorization lamp 48 exterior 48 hazard warning lights 49 headlamps 48 interior lighting 47 lighting operation 47 main electrical compartment light 48 stoplights 49 lights and indicators 13 M master switch 25 day run position 25 engine stop position 25 night run position 25 park position 25 methane detection fire suppression system display panel 12 fire butto...

Page 89: ...ster switch 21 retarder disable switch 6 right dash fan 20 speakers switch 23 steering column tilt telescopic 7 sunvisors 5 switch front heat defrost blower 51 T transmission gear range selector alternating current traction motor 7 V valve windshield wiper washer control 12 ventilation 51 W warning lights and indicators abs on 18 air conditioning fail 16 alternator 15 brake on 15 check engine indi...

Page 90: ...ve braking applied indicator 17 regenerative braking off indicator 17 right turn signal 16 stop engine 14 stop hev indicator 17 wait to start 18 warning interlock deactivated 16 wheelchair ramp 16 wheelchair stop 16 wheelchair ramp system 63 operation 63 wheelchair restraint system 65 ...

Reviews: