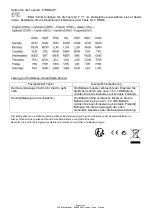
background image

Importeur: 

AIC International - 44980 Ste Luce sur Loire - France 


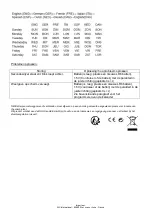
Possible causes of interferences :  

- Domestic appliances without radio interference suppressors 
- TV receivers closer than 2 meters 
- Machinery with HF leakage 
- Nearby metallic structures 
- Inside concrete buildings 


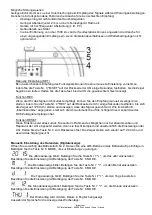
Manual settings (in case of bad reception of signal) : 
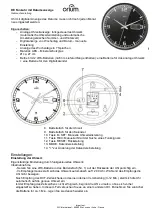
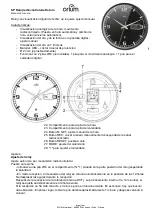
Press and hold the M.SET (3) button for 3 seconds to set correct time: 
- Press the M.SET button (3) for 1 second to advance 1 minute. 
- Press the M.SET button (3) for more than 1 second to auto advance the minute hand. 
- If the M.SET button (3) is not pressed for 8 seconds, or press REC button (4) the clock is set. 


REC function : 
To force DCF reception, press and hold the REC button (4) for 3 seconds, the 

clock will go to 12 o’clock 

and start receiving the radio signal for 3-12 minutes. Once it has received the DCF signal and processed 
it accordingly, the clock automatically displays the correct time 
 
RESET function : 
If after repeat several time 

REC function, in different location, the clock still desn’t catch the signal, press 

and hold the RESET button (5) for 3 seconds, the 

clock will go to 12 o’clock and start receiving the radio 

signal for 3-12 minutes. 


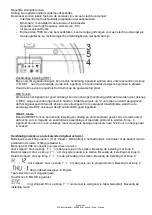
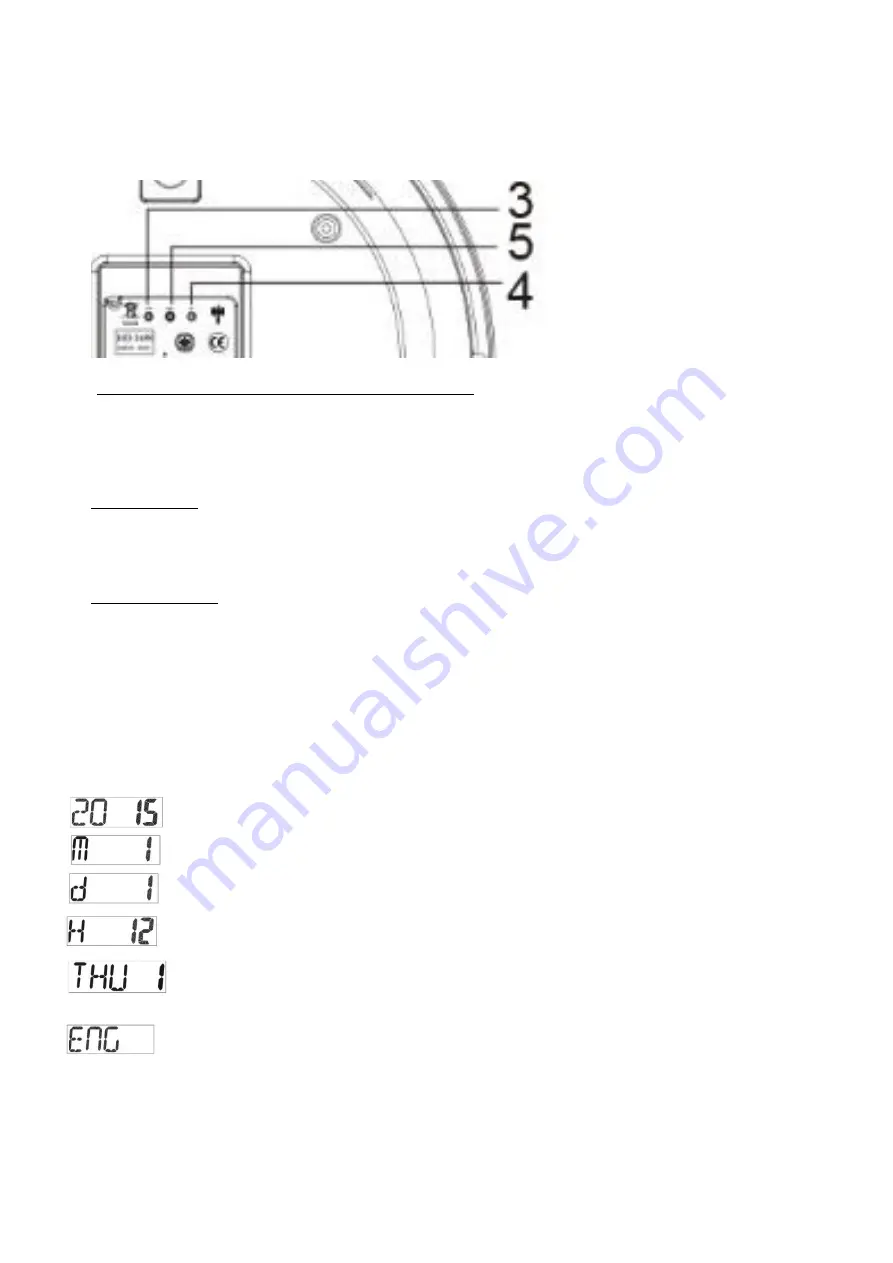
Calendar settings (manual) 

:  

Open carefully battery compartment (n°2). Insert one AA size battery into the battery compartment (2) on the 
as indicated by the polarity ma/- . 
Press MODE N° 6 to start calendar settings : 


the year flashes. Use the “

+*

 buttons to set the year. 

Press “

MODE

 to confirm your setting. 

 the month 

flashes. Use the “

+*

 buttons to set the month. 

Press “

MODE

 to confirm your setting 

the date 

flashes. Use the “

+*

 buttons to set the date. 

Press “

MODE

 to confirm your setting 

 the hour 

flashes. Use the “

+*

 buttons to set the hour. 

Press “

MODE

 to confirm your setting 

day and date display on digital screen (according to your settings) in english. le jour et la date 

Press and hold MODE button N°6 

Eng flashes : 

Use the “

+*

 buttons to choose language (according to table below). Press 

MODE

 to confirm your setting. 


Summary of Contents for Datum

Page 1: ...ndrier 3 Bouton M SET r glage manuel de l heure 4 Bouton REC Relancer manuellement la recherche du signal radio contr l 5 Bouton RESET remise z ro 6 MODE r glage du calendrier 7 pour ajuster le r glag...

Page 2: ...secondes sur le bouton N 4 REC situ au dos de l horloge jusqu ce que les aiguilles soient sur 12h00 et indiquent ainsi qu elle cherche capter le signal Comme indiqu dans le paragraphe mise en service...

Page 3: ...r correctement en respectant la polarit L affichage sur l cran digital s affaiblit La pile est us e veuillez remplacer la pile par 1 pile LR6 neuve 1 5V veillez l installer correctement en respectant...

Page 4: ...n for manual time settings 4 REC button start again radio controlled signal search 5 RESET buton 6 MODE calendar settings 7 to adjust calendar settings Settings Clock settings Radio controlled movemen...

Page 5: ...ally displays the correct time RESET function If after repeat several time REC function in different location the clock still desn t catch the signal press and hold the RESET button 5 for 3 seconds th...

Page 6: ...ause of poor reception if topographical and meteorological conditions are poor You should reinitiate the signal refer to settings above Second hand doesn t run anymore or clock gets late Battery must...

Page 7: ...aste M SET Manuelle Uhrzeiteinstellung 11 Taste REC Manueller Start der Suche eines Funksignals 12 Taste RESET R ckstellung 13 MODE Kalendereinstellung 14 zur nderung der Kalendereinstellung Einstellu...

Page 8: ...esucht wird Wie im Abschnitt Inbetriebnahme angegeben stellt sich die Uhr automatisch auf die richtige Uhrzeit sobald sie das DCF Zeitsignal empfangen hat Funktion RESET Diese Funktion setzt alles zur...

Page 9: ...die Batterie durch eine neue 1 5 V LR6 Batterie Achten Sie beim Einsetzen auf korrekte Polarit t Die Digitalanzeige wird schw cher Die Batterien sind verbraucht Ersetzen Sie die Batterie durch eine n...

Page 10: ...18 REC knop Handmatig radiogestuurd signaal zoeken 19 RESET knop reset 20 MODE kalender instellen 21 voor het instellen van de kalender Instellingen Instellen van de klok Autonoom door radiogestuurde...

Page 11: ...ezocht wordt Zoals reeds uiteengezet in de paragraaf Inbedrijfname wordt na de eerstvolgende DCF ontvangst de tijd automatisch goed ingesteld RESET functie Door de RESET functie worden alle instelling...

Page 12: ...gave op scherm vervaagt Batterij is leeg plaats een nieuwe LR6 batterij 1 5V controleer of de batterij met de polariteit in de juiste richting geplaatst is Zie bovenstaande paragraaf voor het programm...

Page 13: ...M SET ajuste manual de la hora 25 Bot n REC volver a lanzar manualmente la b squeda de la se al radiocontrolada 26 Bot n RESET puesta a cero 27 MODE ajuste del calendario 28 para ajustar el calendari...

Page 14: ...REC situado en la parte posterior del reloj hasta que las agujas est n en las 12 00 e indiquen as que buscan captar la se al Como se indica en el p rrafo de puesta en funcionamiento el reloj se ajusta...

Page 15: ...ados Defectos observados Soluciones c mo resolver el problema La aguja de los segundos no avanza el reloj se retrasa La pila debe estar gastada reemplazar la pila por una pila LR6 nueva de 1 5 V inst...

Reviews: