User manual
UM0972150 R1-0
3
Buttons
1 2 3 4 5 6 7 8
objects in
monitor are
closer than
they appear
C3
C2
C1
Figure 2
Figure 1
1. Service menu
Adjustment of the Spectrum scanner settings is done via the service
menu when an Orlaco Serial monitor is connected.
To open the
service menu, simultaneously press the camera selection button
(1), the minus button (6) and the plus button (7) (see Figure 1).
The Monitor service menu (see Figure 2) will appear
. The following
buttons are used to navigate through the menus:
5 - Option/previous menu:
Return to the previous menu
6 - Minus:
Go to the next menu option
7 - Plus:
Go to the previous menu option
8 - Enter:
Select or enable the chosen option
2. Spectrum Scanner Menu
There are settings in the Spectrum Scanner that can be adjusted.
We strongly advise not to change settings before consulting a
Orlaco service technician.
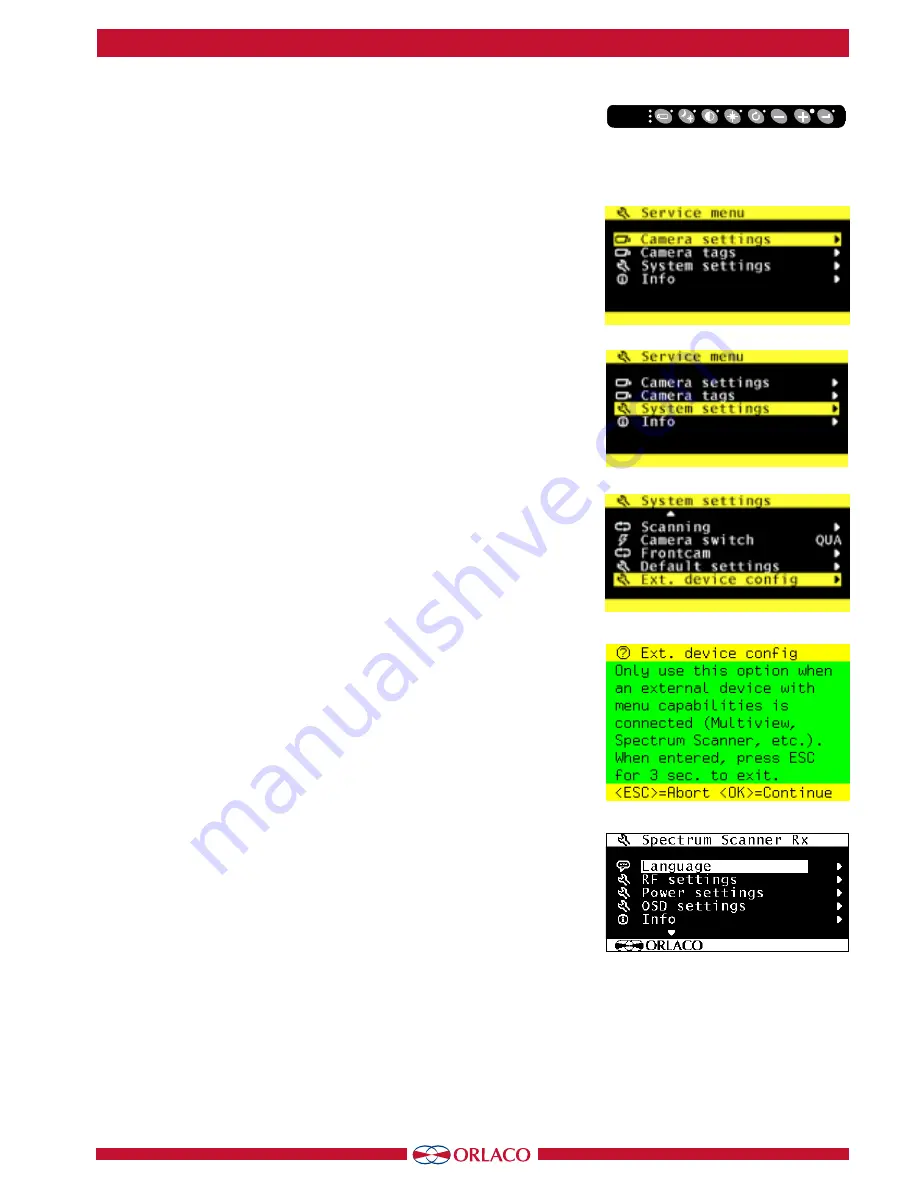
Open the service menu and go to system settings (see figure 3).
Select the Ext. Device Config (see figure 4).
A warning is shown in the monitor (see figure 5). Press enter to
continue.
The Spectrum Scanner Rx (Receiver) menu is shown (See figure 6).
The changes made here are done in the receiver of the Spectrum
Scanner.
If changes will be made, we advise to make the changes in the
transmitter first, see chapter 2. 5.
2.1. Language
(see figure 6).
The OSD menu language is set as English by default. If you would
like to operate the OSD menu in a different language you can
change it. The OSD menu is available in English, Dutch, German,
French, Chech, Hungarian, Italian, Polish, Portuguese, Spanish,
Turkish, Swedish, Finnish, Danish and Norwegian.
Figure 3
Figure 4
Figure 5
Figure 6


