


Pag. 1
4
/
2
4
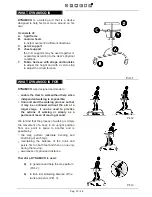
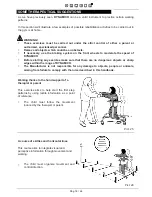
There is no predetermined position!
Each position must be decided according to the
User and it must be modified according to his
physical development, to the change in his
motory situation and rehabilitation programme.
Generally speaking ,
however, the distance of
the supports from the ground must allow the
User to just touch the floor
(so that only part
of the child's weight is on his feet), with a slight
semi-bending of the pelvis and knees.
Then this distance will be progressively
reduced
so that the child's weight will be
gradually put back on to his feet, a little at a
time, until he is standing more firmly on his feet
with
his
lower
limbs
straighter.
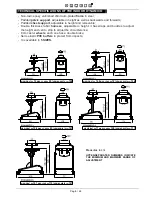
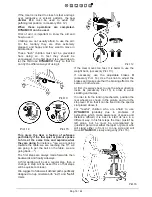
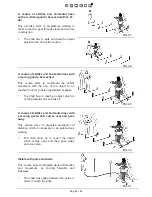
Pict.8
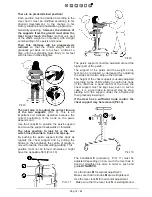
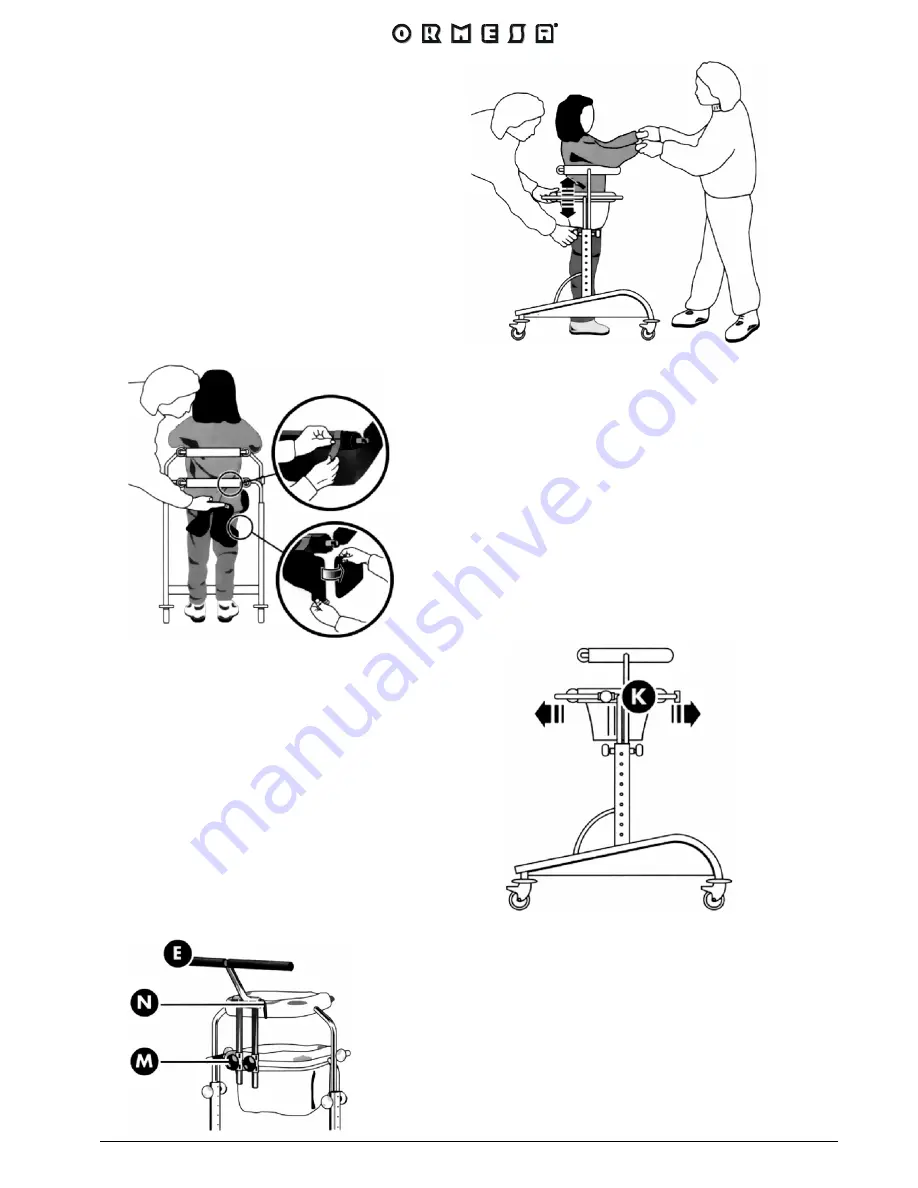
The pelvic support should be adjusted around the
higher part of the pelvis.
The support of the pelvis and the weight on his
feet can be increased or decreased by adjusting
the straps and velcro strip on the harness.
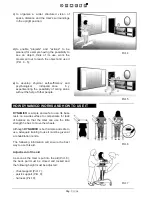
The height of the chest support is usually adjusted
according to the child's ability to control his trunk
(if the child has a good control of the trunk, the
chest support must be kept low); even in such a
case, it is a good idea to proceed step by step,
starting with the support under the armpits and
then gradually lowering it.
If the User has a sufficient trunk control, the
chest support may be removed (Pict.3).
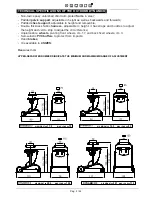
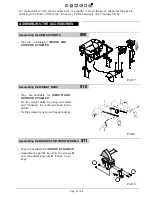
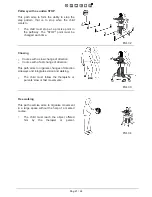
The next step is to adjust the correct line-up
of the two supports
(Pict. 9). This is an
important and delicate operation because the
correct positioning of the trunk on the pelvis
depends on it.
Use the knobs
K
to position the pelvic support
and move the support backwards or forwards.
The ideal position to look for is the one
which lines shoulders, trunk and hips up.
By pushing the pelvic support further back as
regards the chest support and by putting the
hands on the handlebar, the centre of gravity is
moved forwards, thus stimulating walking. This
position must not be forced, otherwise it might
have the opposite effect (Pict. 10).
Pict. 10
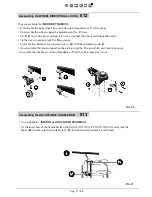
The handlebar
E
(accessory, Pict. 11) must be
adjusted depending on how much the User has to
bend or straighten his arms in order to push and
guide
DYNAMICO
.
Use the knobs
M
for vertical adjustment.
Make sure that the knobs
M
are well tightened.
Use the lever lock
N
for horizontal adjustment.
Pict. 11 Make sure that the lever lock
N
is well tightened.
Pict.9
Summary of Contents for DYNAMICO 1
Page 2: ......
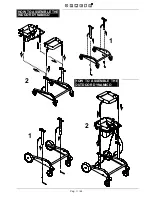
Page 13: ...Pag 11 24 HOW TO ASSEMBLE THE INDOOR DYNAMICO HOW TO ASSEMBLE THE OUTDOOR DYNAMICO 1 2 1 2 ...
Page 27: ......