background image

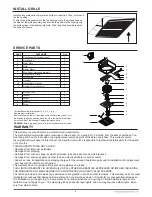
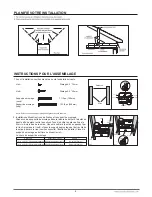
2. Mount with mountion holes and hanger bar

    Slide one hanger bar into the channel on the housing and adjust as 

    needed to fit between framing. Hold housing in place so that the housing 

    contact the bottom of the joist, Screw housing to joist through the hole A 

    and hole B. Screw the hanger bar onto the other side of joist through the

    hole (refer to the right diagram). 

    Screw hanger bar to housing with screw A.   

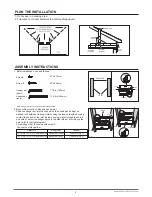
PLAN THE INSTALLATION

1. Do not use in a cooking area.

2. Two ways to connect ductwork to a factory-shipped unit.

ASSEMBLY INSTRUCTIONS

2

*Purchase

separately

ROUND 

ELBOW *

ROUND 

DUCT *

ROOF CAP *

WALL 

CAP *

Distance A

JOIST

1. Befor installation, you need to know:

Fig. 1

Fig. 2

Hole A 

Hole B 

Hole A 

Hole B 

Distance A

13 1/4 in to 15 1/2 in (336mm-394mm)
16 1/2 in to 18 7/8 in (419mm-480mm) 

Hanger Bar

Channel 

Channel A (Fig. 1)

Channel B (Fig. 2)

Hanger bar (short)
Hanger bar (long)

The choice of Hanger Bar

Channel A

Channel B

ST4.2*13mm

Screw A

Screw B

Hanger bar 

(short)

Hanger bar 

(long)

ST4.2*25mm

7 1/2 in (190mm)

13 3/8 in (340mm)

Screw A

Screw B

Note: Hanger bar (short) only can slide into channle A.

Screw A

Screw A

Screw A

Screw B

Summary of Contents for ODS45-9003

Page 1: ...ircuit Interrupter protected branch circuit ceiling installation only 8 This unit must be grounded 1 For general ventilating use only Do not use to exhaust hazardous or explosive materials and vapors...

Page 2: ...ea 2 Two ways to connect ductwork to a factory shipped unit ASSEMBLY INSTRUCTIONS 2 Purchase separately ROUND ELBOW ROUND DUCT ROOF CAP WALL CAP Distance A JOIST 1 Befor installation you need to know...

Page 3: ...ugh the hole refer to the right diagram Screw hanger bar to housing with screw A 5 INSTALL ROUND DUCTWORK Connect the round ductwork not included to the damper duct connector and run the ductwork to a...

Page 4: ...date of purchase You must keep and be able to provide your original sales receipt as proof of the date of purchase This warranty covers the original retail purchaser of this product the manufacturer w...

Page 5: ...ment N utilisez pas cet jusqu 12 45 degr s au maximum Le raccordement pour le conduit d a ration doit tre dirig vers aux paliers du moteur ou augmenter le bruit ou d s quilibrer les roues aubes d huil...

Page 6: ...l illustration droite Vissez le support de montage au bo tier en utilisant la vis A Distance A Solive 1 Avant l installation veuillez prendre en note les d tails suivants Fig 1 Fig 2 Trou A Trou B Tr...

Page 7: ...i ci touche le bas de la solive Vissez le bo tier la solive en passant par les trous D et C Vissez le support de montage de l autre c t de la solive en passant par le trou veuillez voir la figure droi...

Page 8: ...S LES L MENTS SUIVANTS les dommages caus s par une installation inad quate les dommages subis pendant le transport les dommages caus s par un usage inappropri un usage abusif un accident une modificat...

Reviews: