TROUBLESHOOTING
Instruction Manual
1-888-543-6473
1-888-541-6474
13376 Comber Way
Surrey BC V3W 5V9
info@ortechindustries.com
www.ortechindustries.com
375 Admiral Blvd
Missis
s
auga
,
ON L5T 2N1
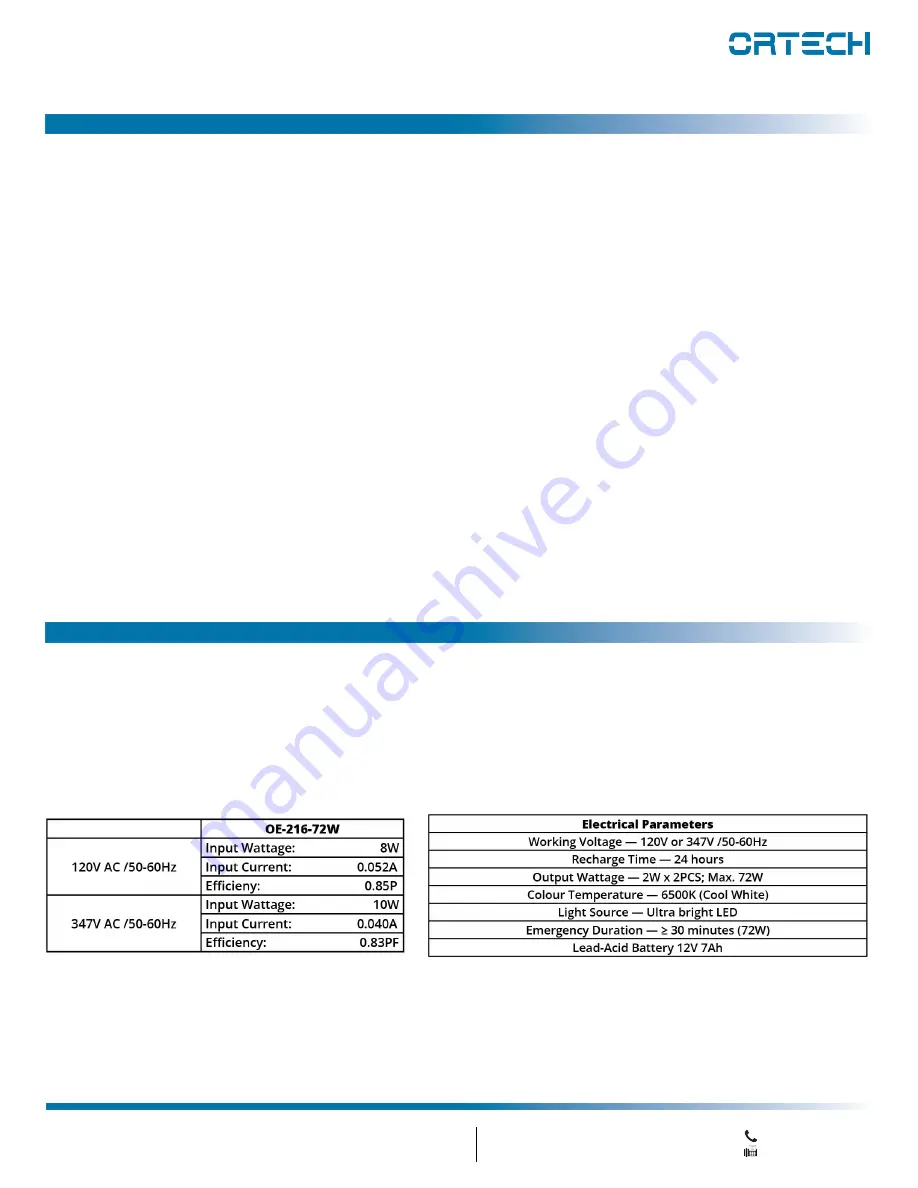
LED Emergency Lights
MODEL
O
E-21
6-72W
Emergency Lamps
come on dim when test button is pressed
:
Battery discharged — permit unit to charge for
3
0 hours and then retest. If lamps are still dim, check charger for proper
function. If charger functions correctly, replace battery.
Emergency Lamps
come on when battery is first connected
:
Batt
ery may be connected in reverse polarity
.
Check connections. Connect Positive (+) lead to Positive (+) battery terminal
and Negative (-) lead to Negative (-) battery terminal. The lamps should then turn OFF and the charge indicator should light
when AC power is applied (see Fig.3 on page 2 of this instruction manual).
Emergency Lam
ps come on dim when AC power is ON
:
1.
Check supply voltage and AC connections. This emergency light is provided with brownout protection.
The AC supply must be at least 80% of nominal (120V on a 347V
line
) for equipment to function normally.
2.
At lower voltages, the emergency lamps will begin to glow dimly until the source voltage drops below the full turn-on point.
NOTE — This condition may also be caused by incorrectly connecting a 120V supply to the 347V transformer lead.
Nothing happens when the unit is energized:
Some model have a standard time delay built into the design of the charger board. Please allow 15 minutes with AC current
connected. At this point, the LED AC-ON and CHARGE lights should illuminate.
IMPORTANT REMINDER
OE-21
6-72W is constructed with steel housing and lightweight thermal plastic head in matching colour. It has a simple
and modern design with high efficiency LED remote heads. Universal mounting pattern and keyhole slots are
stamped on the back and conduit knockouts on the sides of each unit.


