Instruction Manual
1-888-543-6473
1-888-541-6474
13376 Comber Way
Surrey BC V3W 5V9
info@ortechindustries.com
www.ortechindustries.com
375 Admiral Blvd
Missis
s
auga
,
ON L5T 2N1
LED Security Lights
MODEL
OL-
2
H
S
INSTALLATION GUIDE
REMINDER
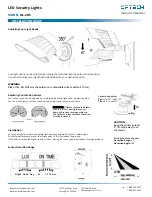
You MUST adjust the motion sensor on the light to the desired area before you can adjust the time and LUX settings.
Time Setting
This setting controls the time span of how long your security light will
remain ON. The time setting will allow you to set the time period the light
will stay ON. Slide the switch to the amount of time you would like the light to stay ON (See illustration on the previous page SENSOR DETECTION
RANGE section. Dials are located on the bottom side of the motion detector)
LUX Setting
The LUX setting controls when the light will come ON. It controls the amount of light needed to turn the light ON. The LUX setting is marked by
the sun and moon. Use one of the three predetermined settings as illustrated in the illustration on the previous page SENSOR DETECTION
RANGE section. To adjust the light to come ON when it is darker outside, slide the switch to "L". To adjust the light to come ON at dusk, slide the
switch to "M". To adjust the light to come ON when it is lighter outside, slide the switch to the "H".
Avoid aiming the control at:
•
Objects that change temperature rapidly, such as
heating vents and air conditioners
. These heat sources could cause false triggering
•
Areas where
pets or traffic
may trigger the control
•
Nearby large, light coloured objects
reflecting light may trigger the shut-off feature. DO NOT point other lights at the sensor
REMINDER
Sensor has a 1-1/2 minute warm up period before it will detect motion. When first turned ON, wait for 1-1/2 minute.
TROUBLESHOOTING
Lights will not come on:
1. Light switch is turned OFF
2. Light is loose or burned out
3. Fuse is blown or circuit breaker is turned OFF
4. Daylight turnoff is in effect (double-check after dark)
5. Incorrect circuit wiring, if this is a new installation
6. Re-aim the sensor to cover desired area
Lights come on for no apparent reason:
1. Light control may be sensing small animals or
automobile traffic (re-aim the sensor)
2. Range is set too high (reduce range setting)
Lights come on
in daylight:
1. Light control may be installed in a relatively dark location
Lights
stay ON continuously:
1.
A lamp is positioned too close to the sensor or pointed at
nearby objects that cause heat to trigger the sensor
(reposition the lamp away from the sensor or nearby objects)
2.
Light control is pointed toward a heat source like an air vent,
dryer vent, or brightly-painted heat ref
le
ctive surface
(Reposition sensor. Reduce Range)
ORTECH reserves the right to modify at any time, without notice,
any or all of our product's features, designs, components and
specifications to meet market changes.
Lights flash ON and OFF:
1.
Heat or light from the lamps may be turning the light
control ON and OFF (Reposition the lamps away from
the sensor)
2.
Heat being ref
le
cted from other objects may be
affecting the sensor (Reposition sensor)
MAINTENANCE
To clean the surface of the light, use mild soap and water.
DO NOT use scouring pads, powders, steel wool or any other abrasive materials.
DO NOT immerse in water.


