background image

Deutsch

A N P A S S E N   F Ü R   D E N   A R Z T   /   T E C H N I K E R

EINSTELLUNG DER FLEXION-EXTENSION 

NUR PP3

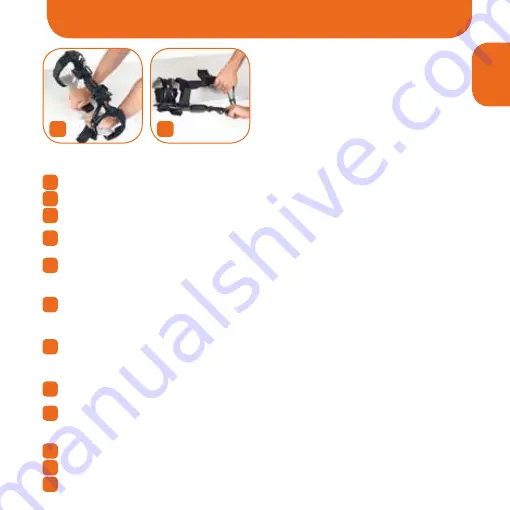
Die Schrauben, die die Flexions-/Extensionskeile im Sitz blockieren, aufschrauben (Abb. H)
Die eventuell bereits eingeführten Keile herausnehmen.
Die Keile mit der gewünschten Flexion/Extension (Abb. I) einführen, so dass die in den Kei-
len vorliegenden Kerben mit den in der Knieorthese vorliegenden Sitzen übereinstimmen.
Die Schrauben einführen und überprüfen, dass sie gut in den Sitz eintreten.
Fest anziehen (Abb. H).
Überprüfen, dass die verwendeten Flexions- oder Extensionskeile bei beiden Gelenken 
dieselbe Gradzahl haben.

NUR PP4

Die beiden Deckelhälften des Gelenks verschieben und öffnen 
(Abb. L), das Fixierelement herausnehmen (Abb. M) und die Stifte an die 
gewünschte Gradzahl setzen (Abb. N)
Fixierelement in der Mitte wieder einsetzen (Abb. M) und die beiden Deckelhälften in die 
Mitte verschieben, bis sie mit einem hörbaren Klick einrasten (Abb. L)

IM FALLE DER EINSTELLUNG – 0°/10°/20°/30°

Erst den Extensionskeil (der mit einer Kerbe) und dann den Flexionskeil
(denjenigen mit zwei Kerben) einführen.
Falls beim Einführen des zweiten Keils Probleme auftreten, eventuell

den störenden Lack an der Knieorthese abkratzen oder die Kerben des Keils feilen.

ENTFERNEN DER GURTFÜHRUNGEN (BEI BEDARF)

Die Polsterung vom Rahmen entfernen;
Von innen die der zu entfernenden Schnalle zugehörige Schraube lösen;
Die Niete und die Schnalle herausziehen.

A
B
C

D

E

A

B

F

G

H

I

L

1

2

Summary of Contents for pluspoint 3

Page 1: ...com Niederlassung Deutschland Orthoservice Deutschland GmbH Flugstraße 8 D 76532 Baden Baden Deutschland Tel 0049 0 7221 9913911 Fax 0049 0 7221 9913913 info orthoservice de www orthoservice de Sede italiana RO TEN s r l Sede legale Via Fratelli Ruffini 10 I 20123 Milano MI Italia Sede operativa e amministrativa Via Comasina 111 I 20843 Verano Brianza MB Italia Tel 0039 039 6014094 Fax 0039 039 60...

Page 2: ...om www orthoservice com Niederlassung Deutschland Orthoservice Deutschland GmbH Flugstraße 8 D 76532 Baden Baden Deutschland Tel 0049 0 7221 9913911 Fax 0049 0 7221 9913913 info orthoservice de www orthoservice de Sede italiana RO TEN s r l Sede legale Via Fratelli Ruffini 10 I 20123 Milano MI Italia Sede operativa e amministrativa Via Comasina 111 I 20843 Verano Brianza MB Italia Tel 0039 039 601...

Page 3: ...in alleiniger Verantwortung dass es sich bei diesem Produkt um ein Medizinprodukt der Klasse I handelt und dass es gemäß den grundlegenden Anforderungen der Richtlinien 93 42 EWG und 2007 47 EWG hergestellt wurde Diese Gebrauchsanweisung wurde nach den Vorgaben der vorgenannten Richtlinien erstellt Ihr Zweck ist es die sichere und ordnungsgemäße Anwendung des Medizinprodukts zu gewährleisten AUSWA...

Page 4: ...takt mit der Haut vermieden wird Wenden Sie sich bei Zweifeln über die Art der Anwendung bitte an Ihren Orthopädietechniker Das Produkt sollte nicht in der Nähe von offenem Feuer oder starken elektromagnetischen Feldern verwendet werden HINWEISE Das Produkt darf nur bei medizinischer Indikation oder auf ärztliche Anordnung verwendet werden Es muss von einem Orthopädietechniker angelegt werden der ...

Page 5: ... der Knieorthese vormontiert ist 2x dicke Kondylenpolster größere Stärke 8 Paar Keile zur Flexionseinstellung auf 0 10 20 30 45 60 75 90 5 Paar Keile zur Extensionseinstellung auf 0 10 20 30 40 die 10 Keile sind an der Knieorthese vormontiert 1x Mediales anatomisch geformtes Kondylenpolster auf der Orthese vormontiert A B C D E F L I E F E R U M FA N G A B C D E F Deutsch ...

Page 6: ...nd her zu gehen und das Knie einige Male zu beugen Überprüfen dass die Kondylenstützen gut am Gelenk anliegen Überprüfen dass die steifen Oberschenkel und Beinbinden gut am Muskel anliegen ohne jedoch einen übermäßigen Druck auszuüben Falls nötig die Knieorthese an das Bein des Patienten anpassen Die Struktur so anpassen dass sie perfekt an der Anatomie des betroffenen Beins ausgerichtet ist Abb H...

Page 7: ... PP4 Die beiden Deckelhälften des Gelenks verschieben und öffnen Abb L das Fixierelement herausnehmen Abb M und die Stifte an die gewünschte Gradzahl setzen Abb N Fixierelement in der Mitte wieder einsetzen Abb M und die beiden Deckelhälften in die Mitte verschieben bis sie mit einem hörbaren Klick einrasten Abb L IM FALLE DER EINSTELLUNG 0 10 20 30 Erst den Extensionskeil der mit einer Kerbe und ...

Page 8: ... Gelenke werden hinter dem gebeugten Knie angebracht da sich diese mit dem Verschluss jedes Riemens nach vorne verschieben bis die Orthese in der richtigen Position am Bein angebracht ist Die Riemen Nr 3 bis Nr 5 in der Reihenfolge der Nummern schließen Abb S Aufstehen und Riemen Nr 6 Abb T schließen Hin und her gehen und die Knie einige Male beugen Überprüfen dass die Kondylenstützen gut am Gelen...

Page 9: ...5 90 Ruhigstellung 0 10 20 30 Nur PP4 Neues polyzentrisches KLICKKLACK Gelenk superflach und leicht von mit Keilen verstellbar OHNE Werkzeuge Extension 0 10 20 30 40 Flexion 45 60 75 90 Blockierung 0 10 20 30 Ein mediales anatomisch vorgeformtes Kondylenpolster vormontiert für höchsten Tragekomfort sowie optimale Fixierung Zwei unterschiedlich starke und leicht austauschbare Kondylenpolster Sets z...

Page 10: ...ents of the directives 93 42 EEC and 2007 47 EEC These operating instructions were created in accordance with the specification of the above mentioned directives They aim to ensure the safe and correct use of the medical product TRADEMARKS OF MATERIALS Velcro is a registered trademark of Velcro Industries B V SELECTION SIZE Size S S M M L L XL XL XXL Thigh circ taken 15 cm above 39 47 47 53 47 53 ...

Page 11: ...garment avoiding direct contact with the skin If in doubt about how to apply contact an orthopaedic technician The device should not be worn in the vicinity of open flames or strong electromagnetic fields WARNINGS The product may only be used in the event of medical indication or when prescribed by a physician and must be applied by an orthopaedic technician the competent authority figure for the ...

Page 12: ...k and bend the knee Make sure the condylar supports fit tightly around the joint Check that the hard thigh and leg grips fit tightly around the muscles without causing excessive pressure If necessary adjust the brace to the patient s limb Modify the structure so as to perfectly suit the anatomy of the affected limb fig H I using bending irons It is also possible to add shims in correspondence with...

Page 13: ...he two half covers to the side fig L remove the central locking component fig M and insert replace the wedges to the required degree of flexion extension fig N Replace the central locking component fig M and slide the two half covers towards the centre until they securely click into place fig L IN CASE OF ADJUSTMENT OF THE STOP 0 10 20 30 First insert the extension wedge the one with only one notc...

Page 14: ...about 1 cm fig R Note The joints are positioned behind the bent knee because when each strap is fastened they move forward until the brace is correctly positioned on the leg Fasten straps 3 through 5 in order fig S Stand up and fasten strap 6 fig T Walk around bending the knee a few times Make sure the condylar pads fit tightly around the joint and that the hard thigh and leg grips fit tightly aro...

Page 15: ... only the new polycentric CLICKCLACK hinge can be easily adjusted using wedges and WITHOUT the need for any tools Extension 0 10 20 30 40 Flexion 45 60 75 90 Lock 0 10 20 30 A medial anatomically formed condyle pad is pre mounted for the greatest in wearing comfort and optimum hold Two sets of replaceable condyle pads of different thicknesses enable simple adaptation e g after the swelling of the ...

Page 16: ...tives 93 42 CEE et 2007 47 CEE Le présent mode d emploi a été rédigé selon les prescriptions des directives mentionnées ci dessus Son but est de garantir une utilisation sûre et en bonne et due forme du produit médical MARQUES DES MATÉRIAUX Velcro est une marque déposée de l entreprise Velcro Industries B V SÉLECTION TAILLES Mesure S S M M L L XL XL XXL Circonf cuisse prise 15 cm au dessus 39 47 4...

Page 17: ...ntact direct avec la peau Si vous avez des questions concernant l utilisation veuillez vous adresser à un technicien orthopédiste Ne pas exposer le produit à une flamme ouverte ou à des champs magnétiques importants AVERTISSEMENTS L utilisation de ce produit est réservée aux indications médicales ou ne doit que se faire sur ordonnance médicale Le réglage individuel doit être effectué par un techni...

Page 18: ...e S assurer que le support condylien soit correctement ajusté autour du joint Vérifier que les grips de la cuisse et de la jambe enroulent bien les muscles sont pressions excessives Si nécessaire ajuster l attelle au membre du patient Modifier la structure pour l ajuster parfaitement à l anatomie du membre touché fig H I avec un instrument d ajustement Selon le type de condyle il est possible de m...

Page 19: ...erture de l articulation en faisant coulisser latéralement les deux de mi couvercles fig L extraire l élément central de blocage fig M et insérer rempla cer les butées aux degrés souhaités fig N Réinsérer l élément central de blocage fig M en faisant coulisser vers le centre les deux demi couvercles jusqu au clic de sécurité fig L EN CAS D AJUSTEMENT DE STOP 0 10 20 30 D abord insérer les cales d ...

Page 20: ...e les joints sont positionner derrière la courbe du genou car lorsque chaque stras est fermé ils bougent vers l avant jusqu a ce que l attelle soit correctement positionner sur la jambe Fermer le strap 3 à travers le strap 5 fig S Se mettre debout et fermer le strap 6 fig T Marcher et courber la jambe S assurer que le support condylien soit correctement ajusté autour du joint et vérifier que les g...

Page 21: ...KCLACK polycentrique à profil ultraplat réglable facilement grâce à des butées et SANS aucun outil Extension 0 10 20 30 40 Flexion 45 60 75 90 Blocage 0 10 20 30 Rembourrage condyle médial pré monté de forme anatomique assurant un grand confort de port et une fixation optimale Deux kits différents de rembourrages condyles solides et faciles à échanger permettant un ré ajustage facile p ex une fois...

Page 22: ...гивать изделие во избежание нежелательного давления на нервные и сосудистые окончания Рекомендуется одевать изделие на х б майку во избежание прямого контакта с кожей В случае возникновения сомнений в применении изделия обратитесь к технику ортопеду ПРЕДУПРЕЖДЕНИЕ Это медицинское приспособление должно быть выписано врачом и наложено ортопедом Ортопед является вашим техником который профессионально...

Page 23: ...LICKCLACK легко регулируемое при помощи клиньев и БЕЗ каких либо дополнительных инструментов Разгибание 0 10 20 30 40 Сгибание 45 60 75 90 Блокировка 0 10 20 30 Анатомическая медиальная мыщелковая прокладка смонтированная для максимального комфорта и оптимальной устойчивости Два дополнительных комплекта мыщелковых прокладок различной толщины легко заменяемых для лёгкой адаптации колена например по...

Page 24: ... Попросите пациента походить и несколько раз согнуть колено Убедитесь что мыщелковые опоры плотно прилегают к шарнирному соединению Проверьте что жёсткий захват бедра и ноги плотно охватывает мышцы но не пережимает их При необходимости отрегулируйте наколенник по ноге пациента Измените конструкцию таким образом чтобы она идеально следовала анатомии поражённой конечности рис H I с помощью рычага сг...

Page 25: ...шку шарнирного соединения сместив две половинки крышки в боковом направлении рис L извлеките центральный элемент блокировки рис M и вставьте замените клинья под нужными углами рис N Установите обратно центральный элемент блокировки рис M перемещая две половинки крышки к центру до предохранительного щелчка рис L В СЛУЧАЕ РЕГУЛИРОВКИ БЛОКА 0 10 20 30 Вставьте клин разгибания с одним делением а затем...

Page 26: ... примерно на 1 см рис R Примечание соединения располагаются позади согнутого колена потому что с закрытием каждого ремня они перемещаются вперёд до правильного позиционирования бандажа на ноге Закрепите ремешки от 3 до 5 в соответствии с нумерацией рис S Встаньте и закрепите ремешок 6 рис T Походите и посгибайте колени Убедитесь что мыщелковые прокладки плотно прилегают к шарнирному соединению и ч...

Page 27: ... 2007 47 CEE Эти инструкции были подготовлены в соответствии с основополагающими принципами упомянутыми выше Они предназначены для обеспечения надлежащего и безопасного использования медицинского изделия ТОРГОВЫЕ МАРКИ МАТЕРИАЛОВ Velcro является зарегистрированной торговой маркой Velcro Industries B V ВЫБОР РАЗМЕРЫ Размер S S M M L L XL XL XXL Окружность бедра на уровне 15 см выше центра 39 47 47 ...

Page 28: ...liabile indossare un indumento evitando il contatto diretto con la pelle In caso di dubbio sulle modalità di applicazione rivolgersi ad un tecnico ortopedico È consigliabile non indossare il dispositivo in vicinanza di fiamme libere o forti campi elettromagnetici AVVERTENZE Il prodotto deve essere utilizzato su indicazione medica o su prescrizione e applicato da un tecnico ortopedico che è la figu...

Page 29: ...ssimo profilo regolabile facilmente tramite cunei e SENZA alcun utensile estensione 0 10 20 30 40 flessione 45 60 75 90 blocco 0 10 20 30 Cuscinetto condiloideo mediale anatomico premontato per il massimo comfort e un ottimale stabilità Due set di imbottiture condilari di diverso spessore in dotazione facilmente sostituibili per un agevole adattamento al ginocchio ad esempio dopo la regressione de...

Page 30: ...ino n 6 fig G Chiedere al paziente di camminare e fare piegamenti sulle ginocchia Accertarsi che gli appoggi condilari siano ben aderenti all articolazione Controllare che la presa rigida di coscia e di gamba siano ben aderenti alla muscolatura senza però creare pressioni eccessive Se necessario adattare la ginocchiera all arto del paziente Modificare la struttura così da seguire perfettamente l a...

Page 31: ...re la copertura dello snodo facendo scorrere i due semi coperchi lateralmente fig L estrarre l elemento centrale di blocco fig M e inserire sostituire i cunei ai gradi desiderati fig N Re inserire l elemento centrale di blocco fig M facendo scorrere i due semi coperchi verso il centro fino al clack di sicurezza fig L IN CASO DI REGOLAZIONE DEL BLOCCO A 0 10 20 30 Inserire prima il cuneo di estensi...

Page 32: ...le articolazioni vengono posizionate dietro il ginocchio piegato perché con la chiusura di ogni cinturino queste si spostano in avanti fino al corretto posizionamento del tutore sulla gamba Chiudere i cinturini dal n 3 al n 5 seguendo la numerazione fig S Alzarsi e chiudere il cinturino n 6 fig T Camminare e fare qualche piegamento sulle ginocchia Accertarsi che i cuscinetti condilari siano ben ad...

Page 33: ...tive 93 42 CEE e 2007 47 CEE Le presenti istruzioni sono state redatte in applicazione delle Direttive sopra menzionate Esse hanno lo scopo di garantire un utilizzo adeguato e sicuro del dispositivo medico MARCHI COMMERCIALI DEI MATERIALI Velcro è un marchio registrato di Velcro Industries B V SCELTA DIMENSIONI Taglia S S M M L L XL XL XXL Circonf coscia presa 15 cm sopra 39 47 47 53 47 53 53 60 5...

Page 34: ......

Reviews: