27
26
24
2
25
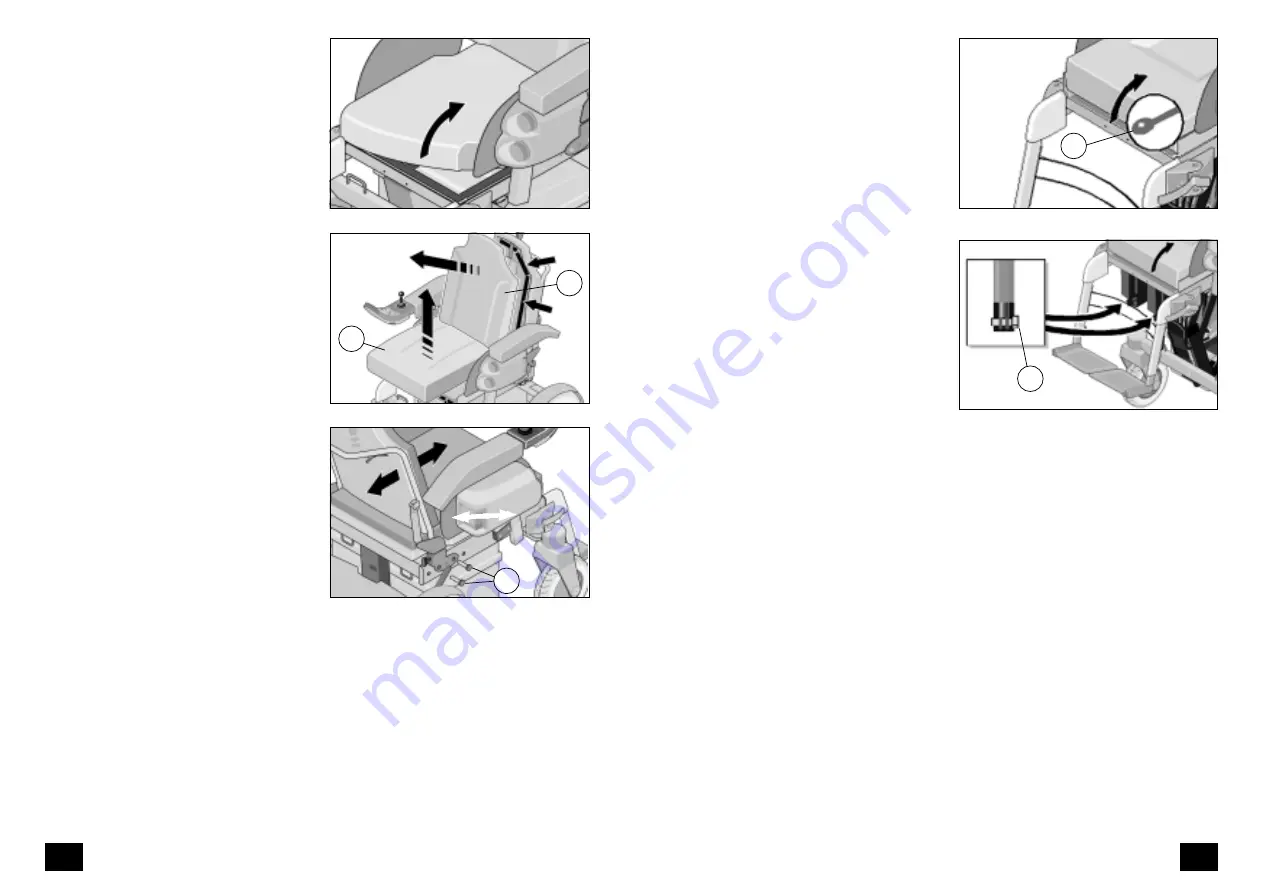
5.1.3 Swivelling up the seat
1. The seat must be swivelled up to the
rear for maintenance work and for
access to the batteries and the fuses.
!
Attention:
– Park the wheelchair on a level sur-
face and move the selection lever
into the drive mode position.
– Drive down the electrically-operat-
ed seat-angle adjusting device.
– Bring the backrest into the upright
position.
– Switch off the control unit and then
pull out the security plug.
– Detach the legrests.
2. Lightly press down the lever under
the seat (Fig. 24/
➀
) and then swiv-
el up the seat until the locking mech-
anism latches!
☞
With seat lifter and electrically-
adjustable seat angle
Detach the connecting elements
(Fig. 25/
➁
) and then swivel up the
seat until the locking mechanism
latches!
1
23
1
5. Components
5.1 Seat
5.1.1 Seat cushion
The standard seat cushion (Fig. 21) is
secured to the seat plate with Velcro fas-
teners and can be pulled off.
The ERGOpor seat cushion (Fig. 22/
➀
)
is secured to the seat shell with Velcro
fasteners and can be pulled off.
5.1.2 Adjusting the seat depth
The seat depth can be changed by
moving the backrest to a different posi-
tion.
☞
Note:
The attaching must be carried out by
an authorised dealer.
The securing screws (Fig. 23/
➀
) must
be removed to reposition the backreast.
Then remove the spacer sleeves from
the holes and insert them into the holes
for the new position of the backrest
mount. Attach the backrest mount with
the securing screws.
21
22
2
1


