background image

13

Dongguan  Ortur  Intelligent  Technologies  Co.,  Ltd.                                                                                                                     

https://ortur.tech/auferolaser1

No.1 Building, Ruijin Science and Technology Industrial Park, Changping, Dongguan 523558, Guandong Province, China

By

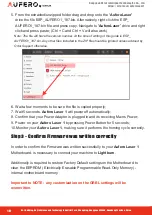
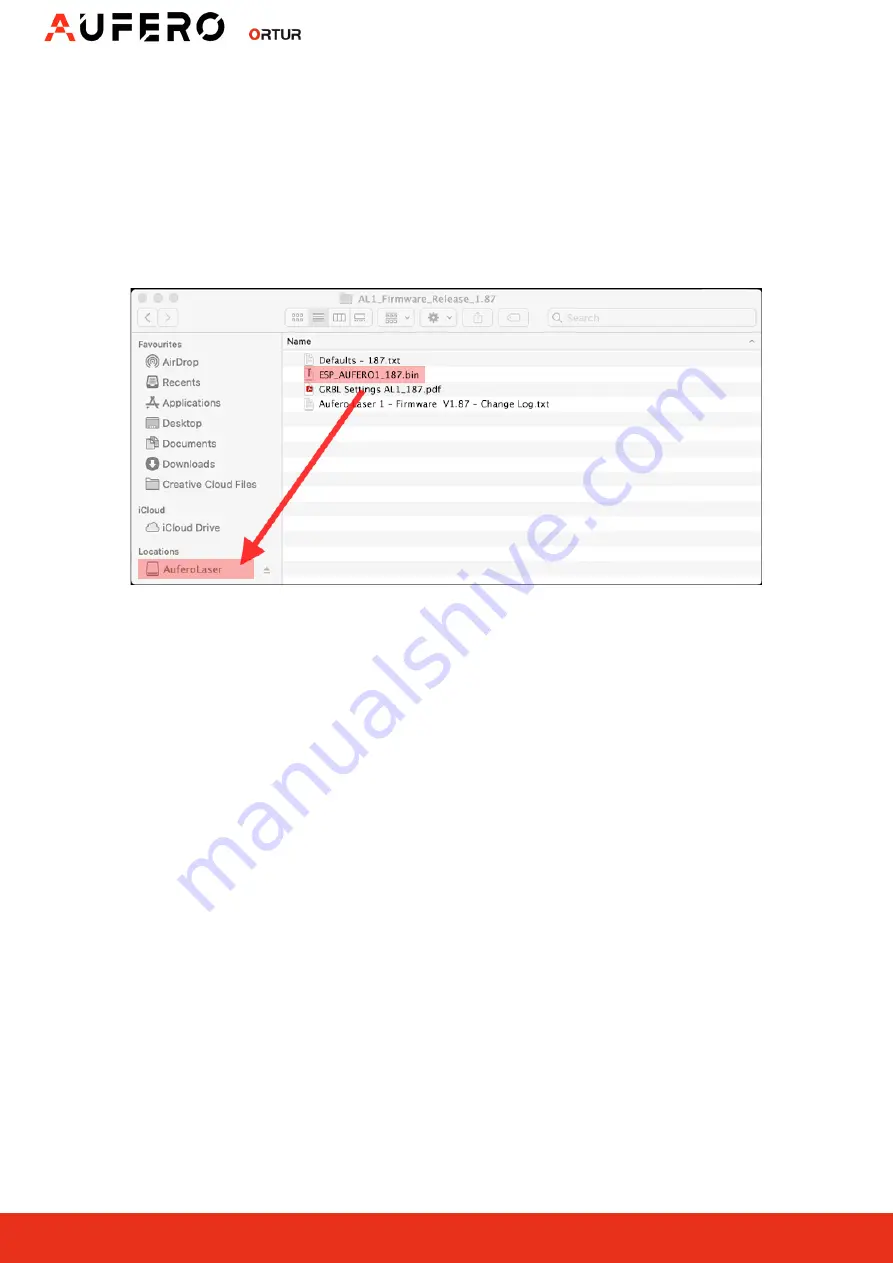
5.  From the extracted/unzipped folder drag and drop onto the “

AuferoLaser

” 

drive the file ESP_AUFERO1_187.bin. Alternatively, Ctrl click the ESP_
AUFERO1_187.bin file and press copy. Navigate to “

AuferoLaser

”  drive and ctrl 

click and press Paste Item; (C C and CV will also work)

Note: 

The file will have the version number. At the time of writing of this guide is ESP_

AUFERO1_187.bin. Any other files included in the ZIP file should be ignored unless advised by 

Ortur Support otherwise

6.  Wait a few moments to be sure the file is copied properly;
7.  Wait 5 seconds. 

Aufero Laser 1

 will power off automatically;

8.  Confirm that your Power Adapter is plugged in and its receiving Mains Power;
9.  Power on your 

Aufero Laser 1

 by pressing Power Button for 5 seconds;

10. Monitor your 

Aufero Laser 1

, making sure it performs the homing cycle correctly.

Step 3 - Confirm Firmware was written correctly

In order to confirm the Firmware was written successfully to your 

Aufero Laser 1


Motherboard, is necessary to connect your machine to 

Lightburn

.

Additionally is required to restore Factory Default settings on the Motherboard to 
clear the EEPROM ( Electrically Erasable Programmable Read-Only Memory) - 
internal motherboard memory.

Important to NOTE:  any customization on the GRBL settings will be 
overwritten. 

Summary of Contents for Aufero Laser 1

Page 1: ...Technologies Co Ltd https ortur tech auferolaser1 No 1 Building Ruijin Science and Technology Industrial Park Changping Dongguan 523558 Guandong Province China By Firmware Update Instructions v1 87 15...

Page 2: ...ttps ortur tech support to resolve an issue Aufero Laser 1 is working correctly and showing no problems When TO upgrade the firmware Advised to do so by Ortur or Ortur Customer Support A new version o...

Page 3: ...uccessful please get in touch via our Ticketing system at https ortur tech support Ortur Support team will most likely suggest a remote session to your computer to allow an untouched file transfer to...

Page 4: ...nce China By Update Procedure Windows Step 1 Retrieve Latest Firmware Files 1 Visit https ortur tech latest firmware 2 Browse through the web page until you find Aufero Laser 1 3 Select the Download T...

Page 5: ...ccessful when AuferoLaser device appears in This PC as a drive The drive letter might be different than F Step 2 Enable Firmware mode on your Aufero 1 Connect your Aufero Laser 1 via USB directly to y...

Page 6: ...6 Wait a few moments to be sure the file is copied properly 7 Wait 5 seconds Aufero Laser 1 will power off automatically 8 Confirm that your Power Adapter is plugged in and its receiving Mains Power 9...

Page 7: ...this guide 2 Select the appropriate COM port for your Aufero Laser 1 and press Connect button 3 Once connection is established console window will show the welcome message 4 Confirm that the welcome...

Page 8: ...defaults The firmware update procedure is now complete The Aufero Laser 1 is ready to be used normally Important Note Any customization of the GRBL settings prior to firmware update was overwritten If...

Page 9: ...rsion at the time of writing of this guide 2 Select the appropriate COM port for your Aufero Laser 1 and wait for the Connection status READY 3 Once connection is established console window will show...

Page 10: ...defaults The firmware update procedure is now complete The Aufero Laser 1 is ready to be used normally Important Note Any customization of the GRBL settings prior to firmware update was overwritten I...

Page 11: ...nce China By Update Procedure MacOs Step 1 Retrieve Firmware Files 1 Visit https ortur tech latest firmware 2 Browse through the web page until you find Aufero Laser 1 3 Select the Download Tab and cl...

Page 12: ...press buttons are successful when AuferoLaser device appears in Locations as a drive Step 2 Enable Firmware mode on your Aufero 1 Connect your Aufero Laser 1 via USB directly to your computer do not...

Page 13: ...unless advised by Ortur Support otherwise 6 Wait a few moments to be sure the file is copied properly 7 Wait 5 seconds Aufero Laser 1 will power off automatically 8 Confirm that your Power Adapter is...

Page 14: ...sion at the time of writing of this guide 2 Select the appropriate serial port for your Aufero Laser 1 and wait for the Connection status READY 3 Once connection is established console window will sho...

Page 15: ...defaults The firmware update procedure is now complete The Aufero Laser 1 is ready to be used normally Important Note Any customization of the GRBL settings prior to firmware update was overwritten I...

Page 16: ...vince China By Step 1 Retrieve Firmware Files 1 Visit https ortur tech latest firmware 2 Browse through the web page until you find Aufero Laser 1 3 Select the Download Tab and click DOWNLOAD LINK 4 S...

Page 17: ...s are successful when AuferoLaser device appears in Locations as a drive Step 2 Enable Firmware mode on your Aufero 1 Connect your Aufero Laser 1 via USB directly to your USB directly to your Linux Ma...

Page 18: ...s advised by Ortur Support otherwise 6 Wait a few moments to be sure the file is copied properly 7 Wait 5 seconds Aufero Laser 1 will power off automatically 8 Confirm that your Power Adapter is plugg...

Page 19: ...sion at the time of writing of this guide 2 Select the appropriate serial port for your Aufero Laser 1 and wait for the Connection status READY 3 Once connection is established console window will sho...

Page 20: ...defaults The firmware update procedure is now complete The Aufero Laser 1 is ready to be used normally Important Note Any customization of the GRBL settings prior to firmware update was overwritten I...

Reviews:

Related manuals for Aufero Laser 1