Maintenance & Replacement
There is no maintenance required for this lamp
– it is designed to be used only once, meaning
that replacement is necessary if it becomes defective (repairing is impossible). Before any
handling, ensure that there is NO voltage supplied to the lamp. To replace, unfasten the lamp
from the bracket. Ensure the new lamp is of the same model and characteristics as the one
being replaced.
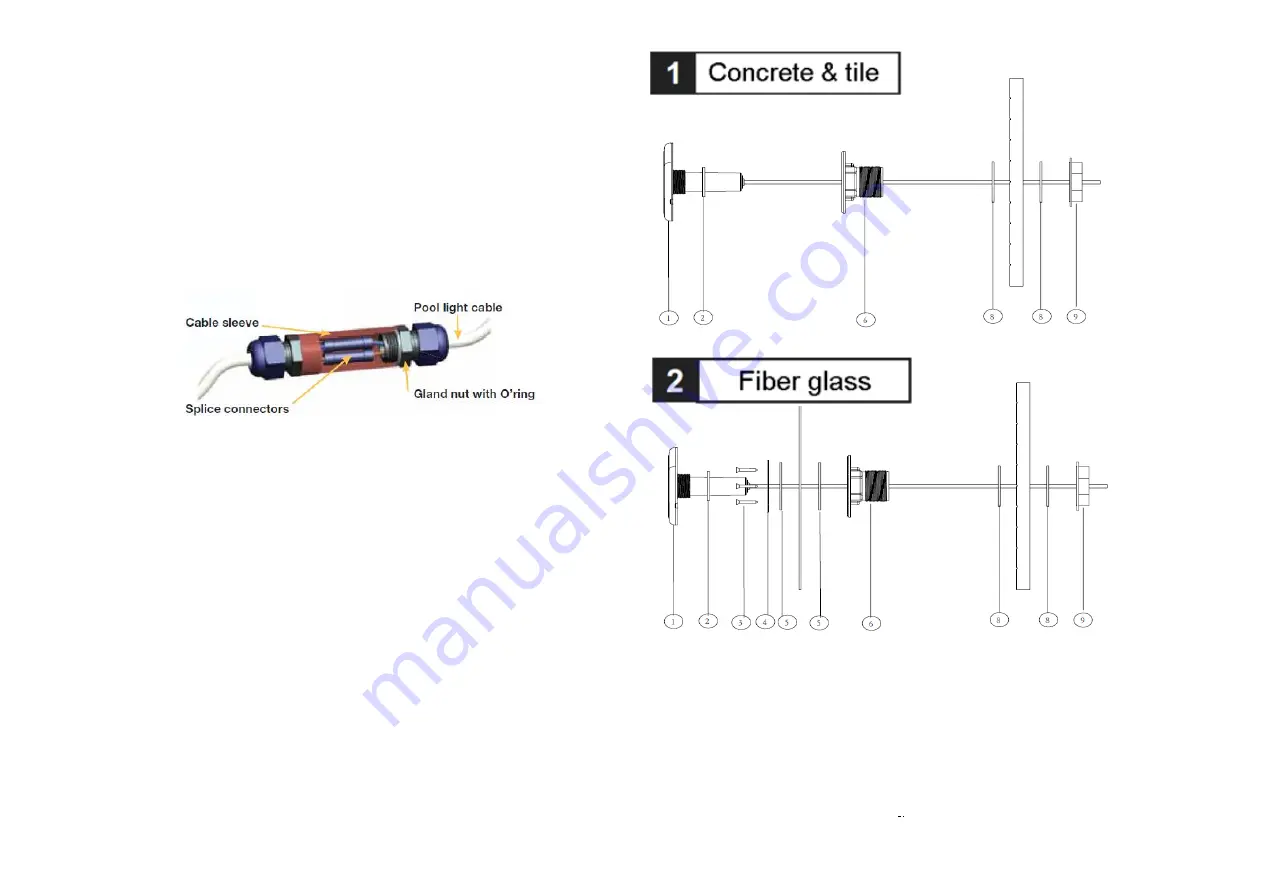
If the cable pipes you use has inner diameter 26mm or more, you can use the retrofit connector
to connect the cable easily. Simply crimp both connections with the splice connectors, slide the
cable sleeve over the connection and hand tighten the gland nuts. Then hide the retrofit
connector in the pipe. The retrofit connector is ordered separately.
Start-up
• The lamp should only operate underwater while secured to the vertical walls of the pool.
Never
switch on the lamp if it is not underwater.
• In case of colored lamps, 16 pre-programmed effects and combinations may be selected using
the on/off switch of your pool lights. Just switch off and switch on within 2 seconds.
• If the light is powered off for more than 20 seconds, it will keep the latest program when it is
turned on again.
• To achieve synchronization, confirm all lamps are installed correctly on the same switch, after
they are powered off for more than 20 seconds, switch on and switch off continuously three
times, and then finally turn them on again. They will all go to program 5. Now you can select a
program for them by switch off and on within 8 seconds.
• Alternatively, we recommend using our optional controller (with in-built safety transformer)
which comes with (a) remote control for easy operation and (b) auxiliary connection of 24V for
operation of any other electrical item.
6
3