10
Step 6:
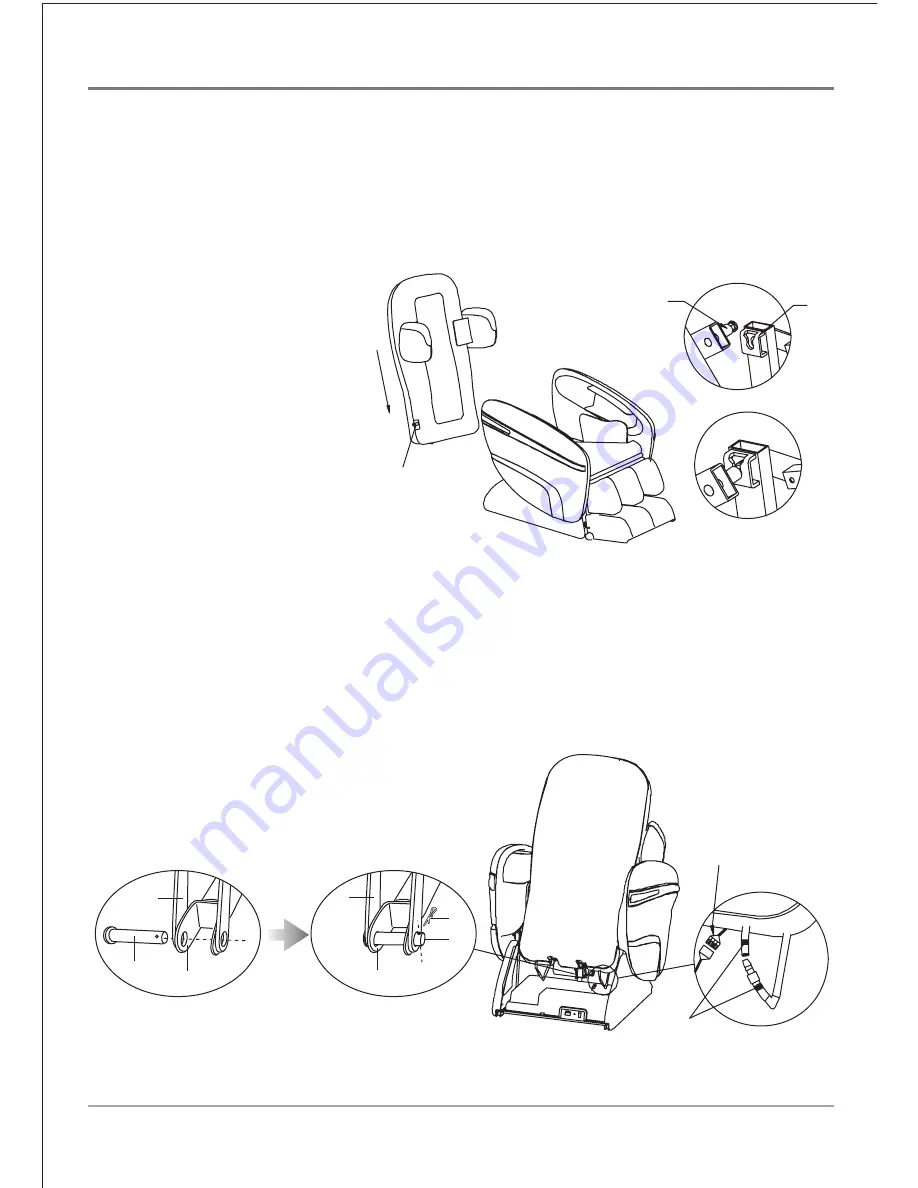
Install the backrest.
Lift the backrest, then lower the backrest into the seat brackets. Securely lock the flat
head bolts (A) into both sides (B) of the seat as demonstrated in PIC 5.
A. Flat Head Bolt(on the backrest)
B. Holder(on the seat)
PIC 5
Before installment
After installment
A
A
B
Step 7:
Attach the connecting rod (A) and the U stay fork of the reclining actuator (B)
with a flat head rivet (C), and secure with a split pin (D), then connect the air pipe and
the audio wire in both left and right sides as demonstrated in PIC 6.
A. Connecting rod (on the backrest)
B. U stay fork of reclining actuator (on the seat)
C. Flat head rivet (part 10 in the list)
D. Split pin (part 11 in the list)
A
C
D
B
A
C
B
Audio cable
Air pipe colour
label: grey
PIC 6
Summary of Contents for OS6000
Page 1: ...User Manual OS6000...
Page 32: ......


