SECTION 7 - BASIC ELECTRICAL INFORMATION & ELECTRICAL SCHEMATICS
3121659
– JLG Lift –
7-1
SECTION 7. BASIC ELECTRICAL INFORMATION & ELECTRICAL SCHEMATICS
7.1
GENERAL
This section contains basic electrical information and sche-
matics to be used for locating and correcting most of the oper-
ating problems which may develop. If a problem should
develop which is not presented in this section or which is not
corrected by listed corrective actions, technically qualified
guidance should be obtained before proceeding with any
maintenance.
NOTE:
Some of the procedures/connectors shown in this section
may not be applicable to all models.
7.2
MULTIMETER BASICS
A wide variety of multimeters or Volt Ohm Meters (VOM) can
be used for troubleshooting your equipment. This section
shows diagrams of a common, digital VOM configured for sev-
eral different circuit measurements. Instructions for your VOM
may vary. Please consult the meter operator’s manual for more
information.
Grounding
"Grounding the meter" means to take the black lead (which is
connected to the COM (common) or negative port) and touch
it to a good path to the negative side of the Voltage source.
Backprobing
To "backprobe" means to take the measurement by accessing
a connector’s contact on the same side as the wires, the back
of the connector. Readings can be done while maintaining cir-
cuit continuity this way. If the connector is the sealed type,
great care must be taken to avoid damaging the seal around
the wire. It is best to use probes or probe tips specifically
designed for this technique, especially on sealed connectors.
Whenever possible insert probes into the side of the connec-
tor such that the test also checks both terminals of the con-
nection. It is possible to inspect a connection within a closed
connector by backprobing both sides of a connector terminal
and measuring resistance. Do this after giving each wire a gen-
tle pull to ensure the wires are still attached to the contact and
contacts are seated in the connector.
Min/Max
Use of the "Min/Max" recording feature of some meters can
help when taking measurements of intermittent conditions
while alone. For example, you can read the Voltage applied to
a solenoid when it is only operational while a switch, far from
the solenoid and meter, is held down.
Polarity
Getting a negative Voltage or current reading when expecting
a positive reading frequently means the leads are reversed.
Check what reading is expected, the location of the signal and
that the leads are connected to the device under test correctly.
Also check that the lead on the "COM" port goes to the Ground
or negative side of the signal and the lead on the other port
goes to the positive side of the signal.
Scale
M = Mega = 1,000,000 * (Displayed Number)
k = kilo = 1,000 * (Displayed Number)
m = milli = (Displayed Number) / 1,000
μ = micro = (Displayed Number) / 1,000,000
Example: 1.2 kW = 1200 W
Example: 50 mA = 0.05 A
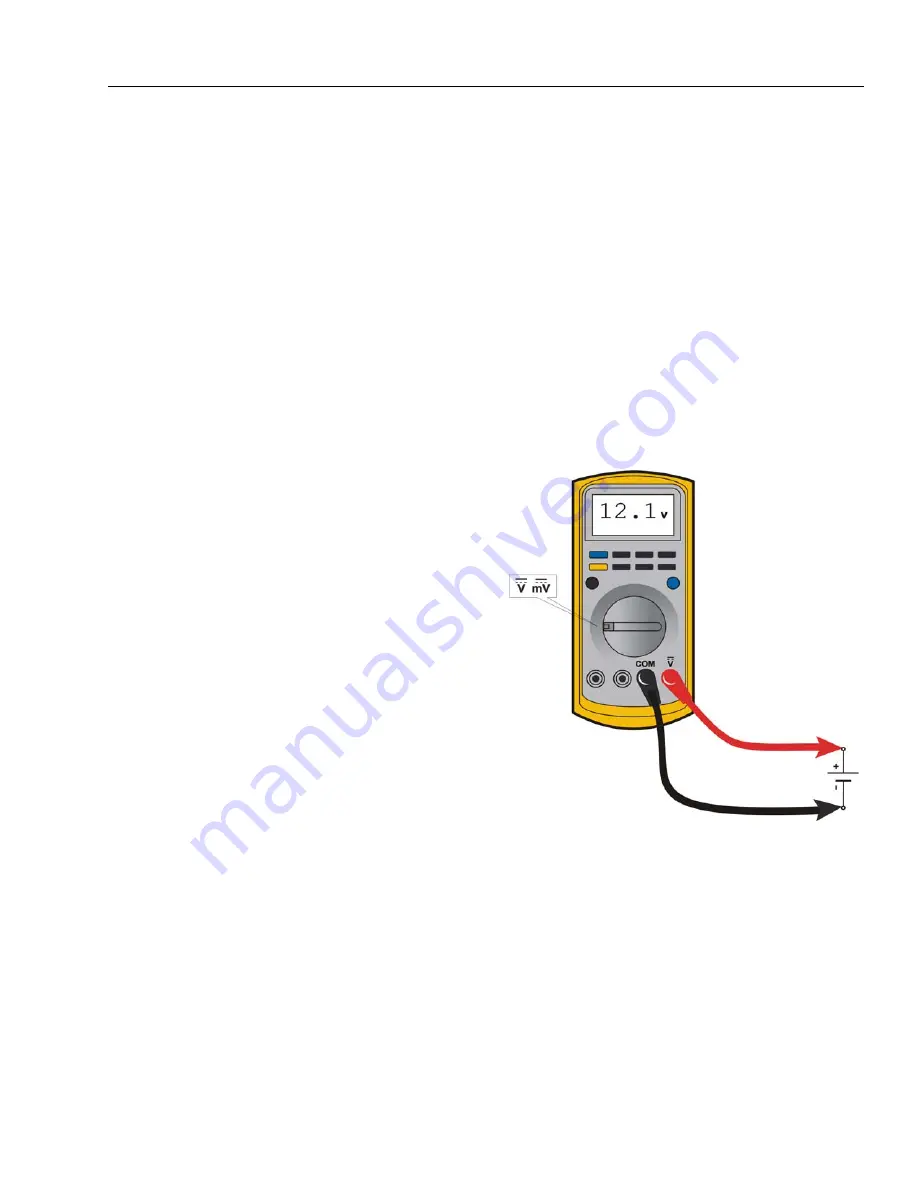
Voltage Measurement
• If meter is not auto ranging, set it to the correct range
(See multimeter’s operation manual)
• Use firm contact with meter leads
Figure 7-1. Voltage Measurement (DC)
Summary of Contents for JLG 450AJ
Page 2: ......
Page 32: ...SECTION 1 SPECIFICATIONS 1 18 JLG Lift 3121659 NOTES...
Page 80: ...SECTION 4 BOOM PLATFORM 4 2 JLG Lift 3121659 Figure 4 1 Boom Assembly...
Page 81: ...SECTION 4 BOOM PLATFORM 3121659 JLG Lift 4 3 Figure 4 2 Main Boom Assembly Sheet 1 of 2...
Page 82: ...SECTION 4 BOOM PLATFORM 4 4 JLG Lift 3121659 Figure 4 3 Main Boom Assembly Sheet 2 of 2...
Page 83: ...SECTION 4 BOOM PLATFORM 3121659 JLG Lift 4 5 Figure 4 4 Upper Boom Assembly...
Page 84: ...SECTION 4 BOOM PLATFORM 4 6 JLG Lift 3121659 Figure 4 5 Jib Assembly...
Page 118: ...SECTION 4 BOOM PLATFORM 4 40 JLG Lift 3121659 NOTES...
Page 156: ...SECTION 5 BASIC HYDRAULIC INFORMATION HYDRAULIC SCHEMATICS 5 38 JLG Lift 3121659 NOTES...
Page 164: ...SECTION 6 JLG CONTROL SYSTEM 6 8 JLG Lift 3121659 Figure 6 2 Tilt Sensor Location...
Page 169: ...SECTION 6 JLG CONTROL SYSTEM 3121659 JLG Lift 6 13 Figure 6 7 Analyzer Connecting Points...
Page 181: ...SECTION 6 JLG CONTROL SYSTEM 3121659 JLG Lift 6 25 Figure 6 19 Platform Module Sheet 1 of 2...
Page 182: ...SECTION 6 JLG CONTROL SYSTEM 6 26 JLG Lift 3121659 Figure 6 20 Platform Module Sheet 2 of 2...
Page 224: ...SECTION 6 JLG CONTROL SYSTEM 6 68 JLG Lift 3121659 NOTES...
Page 340: ...SECTION 7 BASIC ELECTRICAL INFORMATION ELECTRICAL SCHEMATICS 7 116 JLG Lift 3121659 NOTES...
Page 341: ......


