6
3.3 Product dimensions
3.3.1 Delivery
The product should be transported carefully,
with packaging.
3.3.2 Removing the insulation
The product is fitted with a four-port insulation
cap with quick-fit locks that can easily be pulled
apart and put together without the use of tools.
Care should be taken when fitting/dismantling to
ensure that the locking mechanisms and insula-
tion are not damaged.
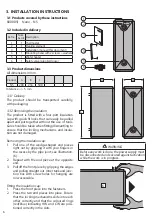
Removing the insulation cap:
1. Pull one of the wedge-shaped end pieces
right out by gripping it with your fingers in
the recess by the pipe joint; see illustration.
(K).
2. Repeat with the end piece at the opposite
end.
3. Pull off the front piece by gripping the edges
and pulling straight out. Inner tank and junc-
tion box with screw holes for hanging are
now accessible.
Fitting the insulation cap:
1. Press the front piece into the fasteners.
2. Press the two end pieces into place. Ensure
that the locking mechanisms slide into each
other correctly and that the coloured rings
(red/blue) indicating HW and CW are posi-
tioned correctly in the slots.
Product.
A
B
C
N 5
200
234
500
Tol/- 5 mm.
3. INSTALLATION INSTRUCTIONS
3.1 Products covered by these instructions
800 0051 Nano - N 5
3.2 Included in delivery
Ref no. Num-
ber of Description
1
1
Thermostat
2
1
Heating element
3
1
Installation manual (this document)
4
1
Mounting band with 2 washers
5
1
Water heater
6
1
Safety valve (supplied loose)
All dimensions in mm.
C
B
A
3
4
5
6
1
2
!
WARNING
Before any work is done, the power supply must
be disconnected and secured against activation
while the work is in progress.
K


