88 / 120
Climatix HERU® 400-2400
2018-02-13
Miscellaneous
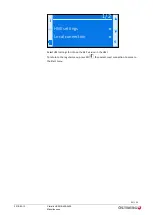
Restart
–
✓
–
Execute
The controller must be
restarted after changes are
made in order for the new
settings to apply.
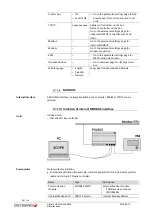
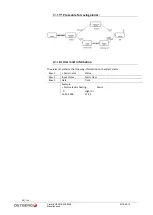
Detailed information on the MODBUS interface (transfer data, initiation, function) is
available in the document CB1P3934.
Main index > System overview > Communications > Modbus > TCP/IP
Main index > System overview > Communications > TCP/IP > Change sett
Parameter
Range
Function
IP
192.168.001.099
IP address on the bus.
Mask
255.255.255.000
Subnet mask on the bus.
Gateway
192.168.001.001
Gateway
DHCP
Passive
Active
DEFAULT
Fixed IP address (must be entered).
Automatic address assigned via DHCP
server.
Reset required !!
✓
Execute
As a matter of principle, the controller
must be set after changing the settings to
assume the data.
User name
Enter user name on the network.
Password
Enter user name on the network.
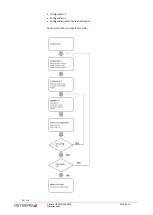
Checking IO configuration
Diagnostics table for checking inputs and outputs
Unconfigured IOs
Inputs and outputs that have not been configured. Cannot be represented in plain text,
but only as a number.
See the tables on the following pages.
1st unconfigured IO no. = 82 => External control input 2 is not allocated to any input
(Select output under Config. IOs).
There must be no IOs that are not connected to an input / output, otherwise the
system will remain locked and cannot be started!
Double
-
configured IOs
The inputs and outputs that use the same input or output cannot be represented in
plain text; they can only be represented as a number.
See the tables on the following pages.
Double config. IO = Yes
Double config. IO = 82 & 81
Double config. IO pos = DI3
External control input 1 and 2 allocated the same output, DI3.
There must be no IOs that are duplicated to one and the same input / output,
otherwise the system will remain locked and cannot be started!
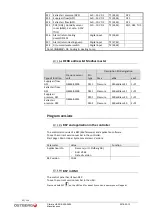
Name
Type Position
(IO
cont)
Name
Type Position
(IO
cont)
NOTE:
Parameter settings for
MODBUS TCP/IP
Warning!
Warning!
Analog inputs
Summary of Contents for HERU 400-2400 S
Page 1: ...U S E R M A N U A L E N H E R U 4 0 0 2 4 0 0 T S HERU T HERU S...
Page 2: ......
Page 14: ...14 120 Climatix HERU 400 2400 2018 02 13 Scope of assembly installation instructions...
Page 45: ...45 120 2018 02 13 Climatix HERU 400 2400 External components basic unit...
Page 97: ...97 120 2018 02 13 Climatix HERU 400 2400 Miscellaneous Menu structure Menu overview...
Page 98: ...98 120 Climatix HERU 400 2400 2018 02 13 Miscellaneous Start page Main index Unit...
Page 104: ...104 120 Climatix HERU 400 2400 2018 02 13 SERVICE HERU...
Page 111: ...111 120 2018 02 13 Climatix HERU 400 2400 SERVICE HERU...
Page 118: ...118 120 2017 11 03 Climatix HERU 400 2400 Troubleshooting...
Page 119: ......
Page 120: ......


