38 / 120
Climatix HERU® 400-2400
2018-02-13
Getting started, a few simple steps
і
Value 1
Time 2
Value 2
Time 3
Value 3
Time 4
1/12
dMonday
Time 1
00:00
Off
06:00
Stage1
18:00
Off
*: *
b
d
a
c
e
f
Explanation of above image:
a.
Time-1 is the first connection time of that day, in this case Monday.
b.
Value-1 is the operating mode that will apply for Time-1.
The same applies for the others. Value-2 is operating mode according to
Time-2, and so on.
There are six different Times/Values for each day of the week.
c.
Must ALWAYS have value 00:00, applies to all days of the week (incl.
exceptions)
d.
*: *= no time stamp, so Value-4 has no significance. Operation will continue
switched off (Off) until the next day of the week Time-1=00:00 according to
the value that Value-1 has this day.
e.
Time-2 with associated Value-2 (i.e. 06:00 / Comf.st2) is that which controls the
start of the ventilation because the unit will be stopped during the night. It
is this time after operating preference that must be changed for custom
start in each individual case.
f.
Time-3 with associated Value-3 (i.e.18:00/Off) is the time that stops operation.
This time must be changed for custom shutdown in the evening in each
individual case.
If the unit will be operated at night in reduced mode, only change Value-3 to Comf.st1.
Reduced air volume can then be set under Setpoint/Sply fan st 1/Extr fan st 1, see chap.
7.1.3.
Choose Economy St1 if the setpoint will also be customized for nighttime, according to
Temperature. Econ. Heating, see chap. 7.1.2.
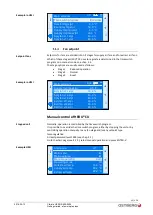
Copy the month’s times
The week schedule has a function that makes it so that you
don’t
need to enter
operating times for each day of the week. It is possible to copy the
month’s
settings
over to Tuesday-Friday.
After the
month’s
settings are done, go to Copy schedule.
Copy schedule is under Schedule, see chap. 7.1.7
Select Tu-Fr and press ENTER-
√.
і
Mon. to
Tu-Su
Tu
We
Th
Fr
2/10
Tu-Fr
Important!
Tip!
Example in HMI:
Copy times
Summary of Contents for HERU 400-2400 S
Page 1: ...U S E R M A N U A L E N H E R U 4 0 0 2 4 0 0 T S HERU T HERU S...
Page 2: ......
Page 14: ...14 120 Climatix HERU 400 2400 2018 02 13 Scope of assembly installation instructions...
Page 45: ...45 120 2018 02 13 Climatix HERU 400 2400 External components basic unit...
Page 97: ...97 120 2018 02 13 Climatix HERU 400 2400 Miscellaneous Menu structure Menu overview...
Page 98: ...98 120 Climatix HERU 400 2400 2018 02 13 Miscellaneous Start page Main index Unit...
Page 104: ...104 120 Climatix HERU 400 2400 2018 02 13 SERVICE HERU...
Page 111: ...111 120 2018 02 13 Climatix HERU 400 2400 SERVICE HERU...
Page 118: ...118 120 2017 11 03 Climatix HERU 400 2400 Troubleshooting...
Page 119: ......
Page 120: ......

