16
Figure 5
Figure 6
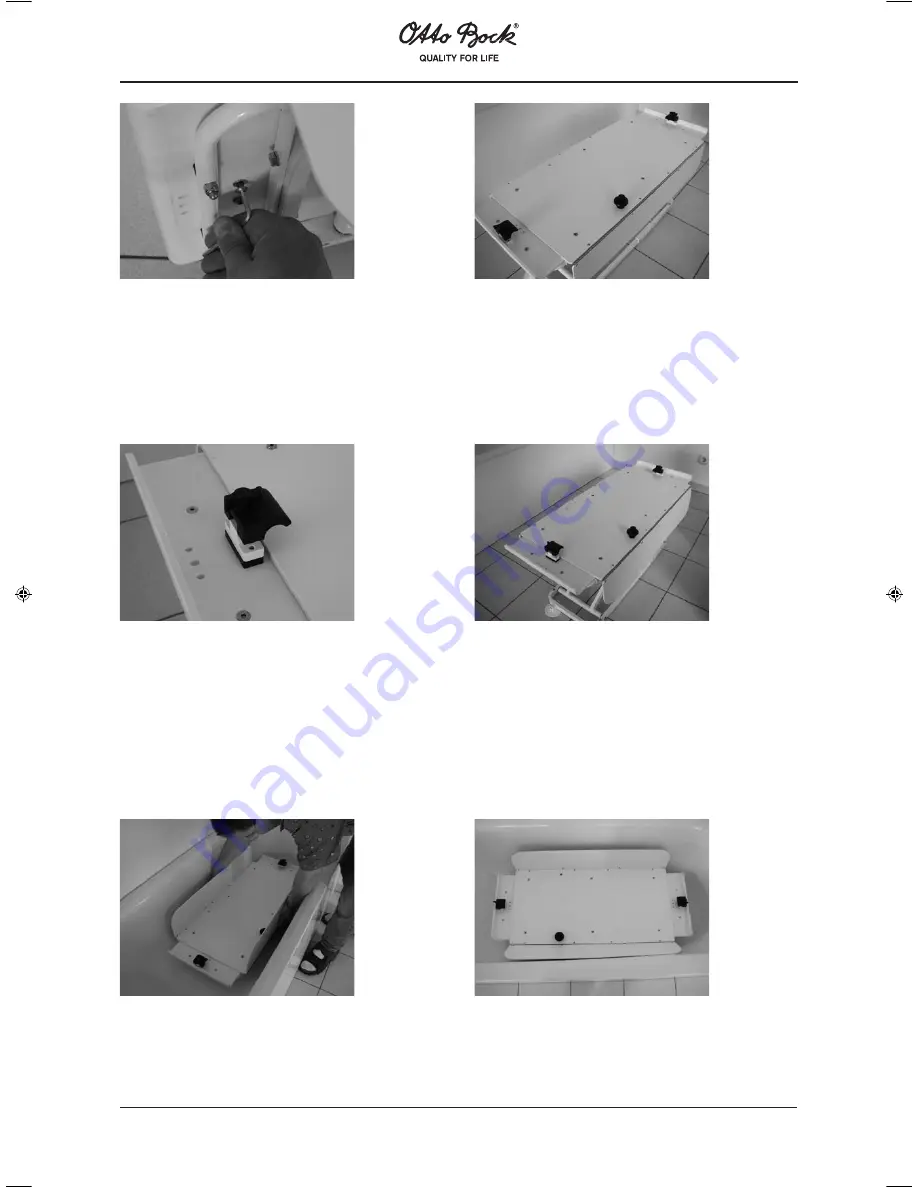
Attach the clamps to the movable panels from below using the four equal length screws and the washers
Figure 5).
The clamps should then be arranged on the cover as in this illustration (Figure 6).
9 Attaching the mountings for the size 1 Flipper bathing seat
Figure 7
Figure 8
Attach the clamps in the same way as in the section 'Attaching the mountings for the Robby and size 2 Flipper
bathing seats' but use the innermost holes on the movable panels (Figure 7).
Use the spacer and the long screws at the 'head end' of the cover (see Figure 3).
The clamps should then be arranged on the cover as in this illustration (Figure 8).
10 Setting the length of the cover
After you have attached the clamps you must now adjust the distance between the clamps to match your
bathtub by repositioning the movable panels.
Figure 9
Figure 10
First lower the HUBFIX bath lift to its lowest position.
Hold the left and right sides of the middle of the HUBFIX bath lift's main cover panel and carefully lift the bath lift
into the bathtub. (Figure 9).
647G154_GB_inhalt
13.02.2004, 11:20 Uhr
16


