Use
Invader Pointer
12 | Ottobock
3
4
7.3.3 Adjusting the seating centre of gravity
INFORMATION
The assembly tasks described below may only be carried out by qualified personnel�
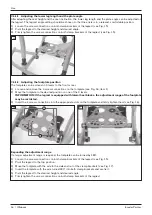
The seating centre of gravity can be subsequently adjusted using the perforated plates under the side panels�
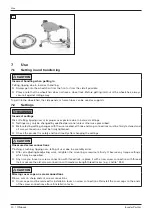
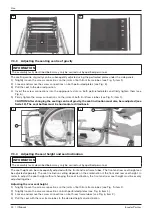
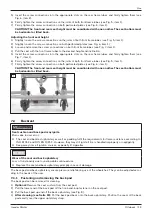
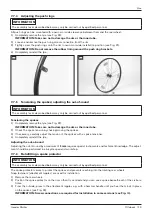
1) Slightly loosen the screw connections on the joints of both front frame tubes (see Fig� 5, item 1)�
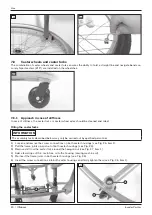
2) Loosen and remove the screw connections on both perforated plates (see Fig� 6)�
3) Pull the seat to the desired position�
4) Insert the screw connections into the appropriate slots on both perforated plates and firmly tighten them (see
Fig� 6)�
5) Firmly tighten the screw connections on the joints of both front frame tubes (see Fig� 5, item 1)�
CAUTION! After changing the seating centre of gravity, the seat inclination must also be readjusted (see
Seite 12). The seat bottom must be horizontal or tilted back.
5
6
7.3.4 Adjusting the seat height and seat inclination
INFORMATION
The assembly tasks described below may only be carried out by qualified personnel�
The seat height can be subsequently adjusted with the front and rear frame tubes� The front and rear seat height can
be adjusted separately� The seat inclination setting depends on the combination of the front and rear seat height� In
order to adjust the seat height without changing the seat inclination, the front and rear seat height must be evenly
adjusted together�
Adjusting the rear seat height
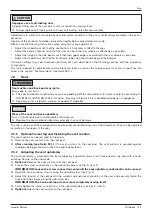
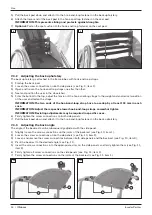
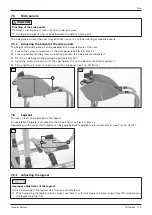
1) Slightly loosen the screw connections on the joints of both front frame tubes (see Fig� 5, item 1)�
2) Slightly loosen the screw connections on both perforated plates (see Fig� 6, item 1)�
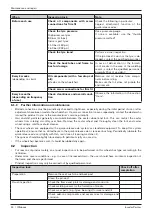
3) Loosen and remove the screw connections on both rear frame tubes (see Fig� 6, item 2)�
4) Pull the seat with the rear frame tubes to the desired height and inclination�


