background image

12 

16 

15 

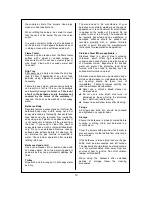
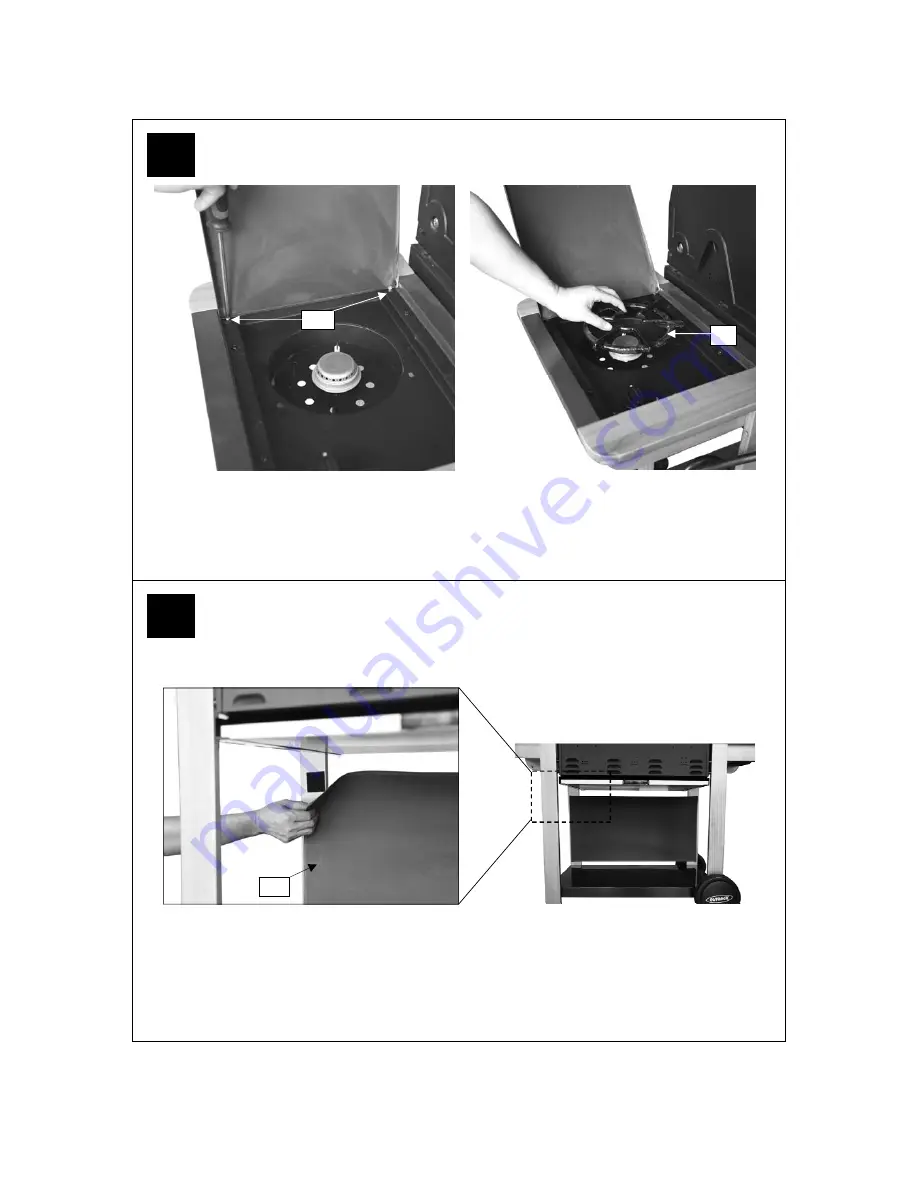
Attach the Front Screen (C16) to the front left / right Legs as shown. 

C6 

Using M4 Step Bolts (D11x2pcs) to limit the side burner lid during opening, to prevent it burning the 
wood part of side burner shelf.  
 
Place the Side Burner Grid (C6) onto the side burner shelf. NOTE: Only use cookware with a base 
diameter of between 150mm and 220mm on the side burner.


D11 

C16 

Summary of Contents for Ranger 3

Page 1: ...dangerous and will invalidate your warranty This does not affect your statutory rights Retain these instructions for future reference Leak test annually and whenever the gas bottle is removed or replaced Check that the hose connections are tight and leak test each time you reconnect the gas bottle For Flare up control please refer to the OPERATION section of this manual FOR YOUR SAFETY If you smel...

Page 2: ... 1 TROLLEY C1 Side Burner Shelf 1 C2 Side Burner Base 1 C3 Ignition Button 1 C4 Side Burner 1 C5 Side Burner Electrode 1 C6 Side Burner Grid 1 C7 Side Burner Knob 1 C8 Side Shelf 1 C9 Hook Rail 1 C10 Tool Hook 3 C11 Bottle Opener 1 C12 Left Front Leg 1 C13 Left Rear Leg 1 C14 Right Front Leg 1 C15 Right Rear Leg 1 C16 Front Screen 1 C17 Trolley Base 1 C18 Axle 1 C19 Wheel 2 C20 Hubcap 2 HARDWARE D...

Page 3: ...el purchased Specifications subject to change without prior notice For more details on hardware please see hardware pack page B1 A4 C13 C12 B11 A1 C16 A3 A2 B2 B4 B7 B8 B9 B10 C8 C15 C17 C20 C1 C11 C9 C10 C14 C19 D14 C18 B3 B6 C6 C5 C7 C3 B5 C2 C4 D13 ...

Page 4: ...4 Hardware Reference Diagram Specifications subject to change without prior notice D1 D2 D3 D4 D5 D6 D7 D7 D8 D9 D10 D11 D12 ...

Page 5: ... the Important Information section carefully before assembly and use of your barbecue 1 Attach the Legs C12 C13 C14 C15 onto the Trolley Base C17 use 1 4 20UNCx12 Bolts D7x8pcs as shown Note Ensure that the legs with the Velcro attached to them are at the front of the barbecue with the Velcro facing inwards D7 Unscrew the Locknuts D14 from both ends of the Axle C18 Slide the axle through the corre...

Page 6: ...ON Care must be taken to ensure the hood or lid does not fall open unexpectedly or becomes damaged when it is set on the ground D5 D4 Attach the Drip Tray Left Bracket B9 to barbecue body using M5x15 Bolts D1x2pcs Washers D2x2pcs and M5 Nuts D3x2pcs as shown Repeat above process for Drip Tray Right Bracket B10 NOTE Ensure that the big tabs of the brackets which stop the drip tray are located at th...

Page 7: ...ip Tray Handle B7 then attach it onto the Drip Tray B8 using the retaining bolts Insert the drip tray by sliding it underneath the barbecue body B7 B8 Attach the Bottle Opener C11 to the right front leg using 1 4 20UNCx12 Bolts D7x2pcs C11 D7 ...

Page 8: ...ough the Tool Hooks C10 as shown then fix the assembly onto the Side Shelf C8 using M6x10 Bolts D8x2pcs Make sure the hooks are facing outwards Attach the side shelf assembly to the right front rear Legs using 1 4 20UCNx25 Bolts D6x8pcs as shown D6 ...

Page 9: ...re assembled Nut D9 Unscrew the pre assembled nut of the Ignition Button C3 Insert the ignition button through the Side Burner Base C2 and secure with the pre assembled nut Carefully lay the side burner base into the side burner shelf then fixing it by using M6x15 Bolts D9x4pcs and M6 Nuts D10x4pcs as shown D10 D6 C1 ...

Page 10: ...10 11 Attach the side burner valve onto the side burner base using M4x10 Bolts D12x2pcs as shown 12 Press the Side Burner Knob C7 onto side burner valve stem D12 C7 ...

Page 11: ...rner C4 Insert the wire of Side Burner Electrode C5 into the hole at the side burner base Feed the venturi tube of the side burner through the hole in bottom of side burner base as shown then fix it and the side burner electrode onto side burner base using the wing nut Make sure that the end of venturi tube is set over the gas outlet of side burner valve ...

Page 12: ...ing M4 Step Bolts D11x2pcs to limit the side burner lid during opening to prevent it burning the wood part of side burner shelf Place the Side Burner Grid C6 onto the side burner shelf NOTE Only use cookware with a base diameter of between 150mm and 220mm on the side burner D11 C16 ...

Page 13: ...13 Attach the Warming Rack A4 to the barbecue body as shown A4 18 17 Lay the Flame Tamers B2 carefully into the body ensuring it lies level within the body Lay the Cooking Grills B1 into place B1 B2 ...

Page 14: ...p 2 Turn the gas on open the gas control valve on the gas bottle or regulator Step 3 Check for leaks by brushing a solution of water and liquid detergent soap over all the gas system joints including gas bottle valve connections hose connections and regulator connections Step 4 NEVER USE AN OPEN FLAME to test for leaks at any time Step 5 If bubbles form over any of the joints there is a leak Turn ...

Page 15: ...a stable flat surface Before you use your barbecue perform a leak test This is the only safe and sure way to detect any gas leaking from joints and connections of the barbecue after assembly Leak test annually and whenever the gas bottle is removed or replaced Do not store flammable materials near this barbecue Do not use aerosols near this barbecue Failure to follow the manual s instructions coul...

Page 16: ...y warranty Preparation Before Cooking To prevent foods from sticking to the cooking surface please use a long handled brush to apply a light coat of cooking or vegetable oil before each barbecuing session Note When cooking for the first time paint colours may change slightly as a result This is normal and should be expected Line the drip tray with aluminium foil then place a uniform layer of clean...

Page 17: ...nts of meat or whole chickens etc More even cooking of food will actually be achieved by using the barbecue with the hood down However this should only be done with the burners on low For best results place the food you wish to bake or roast on a metal baking tray and set it on one side of the cooking grill Turn the burner directly under the food to the OFF position and turn all other burners to a...

Page 18: ...d especially after extended periods of storage Ensure the barbecue and its components are sufficiently cool before cleaning Do not leave the barbecue exposed to outside weather conditions or stored in damp moist areas Never handle Never handle hot parts with unprotected hands Never douse the barbecue with water when its surfaces are hot In order to extend the life and maintain the condition of you...

Page 19: ...y Wipe with a cloth wrung out in hot soapy water and dry The wood used in the manufacture of your barbecue will naturally weather and change its appearance It is quite natural for small cracks to appear on the surface of the wood Do not expose to sun or rain directly The wood should be regularly inspected and any weathered or damaged surfaces should be sanded and recoated promptly with a garden fu...

Page 20: ... 28 30 37 Gas Pressure G30 Butane at 28 30mbar and G31 Propane at 37mbar Countries of Use BE CH CY CZ ES FR GB GR IE IT LT LU LV PT SK SI Category I3B P 30 Gas Pressure G30 Butane and G31 Propane at 30mbar Countries of Use AL BG CY CZ DK EE FI FR HR HU IS IT LT LU MK MT NL NO RO SE SI SK TR Ranger 3S Gas BBQ RC4343A 0359 359BR665 12 96 kW 3 1 02mm Butane 943g hr Propane 926hr Side Burner 0359 359B...

Page 21: ...on the burner Realign the electrode as required Burner will not light with a match LP gas bottle is empty Replace withfull bottle Faulty regulator Have regulator checked or replaced Obstructions in burner Clean burner Obstructions in gas jets or gas hose Clean jets and gas hose Low flame or flashback fire in burner tube a hissing or roaring noise may be heard LP gas bottle too small Use larger bot...

Page 22: ...lect including fat fires and flare ups or use of a faulty or incorrect regulator The product has not sustained damage through foreign objects substances or accidents The care and maintenance instructions given in your Outback manual have been followed If the product includes one or a number of parts or accessories only the defective accessory or part will be replaced i e Hose Regulator Rotisserie ...

Reviews: