16
www.outdoorrooms.com
HGI-31 : 1-23-2018
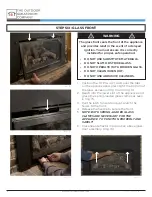
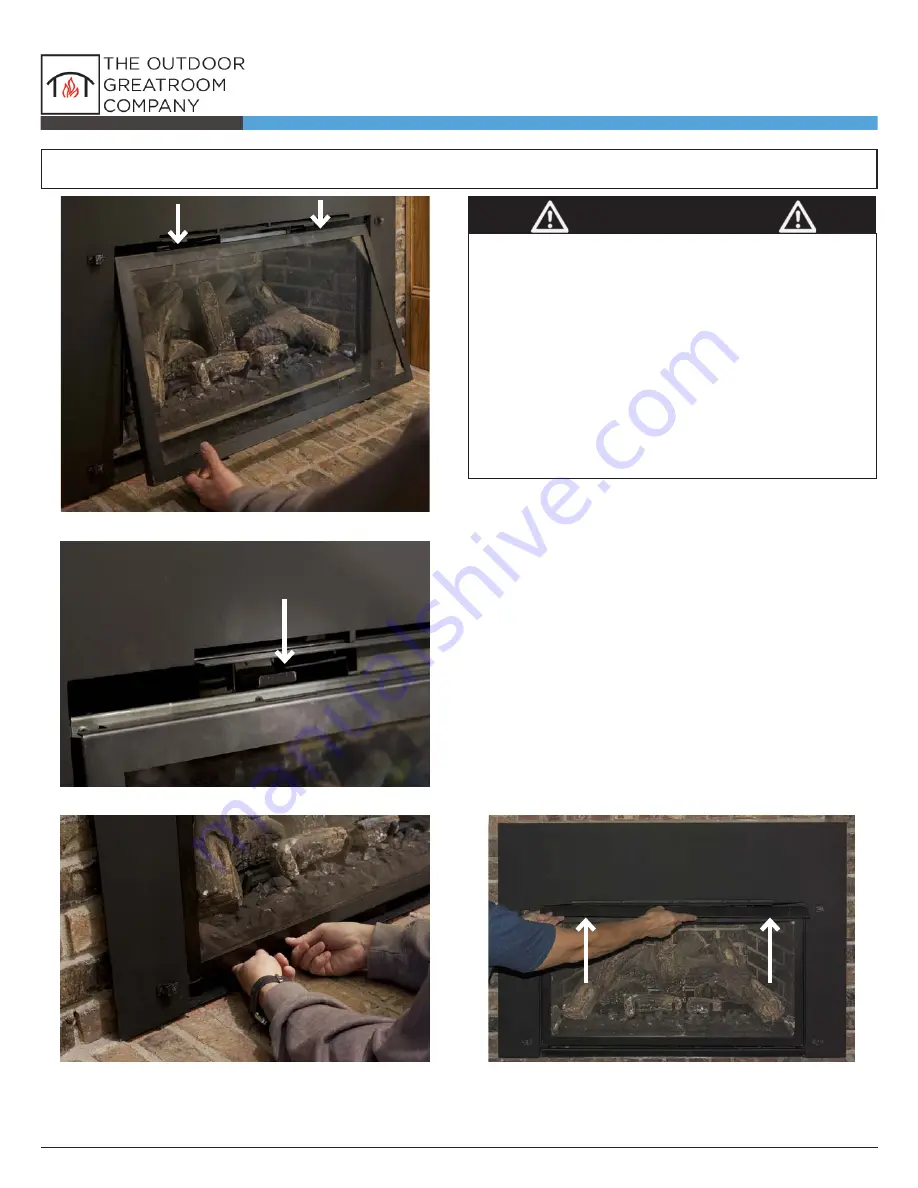
1. Position the TOP two (2) slots over the tabs
on the appliance and press tight the bottom of
the glass as seen in Img. 13 and Img. 14.
2. Reach into the lower slot of the appliance and
grasp the spring-loaded glass clamps as seen
in Img. 15.
3. Pull the latch forward and up to latch the
hooks to the front.
4. Release the handle to secure the front.
5.
NOTE: BOTH SPRING-LOADED GLASS
CLAMPS ARE NECESSARY FOR THE
APPLIANCE TO FUNCTION PROPERLY AND
SAFELY!
6.
Press heat deflector into position above glass
door assembly. (Img. 16)
STEP SIX: GLASS FRONT
WARNING
The glass front seals the front of the appliance
and provides relief in the event of a delayed
ignition. You must ensure it is correctly
installed for proper, safe operation!
•
DO NOT USE SUBSTITUTE MATERIALS.
•
DO NOT SLAM OR STRIKE GLASS.
•
DO NOT OPERATE WITH BROKEN GLASS.
•
DO NOT CLEAN WHEN HOT.
•
DO NOT USE ABRASIVE CLEANERS.
(Img. 13)
(Img. 14)
(Img. 15)
(Img. 16)

