17
HGI-31 : 1-23-2018
www.outdoorrooms.com
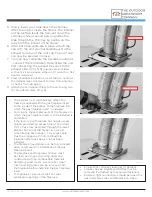
1. The Vented Front Face with Integral Screen
can now be placed on the mounting brackets.
2. Align the tabs of the Safety Screen with
their associated mounting brackets on the
appliance.
(Img. 17)
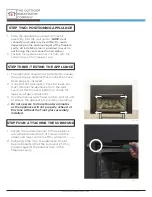
3. Lower the assembly into place.
(Img. 18)
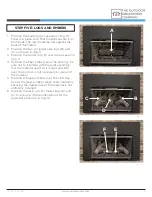
4. The safety screen is now installed.
(Img. 19)
STEP SEVEN: SAFETY SCREEN
(Img. 17)
(Img. 18)
(Img. 19)
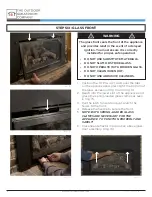
NOTE TO THE INSTALLER
COMPLETE ALL VERIFICATION TESTING PRIOR TO TURNING OVER THE UNIT TO THE
HOME OWNER. FOLLOW THE SECTION “LIGHTING AND OPERATION” BEFORE LIGHTING.
BE SURE TO READ ALL WARNINGS AND SAFETY PRECAUTIONS.
•
If the screen becomes damaged, the
screen shall be replaced with the
manufacturer’s barrier for this appliance.
•
In case of glass breakage, notify
the manufacture for new glass front
assembly. DO NOT ATTEMPT TO
REPLACE THE GLASS PANEL.
•
THIS APPLIANCE IS NOT INTENDED
FOR USE WITH GLASS DOORS.
•
A barrier designed to reduce the risk
of burns from the hot viewing glass
is provided with this appliance and
shall be installed for the protection of
children and other at-risk individuals.
•
If the barrier becomes damaged, the
barrier shall be replaced with the
manufacture’s barrier for this appliance.

