background image

 3 

REQUIRED TOOLS 

⇒ 

Razor Knife 

• 

To cut and remove packaging.  


⇒ 

Hammer or Pry Bar  

• 

To remove 1 x 2 and staples. 


⇒ 

Power Drill or Phillips Screw Driver 

• 

To remove Packaging screws 


⇒ 

Leather Gloves 

• 

To protect hands from rough and sharp 
items found on the San Juan Fireplace. 


⇒ 

It is recommended that a minimum 
of two people assemble and install 
the San Juan Fireplace.


Summary of Contents for SAN JUAN

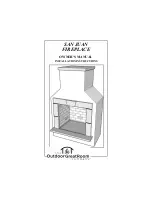
Page 1: ...SAN JUAN FIREPLACE OWNER S MANUAL INSTALLATION INSTRUCTIONS ...

Page 2: ..._______ Contents 2 Required Tools 3 Unwrapping 4 Removal of Firebox Top 5 Placing the Unit 6 Planning the Gas Line 7 Locating LPG Tank 8 Anchoring 9 Firebox Assembly 10 Installing the Hearth Pad 11 Final Instructions Dimensions 12 ...

Page 3: ...r To remove 1 x 2 and staples Power Drill or Phillips Screw Driver To remove Packaging screws Leather Gloves To protect hands from rough and sharp items found on the San Juan Fireplace It is recommended that a minimum of two people assemble and install the San Juan Fireplace ...

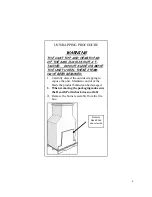
Page 4: ...NIT UNTIL THESE ITEMS HAVE BEEN REMOVED 1 Carefully dissect the outside wrapping to expose the unit Maintain control of the blade the product behind can be damaged 2 When removing the packaging make sure the Hearth Pad in back does not fall 3 Remove the burner assembly from the fire box Remove Hearth Pad and set aside ...

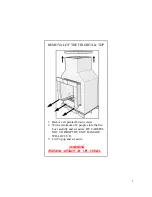
Page 5: ...rown screws 2 With a minimum of 2 people slide the fire box carefully and set aside BE CAREFUL NOT TO DROP THE UNIT DAMAGE WILL OCCUR 3 Lift Top up and set aside WARNING FIREBOX WEIGHT IS 175 195LBS REMOVAL OF THE FIREBOX TOP ...

Page 6: ...6 PLACING THE UNIT 1 When moving the surround into place care ful not to damage the edges 2 THIS SHOULD BE MOVED WITH NO LESS THAN TWO PEOPLE 3 Set the unit at the final location FRAGILE ...

Page 7: ...Juan firebox is located in the back left corner Plan your gas line accordingly PLANNING YOUR GAS LINE Gas Line Inlet The most convenient way to run your gas line is up through the bottom The bottom is open and free of obstructions ...

Page 8: ...ac cessible for service and can be easily shut off if needed 4 A pressure regulator should be used in line before the unit is connected to the pilot safety valve This is not supplied 5 The inlet pressure to the pilot safety valve is 11 W C 6 The size of your incoming line will limit the distance you can place the tank from the burner See the chart below Pipe or Tubing Length ft Tubing 3 8 O D Tubi...

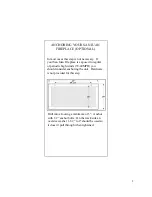
Page 9: ...eplace is exposed to regular or periodic high winds 35 40MPH you should consider anchoring the unit Hardware is not provided for this step Drill into a footing a minimum of 3 Anchor with 1 2 anchor bolts On the track side an oversize washer 1 1 2 to 2 should be used so it doesn t pull through when tightened ...

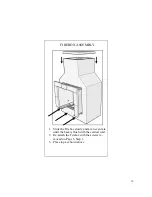
Page 10: ... FIREBOX ASSEMBLY 1 Slide the Firebox slowly and at an even rate until the back is flush with the vertical wall 2 Re attach the Firebox with the screws re moved on Page 5 Step 1 3 Place top as shown above ...

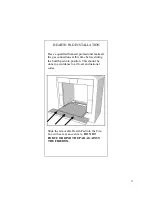
Page 11: ... all the gas connections at this time before sliding the hearth pad into position This should be done in accordance to all local and national codes Slide the removable Hearth Pad into the Fire box with care at an even rate DO NOT FORCE OR BIND THE PAD AGAINST THE FIREBOX ...

Page 12: ...s burner and log set as directed in the installation manual provided in the Burner Log Set box The Outdoor GreatRoom Company 12400 Portland Avenue South Burnsville MN 55337 phone 952 358 7438 fax 952 358 7414 www outdoorgreatrooms com ...

Reviews: