background image

41

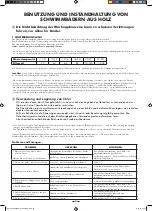
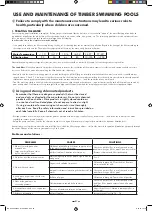
USE AND MAINTENANCE OF TIMBER SWIMMING POOLS

i


 Failure to comply with the maintenance instructions may lead to serious risks to 
health, particularly where children are concerned.

1. TREATING THE WATER 

Your swimming pool installation is complete!  Before you get into the pool for the first time, it is essential to “prepare” the water. Bathing often leads to 
a good deal of pollution caused by things like vegetation, earth, dust, sweat, saliva, hair, grease, etc. The swimming pool water must be protected from 
these substances in order to avoid various micro-organisms developing.   

In order to do this, a few simple rules may be applied:

-  It is a good idea to have the filter running during the day, as it is bathing that causes most of the pollution. Regulate the timing of the filter according to 

the temperature of the water. The higher the temperature of the water, the more easily bacteria will grow. 

Water Temperature

< 10°

10-12°

12-16°

16-24°

24-27°

27-30°

Filtration time

2h

4h

6h

8h

10-12h

-> 20h

Generally speaking, whatever type of system you have, any impurities should be removed if the pool is cleaned regularly using the filter.


The sand filter

: When the amount of impurities in the sand increases, the circulation of the water becomes less efficient and consequently the pressure 

increases. Refer to the notes on maintaining the filtration unit for cleaning it. 

-  Analyse the water in your swimming pool: it is a worth checking the pH level (degree of acidity or alkalinity of the water) every week. It should always 

range between 7.2 and 7.6. An incorrect pH level may result in the water treatment products working less efficiently, may accelerate the development of 
chloramines (causing unpleasant odours and irritation of the mucous membranes…) and the corrosion of any metal parts.. 

-  Treat the water regularly: a weekly disinfectant treatment (bromine, chlorine and active oxygen…) against bacteria will avoid all the problems caused by 

poor quality water. One treatment every fortnight with an algaecide effectively combats the initial appearance and further development of algae.

i


Using and storing chlorinated products


Remember that these are dangerous products that must be stored 

and used only as directed by the manufacturers. Do not mix chemical 

products with each other. Store products in tightly closed containers 

in a cool and well ventilated place; do not expose to direct sunlight. 

If using a container for measuring out chemicals, rinse thoroughly 

after each use. Read the safety information and instructions provided on 

each label carefully. Keep all chemicals out of reach of children..

-  Everyday remove as much dirty matter from the pool as possible with a fishing net (fallen leaves, dead insects…) and clean the surface of the water 

regularly to remove greasy deposits.

-  Empty the pump container. Just like the skimmer container, it is a good idea to empty it regularly to maintain the optimum filtration level.

Annual treatment: In order to have clean water all the time, clean the filter, change about ⅓  to ½ of the water in the pool and look after it properly through 
the winter. Change all the water in your pool every 3 to 4 years.

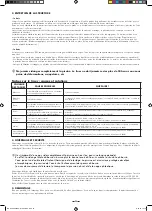
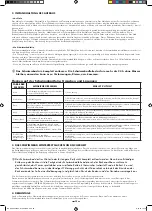
Problems and solutions :

PROBLEMS

CAUSES

SOLUTIONS

1. Water clear with greenish or   

    brownish tint. 

    Large number of brown stains    

    on the sides of the pool. 

Oxidation of metallic salts (iron or copper) present 

in the water used to fill the pool

Check the pH level. Put in a calcium and metal 

stabiliser when you fill the pool. Clean out the filter. 

Remove sediment and filter continuously.

pH level too low. Corrosion of metal parts.

2. Water has a yellow or brownish tint

Water being used to fill the pool is high in iron or 

manganese

See  1.

3. Water milky and cloudy

Organic and colloidal impurities

Chlorinate thoroughly. Clean the filter. Remove 

sediment and filter well.

Inorganic substancesincreasing the hardness of the 

water

Check the pH level. Put in a calcium and metal 

stabiliser when you fill the pool.

4.  Slimy green deposits on the sides of 

the pool

Build up of algae

Chlorinate thoroughly. Treat with an algaecide

5. Sides of the pool have an 

    uneven appearance

Calcium deposits caused by hard water

Check the pH level. Put in a calcium and metal 

stabiliser. If the pool is empty clean with a pool 

descaler.

6.  Irritation to skin and eyes, unpleasant 

odour

Presence of combined chlorine (chloramine) 

Adjust the pH level. Chlorinate thoroughly. Put in 

fresh water

7

.

 Evidence of corrosion

pH level too low

Increase the pH level to 7.0 – 7.4

NOTICE 350x650 - H140-2018/1.indd   42

11.04.18   10:18

Summary of Contents for Ubbink Linea 350x650

Page 1: ...outsideliving com Export Outside Living Industries Nederland B V Postbus 15 NL 1800 AA Alkmaar Berenkoog 87 NL 1822 BN Alkmaar Tel Sales 0031 0 72 5 671 661 Tel 0031 0 72 5 671 671 Fax 0031 0 72 5 671...

Page 2: ...age Montageanleitung Opbouwinstructie Note of assembly Prospecto de montaje Avviso di montaggio 350x650 H140 cm PISCINES ZWEMBADEN POOLS SWIMMING POOLS PISCINAS PISCINE NOTICE 350x650 H140 2018 1 indd...

Page 3: ...mmbades zu verhindern Bitte lassen Sie im unbeaufsichtigten Becken oder in der unmittelbaren N he kein Spielzeug zur ck Halten Sie das Wasser bitte dauerhaft klar und rein Bitte lagern Sie die Produkt...

Page 4: ...nning or boisterous games around the edges of the pool do not allow any child who is not a strong swimmer and is unaccompanied to get into the pool without a life jacket on it is a good idea to remove...

Page 5: ...zioni di salvataggio e soprattutto quelle specifiche per i bambini vietate i tuffi o i salti in presenza di bambini piccoli vietate la corsa e i giochi vivaci ai bordi della piscina non autorizzate l...

Page 6: ...ont e sous 48 heures apr s ouverture du colis Le montage de la piscine sur une dalle b ton est obligatoire pour la validation de la garantie Notre garantie se limite au remplacement des pi ces d fectu...

Page 7: ...ckung montiert werden Es muss eine Betonplatte vorhanden sein damit die Garantie in Kraft gesetzt wird Unsere Garantie beschr nkt sich auf die Ersetzung von fehlerhaften Teilen Sie zieht auf keinen Fa...

Page 8: ...et pakket opgebouwd worden De aanwezigheid van een betonnen fundering is een voorwaarde voor het verkrijgen van garantie Onze garantie is beperkt tot het vervangen van defecte onderdelen Verzoeken om...

Page 9: ...ur warranty covers only the replacement of defective parts It in no way covers demands for compensation or damages The general warranty does not apply in the following circumstances Use of the equipme...

Page 10: ...ebe estar montada dentro de las 48 horas siguientes a la apertura del paquete Es necesario que haya una base de hormig n para que tenga validez la garant a Nuestra garant a se limita a la sustituci n...

Page 11: ...garanzia La piscina dovr essere montata entro 48 ore dall apertura della scatola La presenza di una lastra in cemento indispensabile per convalidare la garanzia La nostra garanzia si limita alla sosti...

Page 12: ...htung Plane Alarm Absperrung Halfingebouwde installatie op betonnen bodemplaat LET OP veiligheidsvoorziening verplicht afdekzeil alarm hek Half buried installation on concrete slab NOTE Compulsory saf...

Page 13: ...disposez bien de l ensemble des pi ces IMPORTANT Si vous choisissez d enterrer ou semi enterrer votre piscine veillez positionner votre pompe et le groupe de filtration au m me niveau que le bas de la...

Page 14: ...scine Celle ci permet d viter l crasement des rainures du bois c est pourquoi on l appelle pi ce martyre Sie finden in Ihrem Frachtst ck ein St ck Holz von etwa 30 cm L nge das zwischen Hammer und den...

Page 15: ...le feutre de protection pour le sol 4b D couper le feutre de protection l aide d un cutter ou d une paire de ciseau 4c Mettre en place le liner par une temp rature ext rieure comprise entre 20 et 25...

Page 16: ...efestigen Sie die Schwimmbadfolie in der Schienenleiste 4f Legen Sie auf dem gesamten Umfang den Blockierring an Beginnen Sie in der Wandmitte 4g Die Schwimmbadfolie maximal spannen 4h F llen Sie Wass...

Page 17: ...Aanbrengen van vilt en folie Uitsnijden van instroomopening en skimmer Aanbrengen van de zwembadrand uit vurenhout Trappen Installeren van de automatische vuilzuiger 4a Leg het beschermvilt op de bode...

Page 18: ...the backwash inlet nozzle and the skimmer Installing pine coping The ladders Installing the automatic pool cleaner 4a Put the ground protection felt in place 4b Cut out the felt underlay using a Stan...

Page 19: ...un c ter o unas tijeras 4c Colocar el revestimiento 4d Hacer coincidir los bordes del revestimiento con los ngulos de la piscina 4e Enganchar el revestimiento al labio del riel 4f Colocar por todo el...

Page 20: ...are il rivestimento 4d Far coincidere gli angoli del rivestimento con quelli della piscina 4e Agganciare il rivestimento sul labbro della rotaia 4f Posizionare su tutto il perimetro della vasca la giu...

Page 21: ...650 H140 cm A 1571 5 70 1571 5 3143 70 3003 1571 5 4 5 4500 20 cm 350 cm 650 cm 20 cm Dalle B ton Ep 200 mm Bodenplatte 200 mm stark betonnen Dikte 200 mm Betonnen fundering Thickness 200 mm hormig n...

Page 22: ...r Seitenw nde Opbouw van de wanden Erecting the sides of the pool Montaje de la pared Montaggio delle pareti PS2 PS2 PS2 PS1 PS1 PS2 PS2 PS2 P S 1 P S 1 P S 1 P S 1 1a J 1c PS1 6x PS2 6x NOTICE 350x65...

Page 23: ...rdeau et les diagonales ruban 10 m A B Unbedingt die Richthilfe der Lagerb cke Schnur und die Diagonalen 10 m Band kontrollieren A B Het is noodzakelijk de uitlijning van de keggen kalklijn en diagona...

Page 24: ...23 OK NO 2 me CAS 2 FALL 2e MOGELIJKHEID 2nd CASE 2 CASO 2 CASO 1h 1h 1i 1i 1i 1j P NOTICE 350x650 H140 2018 1 indd 24 11 04 18 10 18...

Page 25: ...24 1k 1n 1o 1p 150 360 360 360 150 2 cm 1q 1m 1l 1r PF R C2 R C1 NOTICE 350x650 H140 2018 1 indd 25 11 04 18 10 18...

Page 26: ...nsolen Plaatsen van de versterkingsrand en de draagsteunen Positioning the supports and the brackets Colocaci n de refuerzos y consolas Posa dei rinforzi e delle mensole 6443 2260 2260 2260 A 2a 90mm...

Page 27: ...3 Pr paration des parois Vorbereitung der Seitenw nde Voorbereiden van de wanden Preparing the sides of the pool Preparaci n de las paredes Preparazione delle pareti 3a 3b 3c 3d x3 NOTICE 350x650 H140...

Page 28: ...27 3 mm OK NO 3e 3f 3g C 3h 3i NOTICE 350x650 H140 2018 1 indd 28 11 04 18 10 18...

Page 29: ...von Vlies und Schwimmbadfolie Aanbrengen van vilt en folie Installing the felt underlay and the liner Instalaci n del fieltro y del revestimiento Installazione del feltro e del rivestimento x2 3j x3 3...

Page 30: ...ijden van instroomopening en skimmer Cutting the liner and fitting the backwash inlet nozzle and the skimmer Recorte para tobera y skimmer Taglio per condotto e skimmer 5a 5b 5c x3 5e 5f TEFLON Teflon...

Page 31: ...30 Filtre Filter Filter Filtro Filtro 5g 5h 5i 5j 5k 5l Pompe Pumpe Pomp Bomba Pompa Pompe Pumpe Pomp Bomba Pompa 5m 5n 5o NOTICE 350x650 H140 2018 1 indd 31 11 04 18 10 18...

Page 32: ...der Stufen vorhandene Luft ggf ausgetrieben werden 7b Die Leiter kann nicht berall angebracht werden Siehe die Anweisungen f r die Schutzplane 7c Befestigen Sie die Tr gervorrichtungen aus Edelstahl...

Page 33: ...esario 7b No se puede emplazar en cualquier sitio Consultar para ello las instrucciones de la lona 7c Fijar los soportes de acero inoxidable con los pernos suministrados en la caja de la escalera de a...

Page 34: ...Einbau des automatischen Bodensaugers Installeren van de automatische vuilzuiger Installing the automatic pool cleaner Instalaci n del aspirador autom tico Sistemazione della spazzola automatica 8a 8b...

Page 35: ...lida WASTE Desag es Uscita WASTE Scarichi Vanne 1 4 de tour Absperrhahnr Ventiel 1 4 omwenteling 1 4 turn valve V lvula de corte Valvola 1 4 di giro Attention respecter scrupuleusement les indications...

Page 36: ...s et stock s exclusivement selon les indications des fabricants Ne pas m langer les produits chimiques entre eux Entreposer les produits emballages bien ferm s dans un local frais et a r ne pas les e...

Page 37: ...eillissement acc l r de la ligne d eau sous l influence du soleil et des produits oxydants 1 corriger le pH faire un traitement choc et filtrer en continu pendant 48H faire un nettoyage m canique 2 pa...

Page 38: ...ie Chemikalien in gut verschlossenen Verpackungen an einem k hlen und bel fteten Raum lagern sie nicht dem direkten Sonnenlicht aussetzen Falls ein Beh lter f r die Dosierungen verwendet wird ihn nach...

Page 39: ...eren eine Schockbehandlung durchf hren und w hrend 48 h fortlaufend filtern eine maschinelle Reinigung durchf hren 2 ein Entkalkungsmittel einf hren und die Flecken abb rsten die Ablagerung dann absau...

Page 40: ...emische producten niet met elkaar Sla de producten in gesloten verpakking op in een koele en voldoende geventileerde ruimte Stel ze niet aan direct zonlicht bloot Als u een kopje glas of iets anders g...

Page 41: ...toe laat het filter continu lopen gedurende 48 uur en voer een mechanische schoonmaak uit 2 pas een anti aanslagmiddel toe verwijder de vlekken met een borstel en zuig de aanslag op Oranje bruin 1 aan...

Page 42: ...that must be stored and used only as directed by the manufacturers Do not mix chemical products with each other Store products in tightly closed containers in a cool and well ventilated place do not...

Page 43: ...sun and oxidising products 1 Correct the pH level Carry out a high power cleaning treatment and run the filter for 48 hours non stop have the pool cleaned by machine 2 Use a descaler brush the stains...

Page 44: ...espectivos y no deben mezclarse con otros productos qu micos Almacene los productos en envases herm ticamente cerrados en un lugar fresco y ventilado y no los exponga a la luz solar directa En caso de...

Page 45: ...resencia de algas 2 envejecimiento acelerado de la superficie del agua debido al sol o a los productos oxidantes 1 corregir el pH hacer un tratamiento intensivo y filtrar continuamente durante 48 h y...

Page 46: ...duttori Non mischiare tra di loro i prodotti chimici Depositare i prodotti con gli imballaggi ben chiusi in un locale fresco a areato e non esporli alla luce diretta del sole In caso di utilizzo di un...

Page 47: ...o l influsso del sole e dei prodotti ossidanti 1 correggere il pH fare un trattamento drastico e filtrare di continuo per 48 ore effettuare una pulizia meccanica 2 passare un disincrostante e spazzola...

Page 48: ...47 NOTICE 350x650 H140 2018 1 indd 48 11 04 18 10 18...

Reviews: