background image

PATIO HEATER ASSEMBLY

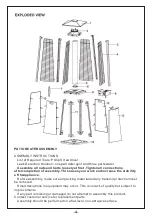
ASSEMBLY INSTRUCTIONS

 List of Required Tools: Philip Screwdriver
 Leak Detection Solution: one part detergent and three parts water
 

Assemble all nuts and bolts loosely at first.Tighten all connections 

aftercompletion of assembly. This eases your work and increase the stability 
of theappliance.

 Before assembly, make sure all packing materialand any transmit protectionmust 

be removed.

 Small deviations in equipment may occur. This is no lack of quality but subject to 

improvements.

 If any part is missing or damaged,do not attempt to assembly this product, 

Contact customer service for replacement parts.

 Assembly should be performed on a flat,level,non-abrasive surface.

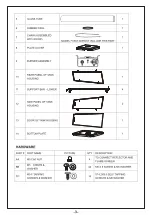
Summary of Contents for 842-192

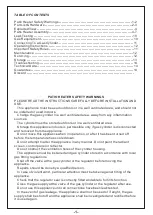
Page 1: ...ASSEMBLY INSTRUCTION MANUAL IMPORTANT RETAIN FOR FUTURE REFERENCE READ CAREFULLY INbza013_UK 842 192_842 193 ...

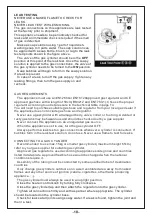
Page 2: ...e this appliance when in operation or after it has been turned off before the temperature has cooled down Do not attempt to alter the appliance in any manner Do not paint the radiant screen control panel or reflector Do not obstruct the ventilation holes of the cylinder housing The appliance must be installed and gas cylinder stored in accordance with local gas fitting regulations Shut off the valve...

Page 3: ...ht popping noise is normal when the appliance is extinguished The regulator hose assembly must be located out of pathways where people may trip over it or in area where the hose will not be subject to accidental damage Any guard or other protective device removed for servicing the heater must be replaced before operating the heater Children and adults should be warned of the hazards of high surfac...

Page 4: ......

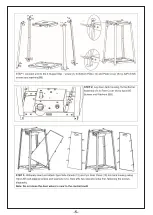
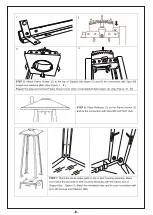
Page 5: ...ssembly This eases your work and increase the stability of theappliance Before assembly make sure all packing materialand any transmit protectionmust be removed Small deviations in equipment may occur This is no lack of quality but subject to improvements If any part is missing or damaged do not attempt to assembly this product Contact customer service for replacement parts Assembly should be perf...

Page 6: ......

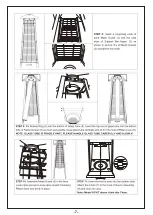
Page 7: ......

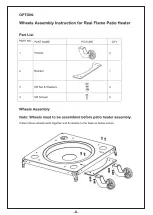
Page 8: ......

Page 9: ......

Page 10: ......

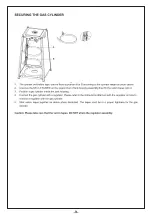
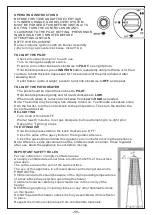
Page 11: ... cylinders outdoors or in a well ventilated area away from naked flames and any other source of ignition candle cigarettes other flame producing appliance The gas cylinder must always be used in an upright position Close the heater control knob by turning fully clockwise Close the gas cylinder tap and then attach the regulator onto the gas cylinder Tighten all connections firmly and with a spanner wh...

Page 12: ...se from the burner turn the control knob to the pilot position Then turn the knob to the level of heat desired RE LIGHTING Turn Control Knob to OFF Wait at least 5 minutes to let gas dissipate before attempting to re light pilot Repeat the Lighting steps TO EXTINGUISH Hold knob depressed turn the knob clockwise to OFF Close the valve of the gas cylinder or the regulator after use Close the gas bot...

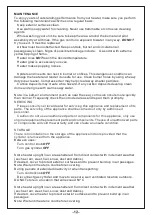
Page 13: ...k the corroded areas and repair them promptly SERVICING Please consult your local dealer for servicing this appliance and replacement of its parts The servicing of the appliance shall be carried out only by authorised personnel Caution do not use unauthorized parts or components for this appliance only use original equipment replacement parts and components Theuse of unauthorized parts or componen...

Page 14: ......

Page 15: ......

Page 16: ......

Reviews: