Ovarro LD Ltd
User Manual
XiLOG 4G/IOT
Document Number:
Template Number: IXD-956 iss 05
Version: 1.0
Page 16 of 42
4.3
Connecting Using Bluetooth Communications
Bluetooth
communications is automatically enabled when the data logger is powered up. There is no configuration to do.
Bluetooth technology uses the 2.4GHz ISM spectrum band (2400 to 2483.5 MHz), which enables a good balance between
range and data throughput.
The maximum range for Bluetooth communications is approximately 10m (30ft). Maximum communication range will vary
depending on the presence of obstacles, people, walls or electromagnetic environment.
To connect the logger:
1.
Start the XiLOG GO app (see
Section
Mobile App for details).
2.
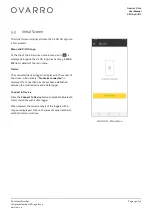
On the initial page, select the
Connect to Device
button.
3.
The serial numbers of the data loggers within range will now be displayed.
4.
Select the required logger by pressing on the serial number.
4.4
Connecting External Sensors and Cables
Installation of XiLOG is principally a matter of connecting the cables for the inputs:
1.
Connecting the cables to the logger may carried out in the vehicle prior to siting the logger, or may be done at the
installation site (in “the pit”).
2.
Ensure that cable connections are clean and dry when attached.
3.
A delay can be configured to allow time to connect cables and install the logger before transmitting data, if required.
However, data transmission before connection presents no problems.
4.5
Siting the Logger
Site the logger at required location:
1.
Check that the site has been prepared and that the installation of pipework has been completed in readiness for
installation of the logger. Ensure that the cables will reach their intended connections.
2.
Position the logger close to the required pipe location(s) that minimizes any possible ingress of water. This will usually
be at the top-most or highest position possible. The logger is rated IP68 and can withstand periodic flooding but should
not be installed in an area of permanent/frequent flooding or underwater.
3.
Ensure that cable connections are clean and dry when attached.
4.
Ensure the site is covered and left ready for use.


