Form No. OVmm-0113
10
OPERATION
Programming Menu Items
Use the following procedure to edit or create menu items. This
procedure requires access to password-protected screens and
should be performed by authorized personnel only.
NOTE: The USB port allows the uploading of pre-programmed
menu items from an external USB drive. Refer to the
“Uploading from a USB Drive” procedure in this section
for details.
1. From the main menu screen on either touchscreen, touch
the BaCK arrow.
• a password keypad will appear on the touchscreen.
2. Input the password using the keypad, and touch ENTER.
• The Home screen will appear on the touchscreen.
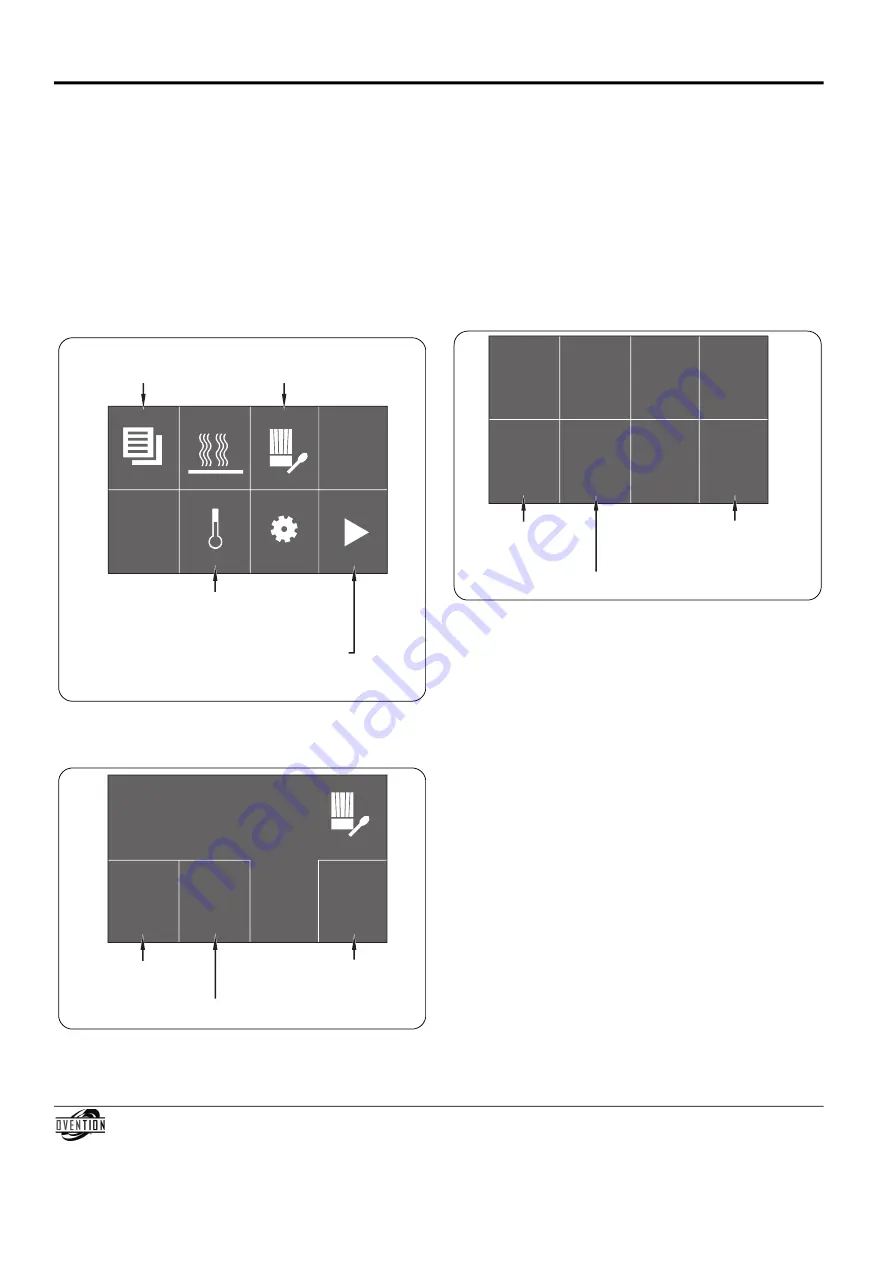
Home Screen
3. Touch the chef’s hat/spoon icon to access the menu
Development screen.
menu Development Screen
Touch to return to
Main Menu screen.
Touch to access
Setpoint Temperature screen
shown at startup.
Touch to access
Menu Development
screen.
Touch arrow to move slider assembly from
left-to-right (right touchscreen shown).
Arrow will appear in opposite corner on left
touchscreen to move slider from right-to-left.
Menu Development
New
Edit
Back
Touch to edit an
existing menu item.
Touch to create
a new menu item.
Touch to return to
Settings screen.
4. Touch either NEW or EDIT to create or edit a menu item.
• a screen that looks like the main menu screen will appear.
• If creating a new menu item, touch an empty box, and
the menu Item Settings screen will appear. If no empty
boxes are available, touch the “down” arrow in the
bottom right box to scroll to the next main menu screen.
If creating a new menu item in an existing Category,
touch the Category, then touch an empty box in the
Category menu screen.
• If editing an existing menu item, touch the desired menu
item, and the menu Item Settings screen will appear. If
editing a menu item in an existing Category, touch the
Category, then touch the desired menu item in the
Category menu screen.
menu Item Settings Screen
5. Touch each “setting” box on the menu Item Settings screen
to edit the corresponding setting. Settings include item
name, cook time, top blower percentage, bottom blower
percentage, cook temperature, and number of stages.
• Touching a “setting” box will bring up a keypad specific
to the setting. Enter the desired value using the keypad,
then touch ENTER to return to the menu Item Settings
screen.
• menu item names can have up to 16 characters.
• Each menu item can be programmed to have up to
three stages, depending on the food product. Stages are
programmed with unique settings to create a
customized cooking sequence for the menu item.
NOTE: It is not necessary to create stages for a menu item if it
is not required by the food product. If unique stages are
not required, leave the cook time setting for stages 2
and 3 at zero.
• To delete a menu item, change the item name to
DELETE (all caps) and touch ENTER to return to the
menu Item Settings screen. Touch BaCK/SaVE on the
menu Item Settings screen to confirm deletion.
6. When the menu item settings are complete, touch
BaCK/SaVE to save settings and return to the menu
Development screen.
• To continue programming, repeat steps 4 and 5 of this
procedure.
• If programming is complete, touch BaCK on the menu
Development screen to return the Home screen.
Start
Cookies
Back/
Save
Bottom
Blower
50%
Stage 1/3
(next)
Top
Blower
50%
Temp
500 F
Time
1:00
Touch to save settings and return
to Menu Development screen.
Touch to start
the menu item
cooking sequence.
Touch to access settings
for next stage.
Total Restaurant Supply - https://totalsupply1.com - Toll Free 1-800-944-9304 - Local 507-288-9454
2940 Hwy 14 W, Rochester, MN 55901


