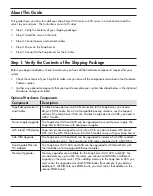
Step 2: Install the Server in a Rack
Note
The Snap Server 500 Series and 600 Series models can only be mounted in a four-post, 32-inch depth,
EIA-compliant rack. A two-post telco-style rack or a rack less than 32-inches in depth will not support the server.
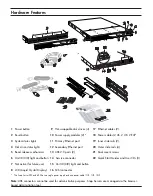
As shown in the Hardware Features illustration, the Snap Server ships with two slide rail assemblies consisting of
inner rails to attach to the chassis, outer rails to attach to the rack, and a packet of screws for mounting the rails
to the chassis and to the rack. The rails are not universal. They are stamped Left and Right and must be mounted
correctly (stamped designation refers to left and right as you are facing the front of the unit).
You will need a Phillips screwdriver to mount the rails and a second person to help position the Snap Server into
the rack.
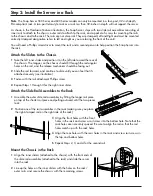
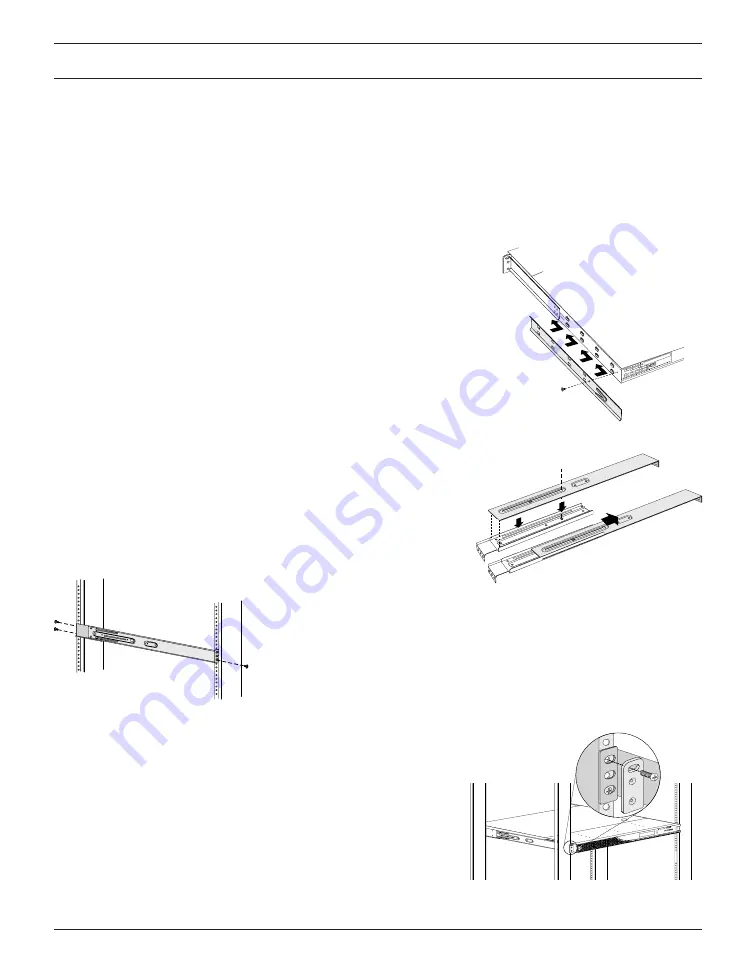
Attach the Sliders to the Chassis
1
Take the left inner slider and position it on the left side toward the rear of
the chassis. The tongues on the chassis should fit through the rectangular
holes on the rail, and the release mechanism should be facing out.
2
Slide the rail forward, and continue to slide until you can feel that it’s
attached securely (see illustration).
3
Fasten with the rail attachment Phillips screw.
4
Repeat Steps 1 through 3 for the right inner slider.
Attach the Slide Rail Assemblies to the Rack
1
Assemble the outer slide rail assemblies by fitting the longer rail piece
on top of the shorter rail piece and pulling outward until the two pieces
lock.
2
Position one of the rail assemblies in the rack (making sure you place
the right-stamped rail on the right side of the rack).
3
Align the front holes with the front
holes in the rack and screw a rail screw into the bottom hole. Note that the
rack holes are not evenly spaced. Be sure to align the rail so that the rail
holes match up with the rack holes.
4
Align the rear holes with the rear holes in the rack and screw rail screws in
the top and bottom holes.
5
Repeat Steps 2, 3, and 4 for the second rail.
Mount the Chassis in the Rack
1
Align the inner sliders (attached to the chassis) with the front ends of
the slide rail assemblies (attached to the rack) and slide the server
into the rack.
2
Line up the holes on the inner sliders with the holes on the rack/
outer rails, and secure the chassis with the remaining screws.


