10400518-001 Sep 2013
©2013 Overland Storage, Inc.
Page 3 of 4
Chassis Replacement Instructions
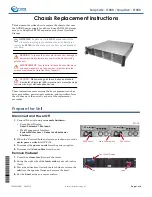
Move Power Supplies
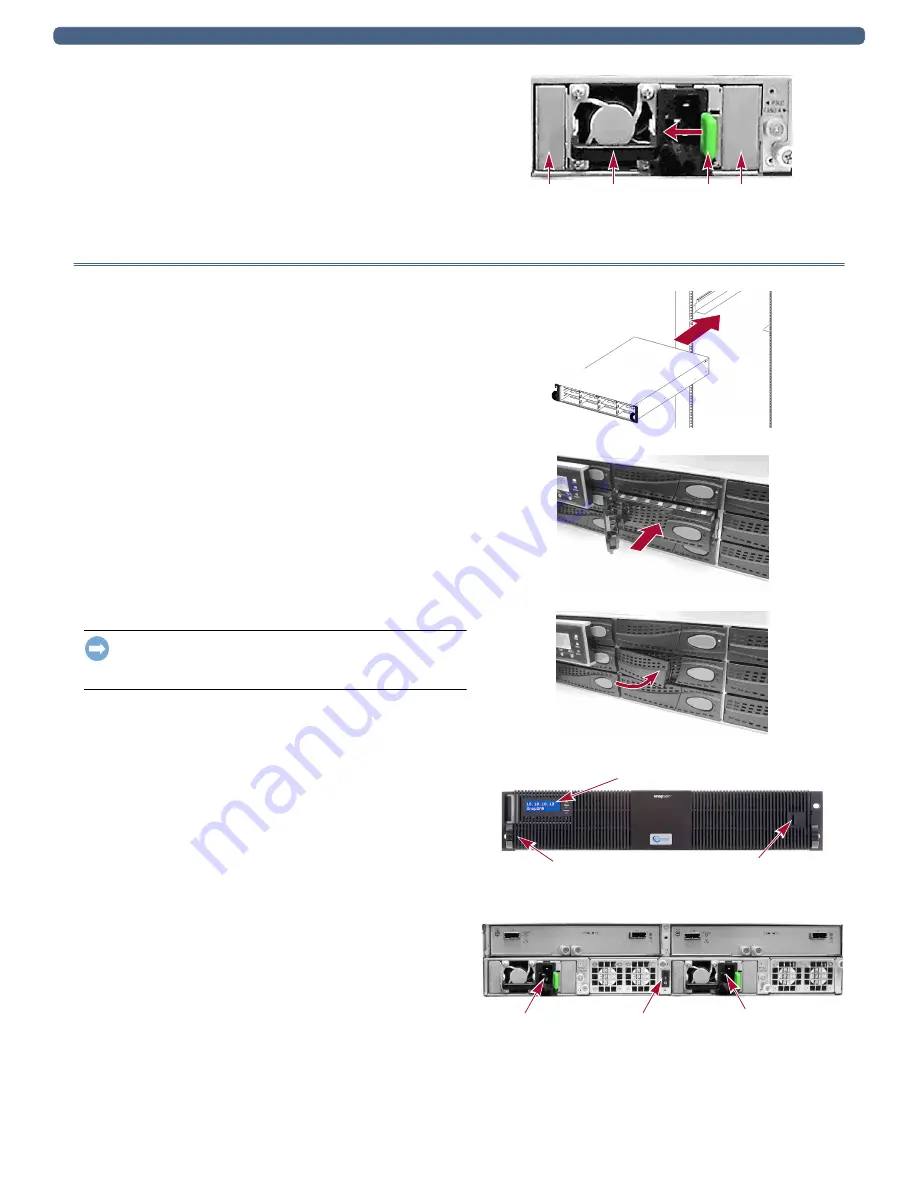
1.
Press the release
latch
to the left and, using the handle,
pull the
module
out of the PSU cage.
2.
Slide the module into the same cage in the
new chassis
,
pushing it in until the latch clicks.
3.
other power supply
.
Install New Chassis
Reinstall Unit in Rack
1.
Use a mechanical lifter to position the
chassis
in front of
its position in the rack.
2.
Slide the chassis onto the
tray rails
and to the back until
it stops.
3.
Using the retained screws in the
front flange
holes,
secure the chassis to the vertical rack rails.
Install Drives
This process applies to both drive and blank assemblies:
1.
Press the
button
to release the assembly lever.
2.
With the button on the right, position the
assembly
in
front of the
same bay
it was removed from.
3.
Slide the
assembly
into the bay until resistance is felt.
4.
Push the
lever
in to lock the assembly in the bay.
5.
each
remaining assembly.
IMPORTANT: To maintain proper airflow and cooling, a drive
blank assembly must be installed in
every
slot. No empty slots
are allowed.
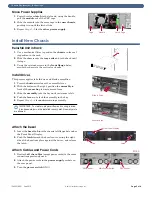
Attach the Bezel
1.
Insert the
bezel tab
into the chassis left flange hole under
the Front Panel Display.
2.
Push the
latch
toward the bezel center, swing the right
side of the bezel into place against the drives, and release
the latch.
Attach Cables and Power Cords
1.
Reattach
all the cables
(except power cords) to the same
connections previously used.
2.
Attach the power cords in the
power supply
sockets on
the rear panel.
3.
Turn the
power switch
ON (|).
Latch
Handle
Cage
Cage
Slide in Drive
Secure Latch
Front Panel Display
Latch
Tab
PSU Socket
PSU Socket
Main Power Switch
E1000