10400455-002
©2008-14 Overland Storage, Inc.
21
Chapter 2
Initial Setup and Configuration
This section covers the initial setup and configuration of an individual SnapScale node
running RAINcloudOS 4.1. It also addresses how to use that node to set up a SnapScale
cluster of three or more nodes, or to add the node to an existing SnapScale cluster.
NOTE: For information concerning the installation and wiring of your SnapScale node hardware,
refer to the appropriate Quick Start Guide for your product.
Topics in Setup and Configuration:
•
•
Setup a New SnapScale Cluster (via Wizard)
•
Join an Existing SnapScale Cluster (via Wizard)
•
Connecting for the First Time
Uninitialized nodes are configured to acquire their IP address from a DHCP server. If no
DHCP server is found on the network, the node defaults to an IP address in the range of
169.254.xxx.xxx and is labeled as “ZeroConf” in SnapServer Manager (SSM). You may not be
able to see Uninitialized nodes on your network until you discover them using either the
default node name or the SSM utility and optionally assign them an IP address.
Connect Using the Node Name
This procedure requires that name resolution services (via DNS or an equivalent service) be
operational.
NOTE: Any node that is selected to be part of a cluster can be used to create the cluster.
1.
Find the
node name
of an Uninitialized node that is to be used to create a new
SnapScale cluster.
A SnapScale node name is of the format “Node
nnnnnnnn
,” where
nnnnnnnn
is the node
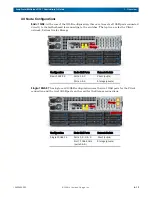
number. The number is a unique, numeric-only string that appears on a label affixed to
the bottom of the unit.
2.
In a web browser, enter the
URL
to connect to the node.
For example, enter “http://Node
nnnnnnnn
” (using the node name).
3.
Press
Enter
to connect to the Web Management Interface.

