background image

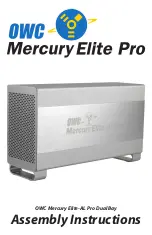
OWC Mercury Elite-AL Pro Dual Bay

Assembly Instructions

Summary of Contents for Mercury Elite-AL Pro

Page 1: ...OWC Mercury Elite AL Pro Dual Bay Assembly Instructions...

Page 2: ...REMOVING AN EXISTING GUID PARTITION 3 3 WINDOWS FORMATTING 4 TROUBLESHOOTING TIPS 4 1 TROUBLESHOOTING 4 2 USAGE TIPS 5 1 FAQ 5 2 ABOUT DATA PROTECTION Thank you for purchasing the OWC Mercury Elite AL...

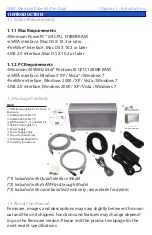
Page 3: ...This Manual Firmware images and descriptions may vary slightly between this man ual and the unit shipped Functions and features may change depend ing on the firmware version Please visit the product...

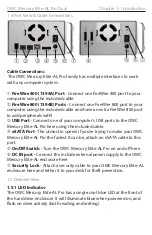
Page 4: ...ed cable FireWire 800 1394B Ports Connect one FireWire 800 port to your computer using the included cable and have an extra FireWire 800 port to add peripherals with USB Port Connect one of your compu...

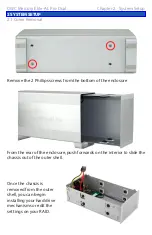
Page 5: ...ush forwards on the interior to slide the chassis out of the outer shell Once the chassis is removed from the outer shell you can begin installing your hard drive mechanisms or edit the settings on yo...

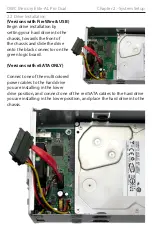
Page 6: ...on the green logic board Versions with eSATA ONLY Connect one of the multicolored power cables to the hard drive you are installing in the lower drive position and connect one of the red SATA cables t...

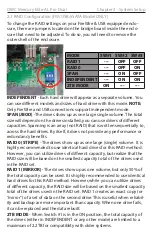
Page 7: ...volume It is highly recommended to use identical hard drives for this RAID method However you can utilize drives of different capacity but realize that the RAID size will be based on the smallest capa...

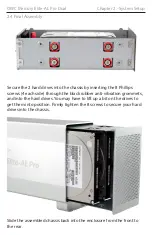
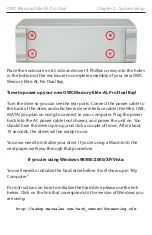
Page 8: ...grommets and into the hard drives You may have to lift up a bit on the drives to get them into position Firmly tighten the 8 screws to secure your hard drives into the chassis Slide the assembled cha...

Page 9: ...C power cable not shown and power the unit on You should hear the drives spin up and click a couple of times After about 15 seconds the drives will be ready to use You now need to initialize your driv...

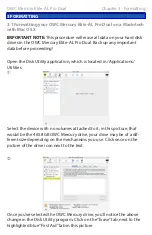
Page 10: ...he above change in the Disk Utility program Click on the Erase tab next to the highlighted blue First Aid tab in this picture 3 1 Formatting your OWC Mercury Elite AL Pro Dual on a Macintosh with Mac...

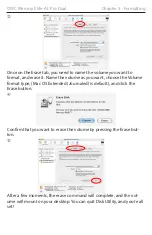
Page 11: ...t type Mac OS Extended Journaled is default and click the Erase button Confirm that you want to erase the volume by pressing the Erase but ton After a few moments the erase command will complete and t...

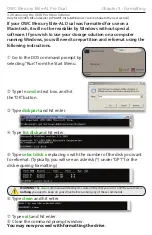
Page 12: ...Menu Type in cmd in text box and hit the OK button Type diskpart and hit enter Type list disk and hit enter Type select disk x replacing x with the number of the disk you want to reformat Typically y...

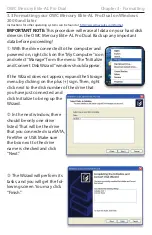
Page 13: ...r expand the Storage menu by clicking on the plus sign Then right click next to the disk number of the drive that you have just connected and click Initialize to bring up the Wizard In the next window...

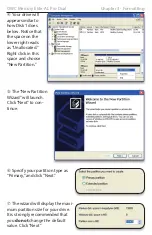
Page 14: ...ace and choose New Partition The New Partition Wizard will launch Click Next to con tinue Specify your partition type as Primary and click Next The wizard will display the maxi mum partition size for...

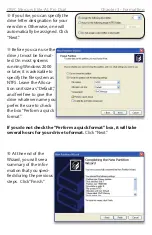
Page 15: ...file system as NTFS Leave the Alloca tion unit size as Default and feel free to give the drive whatever name you prefer Be sure to check the box Perform a quick format If you do not check the Perform...

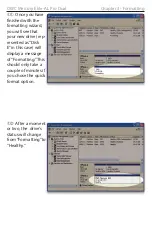
Page 16: ...rep resented as Disk E in this case will display a message of Formatting This should only take a couple of minutes if you chose the quick format option After a moment or two the drive s status will c...

Page 17: ...n apple icon on the Mac disk just to keep things clear You can access files on the Mac disk just like you would with a Windows format ted disk Open files from the disk or from within a program Mac fil...

Page 18: ...rives from your com puter you need to follow a few simple steps For Macintosh systems There are multiple methods to umount disks with Macintosh systems Either drag the icon for the hard disk you wish...

Page 19: ...d restore wizard makes Nova BACKUP extremely easy to use To install and use the included backup software for either OS please insert the included CD and follow the installation and operation instruc t...

Page 20: ...ergy It will take about 30 seconds to access your data after being in sleep or stand by mode Q One of my drives failed and I replaced it Do I need to connect it to the computer to rebuild the data A N...

Page 21: ...the enclosure Your invoice number What operating system you are using Which kind and model of computer you are using All of this will help speed your support contact along 8AM 10PM CT Monday Friday 9...

Page 22: ...outlet on a circuit different from that to which the receiver is connected Health And Safety Precautions Use proper anti static precautions while performing the installation of your hard drives into t...

Reviews: