Copyright ®2006-11 Other World Computing All Rights Reserved. Other World Computing’s Limited Warranty is not transferable and subject to limitations.
Copyrights
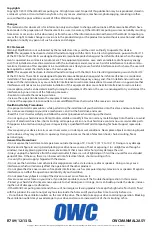
Copyright © 2013 Other World Computing, Inc. All rights reserved. No part of this publication may be reproduced, stored in
a retrieval system, or transmitted in any form or by any means, electronic, mechanical, photocopying, recording or other-
wise, without the prior written consent of Other World Computing.
Changes
The material in this document is for information only and subject to change without notice. While reasonable efforts have
been made in the preparation of this document to assure its accuracy, Other World Computing assumes no liability resulting
from errors or omissions in this document, or from the use of the information contained herein. Other World Computing re-
serves the right to make changes or revisions in the product design or the product manual without reservation and without
obligation to notify any person of such revisions and changes.
FCC Statement:
Warning! Modifications not authorized by the manufacturer may void the user’s authority to operate this device.
NOTE: This equipment has been tested and found to comply with the limits for a Class A digital device, pursuant to Part 15
of the FCC Rules. These limits are designed to provide reasonable protection against harmful interference when the equip-
ment is operated in a commercial environment. This equipment generates, uses, and can radiate radio frequency energy
and, if not installed and used in accordance with the instruction manual, may cause harmful interference to radio commu-
nications. Operation of this equipment in a residential area is likely to cause harmful interference in which case the user will
be required to correct the interference at his own expense.
NOTE: This equipment has been tested and found to comply with the limits for a Class B digital device, pursuant to Part 15
of the FCC Rules. These limits are designed to provide reasonable protection against harmful interference in a residential
installation. This equipment generates, uses and can radiate radio frequency energy and, if not installed and used in accor-
dance with the instructions, may cause harmful interference to radio communications. However, there is no guarantee that
interference will not occur in a particular installation. If this equipment does cause harmful interference to radio or televi-
sion reception, which can be determined by turning the equipment off and on, the user is encouraged to try and correct the
interference by one or more of the following measures:
• Reorient or relocate the receiving antenna.
• Increase the separation between the equipment and receiver.
• Connect the equipment into an outlet on a circuit different from that to which the receiver is connected.
Health And Safety Precautions
• Use proper anti-static precautions while performing the installation of your hard drives into this drive enclosure. Failure to
do so can cause damage to your drive mechanisms, and / or the hard drive enclosure.
• Read this User’s Guide carefully, and follow the correct procedure when setting up the device.
• Do not open your hard drive or attempt to disassemble or modify it. Never insert any metallic object into the drive to avoid
any risk of electrical shock, fire, short-circuiting or dangerous emissions. Your hard drive contains no user-serviceable parts.
If it appears to be malfunctioning, have it inspected by a qualified Other World Computing Technical Support representa-
tive.
• Never expose your device to rain, or use it near water, or in damp or wet conditions. Never place objects containing liquids
on the drive, as they may spill into its openings. Doing so increases the risk of electrical shock, short-circuiting, fire or
personal injury.
General Use Precautions:
• Do not expose the hard drive to temperatures outside the range of 5° C to 40° C (41° F to 104° F). Doing so may damage
the drive or disfigure its casing. Avoid placing your drive near a source of heat or exposing it to sunlight (even through a
window). Inversely, placing your drive in an environment that is too cold or humid may damage the unit.
• Always unplug the hard drive from the electrical outlet if there is a risk of lightning or if it will be unused for an extended
period of time. Otherwise, there is an increased risk of electrical shock, short-circuiting or fire.
• Use only the power supply shipped with the device.
• Do not use the hard drive near other electrical appliances such as televisions, radios or speakers. Doing so may cause
interference which will adversely affect the operation of the other products.
• Do not place the drive near sources of magnetic interference, such as computer displays, televisions or speakers. Magnetic
interference can affect the operation and stability of your hard drive.
• Do not place heavy objects on top of the drive or use excessive force on it.
• Never use excessive force on your drive. If you detect a problem, consult the Troubleshooting section in this manual.
• Protect your hard drive from excessive exposure to dust during use or storage. Dust can build up inside the device, increas-
ing the risk of damage or malfunction.
• Other World Computing recommends the use of normal glass cleaning products to keep the high lustre finish at it’s finest
with this product. Be sure to not get any moisture inside the holes and if you do, allow time to air dry before use.
• Do not block the ventilation outlets on the rear of the drive. These help to keep your drive cool during operation. Blocking
the ventilation outlets may cause damage to your drive and cause an increased risk of short-circuiting or fire.
OWCMANMAL2ASY
R7 09/12/13 SL

