background image

OWC DIGITAL - MERCURY HELIOS 2  

DEVICE SETUP

6

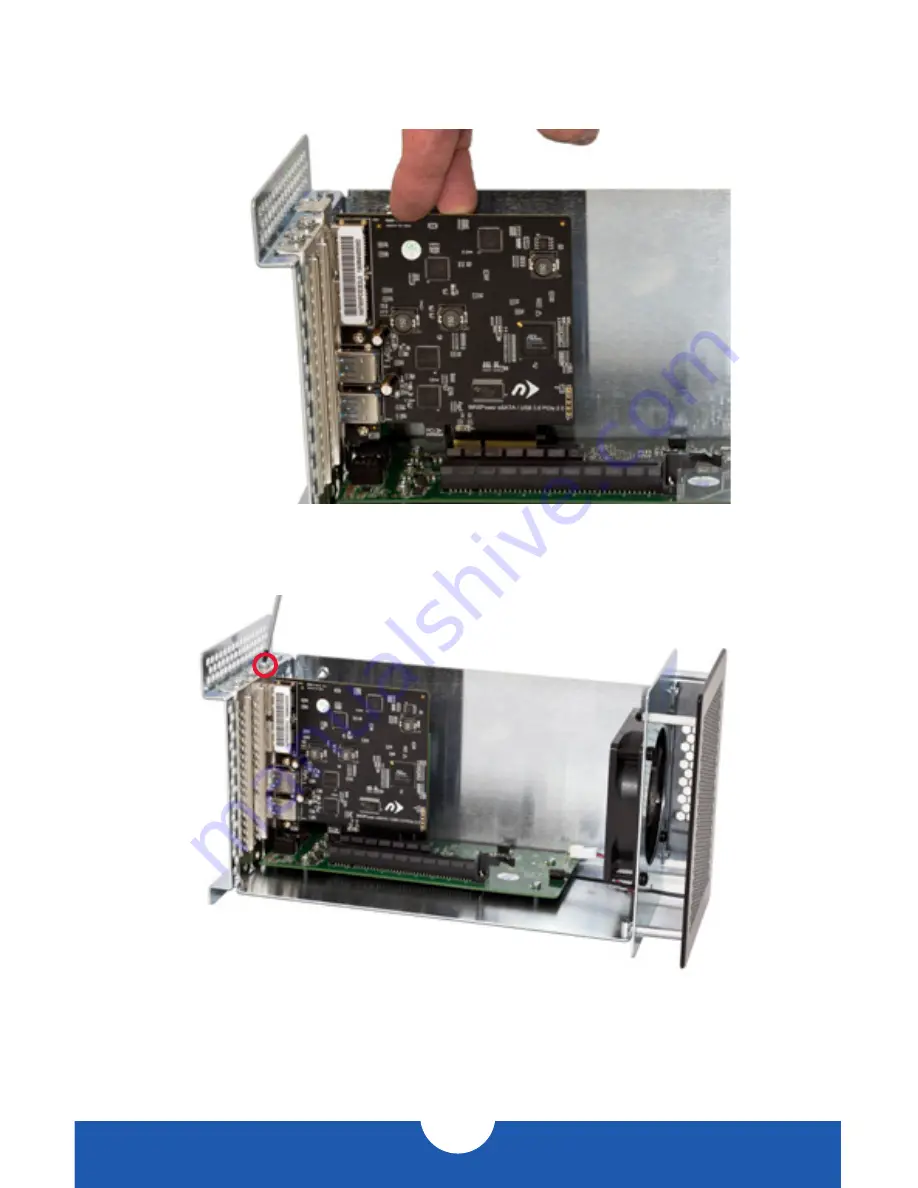
8. Press down on the PCIe card to seat the connectors into the Helios’ PCIe slot, as shown 

below. Press straight down; do not twist or rock the card. If the card does not seat fully, 
do not force it in. Remove the card, check to make sure there is no damage to the card or 
the slot, then try again.

9. Use the screw that you removed in step 4 to secure the PCIe card to the inner chassis, as 

circled below. Do not overtighten the screw.

10. If you are installing a second PCIe card, repeat steps 7-9.

Summary of Contents for Mercury Helios 2

Page 1: ...OWC Digital Mercury Helios 2 ASSEMBLY MANUAL USER GUIDE...

Page 2: ...Apple Mac Requirements 1 1 2 PC Requirements 1 1 3 Supported PCIe Cards 1 2 PACKAGE CONTENTS 1 3 ABOUT THIS MANUAL 1 4 FRONT VIEW 1 5 REAR VIEW 1 6 SPECIFICATIONS DEVICE SETUP 3 2 1 ASSEMBLY 2 2 CONN...

Page 3: ...ges and descriptions may vary slightly between this manual and the unit shipped Functions and features may change depending on the firmware version Please visit the product webpage for the most recent...

Page 4: ...ain up to six total Thunderbolt devices 3 DC power input Connect the included 12V DC power supply here 1 6 SPECIFICATIONS Interface Ports Two Thunderbolt 2 20Gb s ports Expansion Slots Two PCIe 2 0 on...

Page 5: ...commend proper grounding by using a grounding strap Make sure to work in a clean and static free area and avoid wearing clothing that retains static charges 2 1 ASSEMBLY 1 Remove the OWC Digital Mercu...

Page 6: ...to begin sliding out of the outer enclosure as shown below When the inner chassis has moved far enough pull on the front of the inner chassis to remove it fully from the outer enclosure 4 Turn the inn...

Page 7: ...and step 5 to remove the remaining PCIe slot covers as necessary 7 Install the PCIe card as shown below Line up the connectors on the PCIe card with the PCIe slot and make sure that the edge of the me...

Page 8: ...t twist or rock the card If the card does not seat fully do not force it in Remove the card check to make sure there is no damage to the card or the slot then try again 9 Use the screw that you remove...

Page 9: ...to the outer enclosure as shown below Assembly is now complete Proceed to Section 2 2 for information on connecting the Helios 2 to a computer and to other Thunderbolt devices 2 2 CONNECTION 1 Connec...

Page 10: ...e computer is off or in a sleep or hibernation mode the Helios 2 will turn off Thunderbolt chains can contain up to six total Thunderbolt devices Make sure that all installed PCIe cards are Thunderbol...

Page 11: ...he PCIe card If you do see the PCIe card in System Information check the Tunnel Compatible section If it says No the PCIe card is not currently using a Thunderbolt compatible driver Check with the PCI...

Page 12: ...enclosure Failure to do so can cause damage to your drive mechanisms and or the hard drive enclosure Read this user guide carefully and follow the correct procedures when setting up the device Do not...

Reviews: