OWC Mercury Pro
Device Setup
3
2.1 Installation Steps
These assembly instructions are written for users who purchased the OWC
Mercury Pro as an empty enclosure. The instructions show how to install an optical
drive. If you purchased the Mercury Pro with an optical drive already installed,
opening the enclosure before the expiration of the original warranty will VOID the
warranty
. If you wish to remove or replace the optical drive after the expiration of
the original warranty, you may do so at that time. You should start with Step 7 in
that case and work backwards.
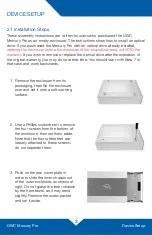
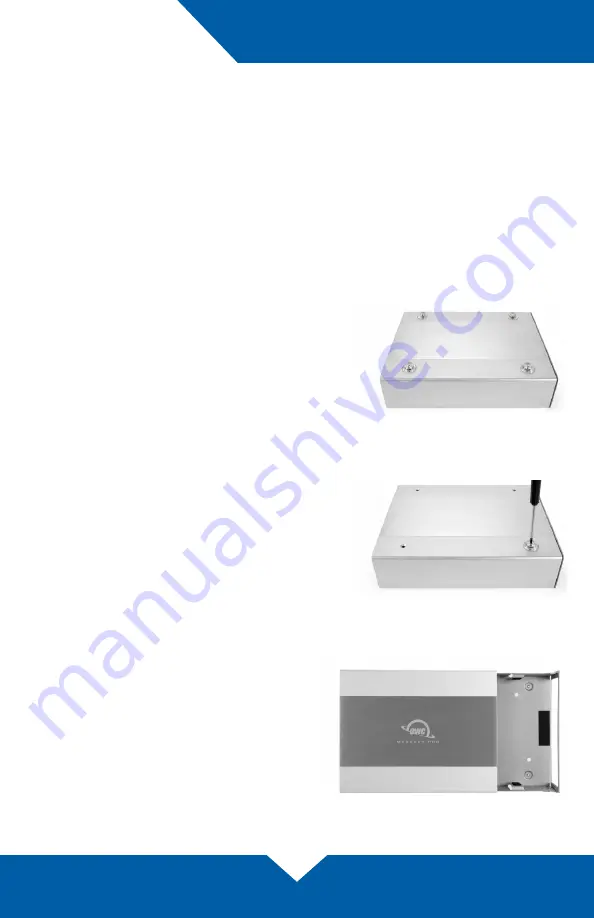
1. Remove the enclosure from its
packaging, then flip the enclosure
over and set it onto a soft working
surface.
2. Use a Phillips screwdriver to remove
the four screws from the bottom of
the enclosure, then set them aside.
Note that the four rubber feet are
loosely attached to these screws;
do not separate them.
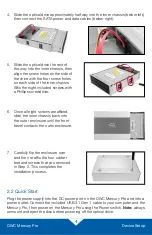
3. Push on the rear cover plate in
order to slide the inner chassis out
of the outer enclosure, as shown at
right. Do not grasp the inner chassis
by the front bezel, as it may bend
slightly. Remove the screw packet
and set it aside.
DEVICE SETUP


