


Page 25
Page 10
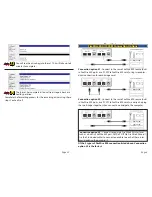
Once you have decided on the proper way to connect the OWC Mercury
Rack Pro to your Macintosh, you’re now ready to power the unit on and
begin using it. Do so now.
The OWC Mercury Rack Pro comes from the factory pre configured
one of 3 ways. Please refer to your invoice to verify which method of
configuration you ordered if you do not know already.
The methods are:
JBOD
- All 4 hard drives formatted independently, as four individual
hard drive volumes. If you had 4 1TB drives in your OWC Mercury Rack
Pro, you would have 4 1TB volumes mount on your desktop.
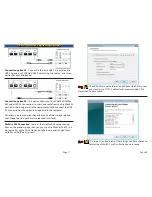
Stripe (RAID 0)
- Two volumes will mount on your desktop, each made
up of a high-speed RAID-0 Stripe - combining two volumes each. Using
a RAID-0 Stripe format, if you had 4 1TB drives in your OWC Mercury
Rack Pro, you would have 2 2TB volumes mount on your desktop.
RAID 0+1
- This method is a bit different than the above two methods as
it uses a piece of software that is included with this bundle - SoftRAID.
SoftRAID combines two Stripe (RAID-0) volumes into a RAID-1 Mirror
- allowing both speed, and full redundancy. If you had 4 1TB drives in
your OWC Mercury Elite 4 Bay RAID Rack using this method, you would
have 1 2TB volume mount on your desktop.
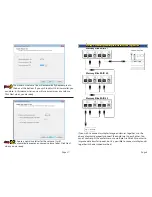
Your solution should be configured properly to work the way that
you ordered it right out of the box. However, if you decide you want
to reconfigure or change the method you ordered, please see the
following pages to reformat or reconfigure your RAID. For RAID 0+1
solutions using SoftRAID, please consult the SoftRAID manual on the
included CD with those solutions.
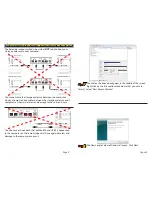
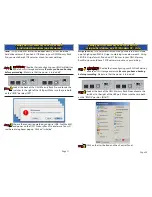
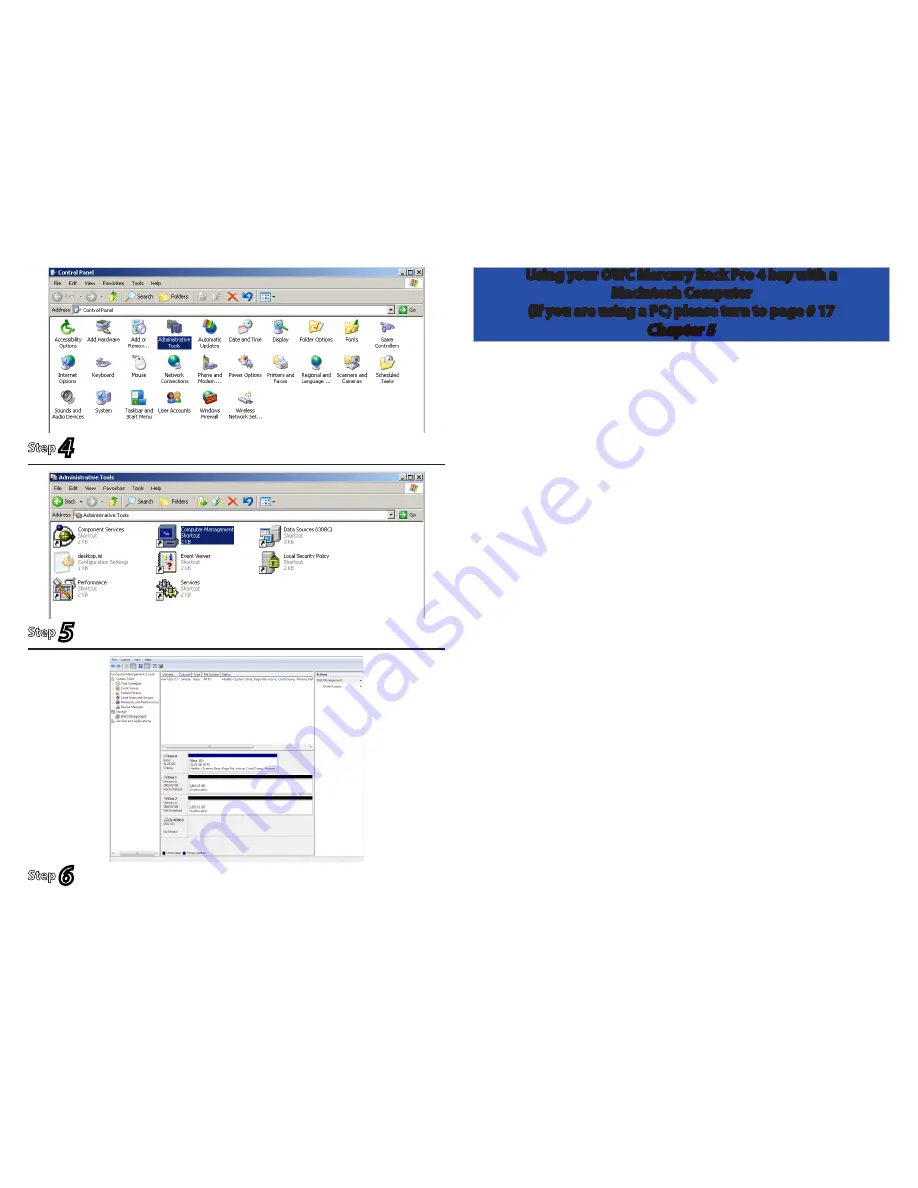
Double click on Computer Management.
Click on Disk Management under the Storage subcategory.
Step
5
Step
6
Open Administrative Tools.
Step
4
Using your OWC Mercury Rack Pro 4 bay with a
Macintosh Computer
(If you are using a PC; please turn to page # 17
Chapter 5


