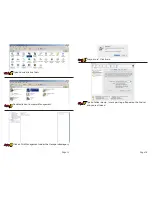
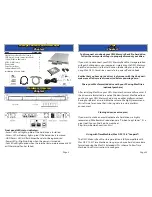
background image

Page 31

Page 4

1.

 Before installing, make sure that you have reviewed the previous 

page and that all necessary cables and parts are present.

2.

 Please be sure to use the heavy duty power cord that is provided. The 

unit is able to be used with 100-240V, 60Hz power and is autoswitching.

3.

 Any disassembly of the enclosure or modification will void your 

warranty. If you are experiencing problems, please contact our technical 

support department before opening the enclosure.

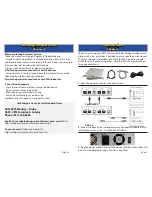
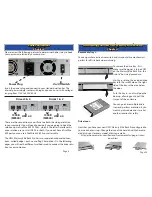
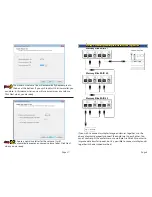
4.  Hardware Requirements:

• For the best performance, connect the enclosure using the included 

1394b cables (FireWire 800). See note below about gaining even more 

performance than a single FireWire 800 connection can provide.

• You can also use a USB 2.0 connection (but not at the same time) if you 

do not have a FireWire port on your computer.

• You can even use a FireWire 400 to 800 converter cable if you don’t 

have a native FireWire 800 port built into your computer.

If you are looking to maximize the performance of this enclosure, it 

has the ability to utilize 2 discrete FireWire 800 connections. You can 

connect 2 drives to one FireWire 800 interface, for example, the built-in 

FireWire 800 connection on your computer, and the other 2 drives to a 

PCI/PCI Express FireWire 800 card, doubling the bandwidth available.

5. OS Requirements:

• Mac:

Compatible with all Apple OS Versions 8.5 through 9.2.x; Apple OS X 

10.0.3 and higher (including OS X ‘Leopard’ 10.5.x).

• Windows:

Compatible with Microsoft Windows 98SE, ME, 2000, XP; Any OS or 

device with standard FireWire or USB support.

IMPORTANT!!

Please read before proceeding with installation
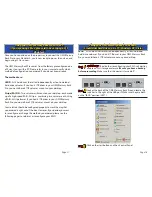
Troubleshooting

Chapter 8

If your OWC Mercury Rack Pro is not functioning properly, begin by 

checking some basic possibilities, such as:

     • Are all cables tightly attached to the computer and drive?

     • Is the power supply plugged in firmly, and is the LED lit on the 

power supply brick?

If the above solutions are not working, a full reset of your system may be 

in order.

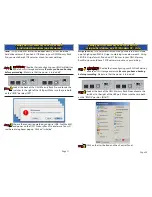
   • Performing a set of open firmware reset routines can result in the 

memory being properly recognized again. To do this, you will need to 

boot your machine into Open firmware. 

To boot into Open Firmware, shut down your Mac, then start it up while 

holding down the Command, Option, O and F keys. At the Open Firm-

ware screen prompt, enter the following commands (you may want to 

write them down on a piece of paper before beginning this process), 

pressing the return key after each:

reset-nvram (press return)

set-defaults (press return)

reset-all (press return, your machine will reboot)

For further troubleshooting tips, visit our FAQ section online at:

http://eshop.macsales.com/tech_center/FAQ/index.cfm

If you are still experiencing problems with your drive, please continue 

on to Chapter 10: Contacting Customer Service, on page 33.

Summary of Contents for Mercury Rack Pro 4 Bay Storage Enclosure

Page 1: ...different from that to which the receiver is connected Health And Safety Precautions Use proper anti static precautions while performing the installation of your hard drives into this drive enclosure...

Page 2: ...nclosures 8 How to NOT hook up your enclosure what NOT to do 9 Chapter 5 Using with a Macintosh 10 Setting up as JBOD 4 individual hard drives 11 Setting up as RAID 0 2 hard drives striped for perform...

Page 3: ...shooting Try and confirm the problem is with the hard drive If you have a sec ond Macintosh computer move the drive to that system and verify that the drive does not function with that machine Visit o...

Page 4: ...n the desktop or in the dock using Mac OS X Your drive is now safe to power off and unhook Realize that you have up to 4 drives to dismount with this 4 bay unit make sure all drives are disconnected b...

Page 5: ...S Requirements Mac Compatible with all Apple OS Versions 8 5 through 9 2 x Apple OS X 10 0 3 and higher including OS X Leopard 10 5 x Windows Compatible with Microsoft Windows 98SE ME 2000 XP Any OS o...

Page 6: ...owing pages you will see the different methods used to connect the drive solu tion to your computer Cable Connections Chapter 4 Drive Icons Now that you have your new OWC Mercury Elite Rack Pro config...

Page 7: ...on 3 Connect to separate FireWire 800 interfaces such as a built in FireWire 800 port AND a PCI PCIe FireWire 800 card Use the 2 included cables to connect one cable to each of these inter faces doubl...

Page 8: ...ows you to maximize the performance of the storage solution even though you do not have two identical interfaces Check Perform a quick format and choose which file system you want to use NTFS is defau...

Page 9: ...a transfer speeds but it is possible to connect multiple units together in the described method The maximum volume size will automatically be prompted in the box at the bottom If you wish to adjust th...

Page 10: ...damage to the unit can occur You also cannot hook both the FireWire 800 and USB 2 0 connection to the computer on the same bridge card Once again data loss and damage to the computer can occur You wil...

Page 11: ...your desktop RAID 0 1 This method is a bit different than the above two methods as it uses a piece of software that is included with this bundle SoftRAID SoftRAID combines two Stripe RAID 0 volumes in...

Page 12: ...mes mount on your desktop Step 1 Step 2 Step 3 Click on the start button and then Control Panel Step 3 Stripe RAID 0 Two volumes will mount on your desktop each made up of a high speed RAID 0 Stripe c...

Page 13: ...volumes listed Click on the first hard drive in the list that has no volume as shown above Step 4 Step 5 You will see the drive begin to format This will take up to 5 minutes to complete The format h...

Page 14: ...nue naming and formatting each of your drives You re all set Step 6 Step 7 Step 8 Check Perform a quick format and choose which file system you want to use NTFS is default and recommended Click Next w...

Page 15: ...itches to the right of the USB port Make sure they are both on the RAID 0 position RIGHT Choose the connection method you desire USB FireWire 800 and power on the OWC Mercury Rack Pro enclosure You wi...

Page 16: ...l unformatted with no volumes listed Click on the first hard drive in the list that has no volume as shown above Step 4 Step 5 You will see the above box appear in the middle of the screen Right click...

Page 17: ...ase 1 pair of drives down 1 more pair to go Repeat on the 2nd set and you re all done Step 7 Step 6 Double click on Computer Management Click on Disk Management under the Storage subcategory Step 5 St...

Page 18: ...esktop Your solution should be configured properly to work the way that you ordered it right out of the box However if you decide you want to reconfigure or change the method you ordered please see th...

Reviews: