background image

3

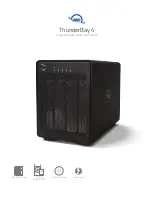
OWC ThunderBay 4

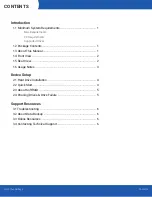
Introduction

1.6 Usage Notes


-

Although the ON/OFF switch controls power to the device, the OWC ThunderBay 4 
requires an active data signal for powered operation. As long as the ON/OFF switch 
is in the ‘ON’ position, the ThunderBay 4 will turn on when it receives a data signal 
through the Thunderbolt cable. If there is no Thunderbolt cable connected, or if the 
computer is off or in a sleep or hibernation mode, the ThunderBay 4 will turn off and 
its power LED will turn orange to indicate that it is not receiving a data signal.


-

In order to use any Thunderbolt devices chained through the ThunderBay 4, the ON/
OFF switch of the ThunderBay 4 must be in the ‘ON’ position.


-

For the safe removal of your drives and to ensure that no data is lost, always 
eject or unmount the drives from your operating system before unplugging the 
ThunderBay 4 or removing the drives. 


-

Thunderbolt device chains can support up to six Thunderbolt devices.


-

Thunderbolt 2 is backwards compatible with Thunderbolt, but any devices 
connected in a Thunderbolt chain after a Thunderbolt device will operate at original 
Thunderbolt  speed (10Gb/s) rather than Thunderbolt 2 speed (20Gb/s). If mixing 
Thunderbolt 2 and original Thunderbolt devices, make sure all Thunderbolt 2 
devices are in front of the Thunderbolt devices (i.e. computer>Thunderbolt 2 
devices>Thunderbolt devices).

Summary of Contents for ThunderBay 4

Page 1: ...2 5 3 5 HDDs SSDs Mac Windows 4 Bay RAID Array Thunderbolt 2 Assembly Manual User Guide ThunderBay 4...

Page 2: ...Contents 1 1 3 About This Manual 1 1 4 Front View 2 1 5 Rear View 2 1 6 Usage Notes 3 Device Setup 2 1 Hard Drive Installation 4 2 2 Quick Start 4 2 3 About SoftRAID 5 2 4 Chaning Drives Drive Failur...

Page 3: ...erBay are trademarks of New Concepts Development Corporation registered in the U S and or other countries Mac and macOS are trademarks of Apple Inc registered in the United States and other countries...

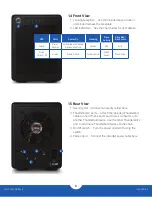
Page 4: ...to lock or unlock and remove the faceplate 2 LED indicators See the chart below for LED details 1 5 Rear View 1 Security slot Connect a security tether here 2 Thunderbolt 2 ports Attach the included...

Page 5: ...devices chained through the ThunderBay 4 the ON OFF switch of the ThunderBay 4 must be in the ON position For the safe removal of your drives and to ensure that no data is lost always eject or unmount...

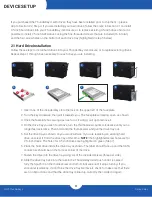
Page 6: ...aceplate has swung open as far as it will go pull up to remove it 4 On the drive tray you wish to remove turn the thumbscrew counter clockwise until you no longer feel resistance Then hold onto the th...

Page 7: ...ThunderBay 4 manages and protects your data with our advanced SoftRAID engine SoftRAID offers multiple RAID options 0 1 4 5 1 0 giving you the ability to set up your storage for speed data security o...

Page 8: ...for OWC technical support contact information 3 2 About Data Backup To ensure that your files are protected and to prevent data loss we strongly suggest that you keep two copies of your data one copy...

Page 9: ...ere is no guarantee that interference will not occur in a particular installation If this equipment does cause harmful interference with radio or television reception which can be determined by turnin...

Page 10: ...keep the device cool during operation Blocking the ventilation openings may cause damage to the device and cause an increased risk of short circuiting or fire Warranty The OWC ThunderBay 4 has up to...

Reviews: