background image

6

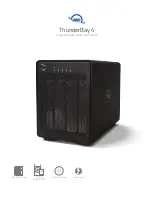
OWC ThunderBay 4

Support Resources

3.1 Troubleshooting

Begin your troubleshooting by verifying that the power cable is connected to the ThunderBay 4 and to a 
power source. If the power cable is connected to a power strip, make sure that the power switch on the 
strip is turned on. Then, verify that both ends of your cables are properly plugged into the computer and the 
ThunderBay 4.

If the ThunderBay 4 is still not working properly, try connecting to another computer or using another 
Thunderbolt cable. Remember that the ThunderBay 4 needs an active data signal in order for the power 
to remain on. If it is disconnected from the computer, or if the computer goes to sleep or turns off, the 
ThunderBay 4 will go to sleep. If you are still experiencing problems, consult Section 3.4 for OWC technical 
support contact information.

3.2 About Data Backup

To ensure that your files are protected and to prevent data loss, we strongly suggest that you keep two 
copies of your data: one copy on your OWC ThunderBay 4 and a second copy on your internal drive or 
another storage medium, such as an optical backup, or on a second external storage unit. Any data loss or 
corruption while using the ThunderBay 4 is the sole responsibility of the user, and under no circumstances 
may OWC, its parent, partners, affiliates, officers, employees, or agents be held liable for loss of the use of 
data including compensation of any kind or recovery of the data.

3.3 Online Resources

To access our online knowledge base, please visit

www.owcdigital.com/faq

3.4 Contacting Technical Support

SUPPORT RESOURCES

Phone:

 M–F, 8am–8pm CT

1.866.692.7100 (N. America)
+1.815.338.4751 (Int’l)

Email:

 Answered within 48 hours

www.owcdigital.com/support

Chat:

 M–F, 8am–8pm, Sat. 9am–5pm CT
www.owcdigital.com/support

Summary of Contents for ThunderBay 4

Page 1: ...2 5 3 5 HDDs SSDs Mac Windows 4 Bay RAID Array Thunderbolt 2 Assembly Manual User Guide ThunderBay 4...

Page 2: ...Contents 1 1 3 About This Manual 1 1 4 Front View 2 1 5 Rear View 2 1 6 Usage Notes 3 Device Setup 2 1 Hard Drive Installation 4 2 2 Quick Start 4 2 3 About SoftRAID 5 2 4 Chaning Drives Drive Failur...

Page 3: ...erBay are trademarks of New Concepts Development Corporation registered in the U S and or other countries Mac and macOS are trademarks of Apple Inc registered in the United States and other countries...

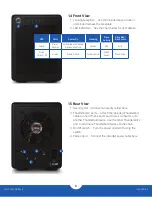
Page 4: ...to lock or unlock and remove the faceplate 2 LED indicators See the chart below for LED details 1 5 Rear View 1 Security slot Connect a security tether here 2 Thunderbolt 2 ports Attach the included...

Page 5: ...devices chained through the ThunderBay 4 the ON OFF switch of the ThunderBay 4 must be in the ON position For the safe removal of your drives and to ensure that no data is lost always eject or unmount...

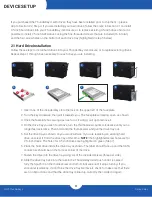
Page 6: ...aceplate has swung open as far as it will go pull up to remove it 4 On the drive tray you wish to remove turn the thumbscrew counter clockwise until you no longer feel resistance Then hold onto the th...

Page 7: ...ThunderBay 4 manages and protects your data with our advanced SoftRAID engine SoftRAID offers multiple RAID options 0 1 4 5 1 0 giving you the ability to set up your storage for speed data security o...

Page 8: ...for OWC technical support contact information 3 2 About Data Backup To ensure that your files are protected and to prevent data loss we strongly suggest that you keep two copies of your data one copy...

Page 9: ...ere is no guarantee that interference will not occur in a particular installation If this equipment does cause harmful interference with radio or television reception which can be determined by turnin...

Page 10: ...keep the device cool during operation Blocking the ventilation openings may cause damage to the device and cause an increased risk of short circuiting or fire Warranty The OWC ThunderBay 4 has up to...

Reviews: