Mounting the additional
solar panel
If you are adding
a panel be sure to
measure the distance
before installing.
Selecting the best
location for the
additional panel
We’ve designed the
VentSure
Solar Attic
Exhaust Fan Additional Solar Panel Kit
to allow you the flexibility to place it
where you can get the best exposure
to the sun during the course of the
day. You can place it on the opposite
side of the roof or an exterior wall
that gets the sun exposure in the
morning or afternoon. Survey your
home to determine the best location
for the extra panel. If the first panel
gets morning sun but no afternoon
sun, consider installing a second panel
where it will get exposed more to the
afternoon sun and vice-versa. This will
keep the fan running for much longer
periods during the day.
Determine the
desired location
for mounting the
solar panel. It is
recommended
the panel be
placed within 30
feet from where
the fan will be
installed. Identify
a location that will
maximize exposure
to the sun’s path
throughout the
day. South or
Southwest facing
roof slopes are
ideal.
(Figure 4)
Note: This product
comes with 30 feet
of extension wire,
as this is suitable
for the vast majority
of installations.
However, the panel
can be placed up to
60 feet away from
the fan’s location
without having a
meaningful drop
in performance.
If the distance
exceeds 30 feet,
a Wire Extension
Kit specific to
this product will need to be purchased
separately from your building materials
supplier.
Surface Mounting
on Asphalt Roofs
Step 1
After determining
a location for
mounting the solar
panel, go into the
attic and make sure
the location will
allow a
3
⁄
8
” diameter
hole without hitting
a rafter. Once the
location has been
confirmed drive
a nail through the
roof deck from the
attic side.
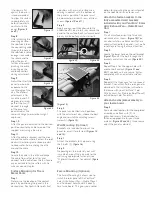
(Figure 5)
Step 2
Locate the nail shank
on the roof. This will
be the center of the
solar mount location.
Step 3
Mark the location
and remove the nail.
Drill a
3
⁄
8
” diameter
hole where the nail
was removed.
Step 4
Locate the solar
panel mounting
base over the
3
⁄
8
”
diameter hole lining
up the center hole
in the mounting
base with the
3
⁄
8
” diameter hole in the
roof deck.
Step 5
Loosen and remove
screw A (both
sides) to allow the
panel to swing away
from the base. Set
the screws aside.
(Figure 6)
Step 6
Pull the wire back through the hole in the
center of the base to allow the base to
lay flat on the roof deck.
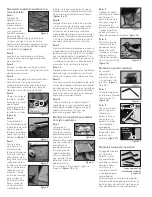
(Figure 7)
Step 7
Fasten the mounting base to the roof
deck using the four (4) 3” galvanized
screws. Seal the tops of the mounting
screws with an
exterior grade
silicone sealant.
Tilt the panel away
from the base
when installing the
screws. If the panel
Figure 7
Figure 8
Figure 9
Figure 11
Figure 12
Figure 13
reinstall
screw A
Figure 17
See Optional
Hardware
Figure 16
Bolt F
Figure 10
mount on at
least 2 tiles
Figure 5
Figure 14
Figure 15
Figure 6
screw A
Optional Fascia
Mounting Kit and
Brackets
Figure 18


