background image

15 

GB/IE

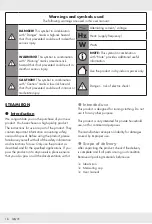
Warnings and symbols used

   .  .  .  .  .  .  .  .  .  .  .  .  .  .  .  .  .  .  .  .  .  .  .  .  .  .  .  .  .  .  .  .  .  .  .  .  .  .  .  .  .  .  .  .  . Page  16

Introduction

   .  .  .  .  .  .  .  .  .  .  .  .  .  .  .  .  .  .  .  .  .  .  .  .  .  .  .  .  .  .  .  .  .  .  .  .  .  .  .  .  .  .  .  .  .  .  .  .  .  .  .  .  .  .  .  .  .  .  .  .  .  .  .  . Page  16

Intended use .  .  .  .  .  .  .  .  .  .  .  .  .  .  .  .  .  .  .  .  .  .  .  .  .  .  .  .  .  .  .  .  .  .  .  .  .  .  .  .  .  .  .  .  .  .  .  .  .  .  .  .  .  .  .  .  .  .  .  .  .  .  .  .  .  . Page  16
Scope of delivery .  .  .  .  .  .  .  .  .  .  .  .  .  .  .  .  .  .  .  .  .  .  .  .  .  .  .  .  .  .  .  .  .  .  .  .  .  .  .  .  .  .  .  .  .  .  .  .  .  .  .  .  .  .  .  .  .  .  .  .  .  . Page  16
Description of parts   .  .  .  .  .  .  .  .  .  .  .  .  .  .  .  .  .  .  .  .  .  .  .  .  .  .  .  .  .  .  .  .  .  .  .  .  .  .  .  .  .  .  .  .  .  .  .  .  .  .  .  .  .  .  .  .  .  .  .  . Page  17
Technical data   .  .  .  .  .  .  .  .  .  .  .  .  .  .  .  .  .  .  .  .  .  .  .  .  .  .  .  .  .  .  .  .  .  .  .  .  .  .  .  .  .  .  .  .  .  .  .  .  .  .  .  .  .  .  .  .  .  .  .  .  .  .  .  . Page  17

Safety instructions

 .  .  .  .  .  .  .  .  .  .  .  .  .  .  .  .  .  .  .  .  .  .  .  .  .  .  .  .  .  .  .  .  .  .  .  .  .  .  .  .  .  .  .  .  .  .  .  .  .  .  .  .  .  .  .  .  . Page  17

Before first use

 .  .  .  .  .  .  .  .  .  .  .  .  .  .  .  .  .  .  .  .  .  .  .  .  .  .  .  .  .  .  .  .  .  .  .  .  .  .  .  .  .  .  .  .  .  .  .  .  .  .  .  .  .  .  .  .  .  .  .  .  . Page  20

Operation

 .  .  .  .  .  .  .  .  .  .  .  .  .  .  .  .  .  .  .  .  .  .  .  .  .  .  .  .  .  .  .  .  .  .  .  .  .  .  .  .  .  .  .  .  .  .  .  .  .  .  .  .  .  .  .  .  .  .  .  .  .  .  .  .  .  .  . Page  20

Setting the temperature   .  .  .  .  .  .  .  .  .  .  .  .  .  .  .  .  .  .  .  .  .  .  .  .  .  .  .  .  .  .  .  .  .  .  .  .  .  .  .  .  .  .  .  .  .  .  .  .  .  .  .  .  .  .  .  .  . Page  20
Ironing   .  .  .  .  .  .  .  .  .  .  .  .  .  .  .  .  .  .  .  .  .  .  .  .  .  .  .  .  .  .  .  .  .  .  .  .  .  .  .  .  .  .  .  .  .  .  .  .  .  .  .  .  .  .  .  .  .  .  .  .  .  .  .  .  .  .  .  .  .  . Page  21
Filling the water tank   .  .  .  .  .  .  .  .  .  .  .  .  .  .  .  .  .  .  .  .  .  .  .  .  .  .  .  .  .  .  .  .  .  .  .  .  .  .  .  .  .  .  .  .  .  .  .  .  .  .  .  .  .  .  .  .  .  .  . Page  21
Ending ironing   .  .  .  .  .  .  .  .  .  .  .  .  .  .  .  .  .  .  .  .  .  .  .  .  .  .  .  .  .  .  .  .  .  .  .  .  .  .  .  .  .  .  .  .  .  .  .  .  .  .  .  .  .  .  .  .  .  .  .  .  .  .  .  . Page  22
Additional product features  .  .  .  .  .  .  .  .  .  .  .  .  .  .  .  .  .  .  .  .  .  .  .  .  .  .  .  .  .  .  .  .  .  .  .  .  .  .  .  .  .  .  .  .  .  .  .  .  .  .  .  .  .  . Page  22

Cleaning and care

   .  .  .  .  .  .  .  .  .  .  .  .  .  .  .  .  .  .  .  .  .  .  .  .  .  .  .  .  .  .  .  .  .  .  .  .  .  .  .  .  .  .  .  .  .  .  .  .  .  .  .  .  .  .  .  .  . Page  22

Self-cleaning function  .  .  .  .  .  .  .  .  .  .  .  .  .  .  .  .  .  .  .  .  .  .  .  .  .  .  .  .  .  .  .  .  .  .  .  .  .  .  .  .  .  .  .  .  .  .  .  .  .  .  .  .  .  .  .  .  .  .  . Page  23

Storage

   .  .  .  .  .  .  .  .  .  .  .  .  .  .  .  .  .  .  .  .  .  .  .  .  .  .  .  .  .  .  .  .  .  .  .  .  .  .  .  .  .  .  .  .  .  .  .  .  .  .  .  .  .  .  .  .  .  .  .  .  .  .  .  .  .  .  .  .  . Page  23

Disposal

 .  .  .  .  .  .  .  .  .  .  .  .  .  .  .  .  .  .  .  .  .  .  .  .  .  .  .  .  .  .  .  .  .  .  .  .  .  .  .  .  .  .  .  .  .  .  .  .  .  .  .  .  .  .  .  .  .  .  .  .  .  .  .  .  .  .  .  .  . Page  23

Warranty

   .  .  .  .  .  .  .  .  .  .  .  .  .  .  .  .  .  .  .  .  .  .  .  .  .  .  .  .  .  .  .  .  .  .  .  .  .  .  .  .  .  .  .  .  .  .  .  .  .  .  .  .  .  .  .  .  .  .  .  .  .  .  .  .  .  .  . Page  24

Summary of Contents for 353419 2007

Page 1: ...en veiligheidsinstructies ELAZKO PAROWE Wskaz wki dotycz ce obs ugi i bezpiecze stwa NAPA OVAC EHLI KA Pokyny pro obsluhu a bezpe nostn pokyny NAPAROVACIA EHLI KA Pokyny pre obsluhu a bezpe nostn pok...

Page 2: ...s de s curit Page 25 NL BE Bedienings en veiligheidsinstructies Pagina 36 PL Wskaz wki dotycz ce obs ugi i bezpiecze stwa Strona 46 CZ Pokyny pro obsluhu a bezpe nostn pokyny Strana 56 SK Pokyny pre o...

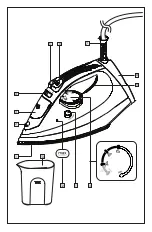
Page 3: ...2 3 4 1 12 11 13 9 8 5 6 7 10...

Page 4: ...nische Daten Seite 7 Sicherheitshinweise Seite 7 Vor der ersten Verwendung Seite 10 Bedienung Seite 10 Temperatur einstellen Seite 10 B geln Seite 11 Wassertank bef llen Seite 11 B geln beenden Seite...

Page 5: ...omschlags DAMPFB GELEISEN Einleitung Wir begl ckw nschen Sie zum Kauf Ihres neuen Produkts Sie haben sich damit f r ein hochwertiges Produkt entschieden Die Bedienungsanleitung ist Teil dieses Produkt...

Page 6: ...ALLE DOKUMENTE WEITER Im Falle von Sch den aufgrund der Nichteinhaltung dieser Bedienungs anleitung erlischt Ihr Garantie anspruch F r Folgesch den wird keine Haftung bernommen Im Falle von Sach oder...

Page 7: ...irgendeiner Weise zu ndern Dieses Produkt kann von Kindern ab 8 Jahren und dar ber sowie von Personen mit verringerten physischen sensorischen oder mentalen F hig keiten oder Mangel an Erfahrung und W...

Page 8: ...digt ist Verwenden Sie das Produkt nur in trockenen Innenr umen Es sind keine Ma nahmen seitens der Anwender erforderlich um das Produkt auf 50 oder 60 Hz einzustellen Das Produkt stellt sich automati...

Page 9: ...er Reichweite von Kindern die j nger als 8 Jahre alt sind wenn es eingeschaltet ist oder abk hlt Vor der ersten Verwendung Entfernen Sie das Verpackungsmaterial berpr fen Sie ob alle Teile vorhanden s...

Page 10: ...ker 7 aus der Steckdose bevor Sie den Wassertank bef llen m ACHTUNG Bef llen Sie den Wassertank mit Leitungswasser oder destilliertem Wasser ohne Zusatzstoffe Falls Sie in Ihrer Region hartes Wasser v...

Page 11: ...r 4 auf die Position kein Dampf Stellen Sie den Sockel 8 des Produkts auf einer ebenen und stabilen Oberfl che ab 3 Ziehen Sie den Netzstecker 7 aus der Steckdose 4 Lassen Sie das Produkt abk hlen die...

Page 12: ...fposition 6 Warten Sie bis sich das Produkt aufgeheizt hat und die Kontrollleuchte f r den Heizvorgang 9 erlischt 7 Halten Sie das Produkt waagerecht ber einem Waschbecken 8 Halten Sie die Taste zur S...

Page 13: ...g ausgesetzt sind z B Batterien und daher als Verschlei teile angesehen werden k nnen oder Besch digungen an zerbrechlichen Teilen z B Schalter Akkus oder die aus Glas gefertigt sind Abwicklung im Gar...

Page 14: ...Technical data Page 17 Safety instructions Page 17 Before first use Page 20 Operation Page 20 Setting the temperature Page 20 Ironing Page 21 Filling the water tank Page 21 Ending ironing Page 22 Add...

Page 15: ...ou on the purchase of your new product You have chosen a high quality product The instructions for use are part of the product They contain important information concerning safety use and disposal Bef...

Page 16: ...TO OTHERS PLEASE ALSO INCLUDE ALL THE DOCUMENTS In the case of damage resulting from non compliance with these operating instructions the warranty claim becomes invalid No liability is accepted for co...

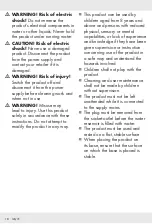
Page 17: ...uct in any way This product can be used by children aged from 8 years and above and persons with reduced physical sensory or mental capabilities or lack of experience and knowledge if they have been g...

Page 18: ...s been damaged in any manner Only use the product in dry indoor rooms No action is needed from users to shift the product between 50 and 60 Hz The product adapts itself for both 50 and 60 Hz Do not op...

Page 19: ...h of children less than 8 years of age when it is energized or cooling down Before first use Remove the packaging Check if all parts are complete To remove any production or transport residue iron a s...

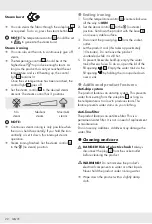
Page 20: ...ock Always disconnect the power plug 7 from the socket outlet before filling the water tank m CAUTION Fill the water tank with tap water or distilled water without any additives If your tap water is h...

Page 21: ...he no steam position Set down the product with the base 8 on an even stable surface 3 Disconnect the power plug 7 from the socket outlet 4 Let the product cool this takes approximately 15 minutes Do n...

Page 22: ...duct to heat up and the control light 9 to go off 7 Hold the product horizontally over a sink 8 Press and hold the self cleaning button 11 until no more steam or boiling soiled water exits the product...

Page 23: ...s warranty does not cover product parts subject to normal wear thus possibly considered consumables e g batteries or for damage to fragile parts e g switches rechargeable batteries or glass parts Warr...

Page 24: ...iques Page 27 Consignes de s curit Page 27 Avant la premi re utilisation Page 30 Fonctionnement Page 30 R glage de la temp rature Page 30 Repassage Page 31 Remplissage du r servoir Page 31 Fin de repa...

Page 25: ...Introduction Nous vous f licitons pour l achat de votre nouveau produit Vous avez opt pour un produit de grande qualit Le mode d emploi fait partie int grante de ce produit Il contient des indication...

Page 26: ...PRODUIT LORSQUE VOUS LE DONNEZ UN TIERS Dans le cas de dommages r sultant du non respect des instructions du mode d emploi le recours la garantie est annul Toute responsabilit est d clin e pour les do...

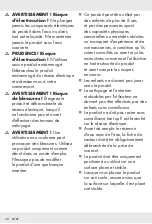
Page 27: ...peut tre utilis par des enfants de plus de 8 ans et par des personnes ayant des capacit s physiques sensorielles ou mentales r duites ou manquant d exp rience et de connaissances condition qu ils soie...

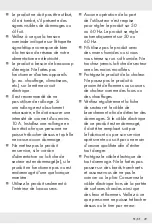
Page 28: ...lement l int rieur de locaux secs Aucune op ration de la part de l utilisateur n est requise pour r gler le produit sur 50 ou 60 Hz Le produit se r gle automatiquement sur 50 ou 60 Hz N utilisez pas l...

Page 29: ...orsqu il est branch ou qu il refroidit Avant la premi re utilisation Retirez les mat riaux d emballage V rifiez que toutes les pi ces soient bien pr sentes Pour liminer d ventuels r sidus dus soit la...

Page 30: ...remplir le r servoir d eau d branchez toujours la fiche de secteur 7 de la prise de courant m ATTENTION Remplissez le r servoir d eau avec de l eau du robinet ou de l eau distill e sans additifs Si v...

Page 31: ...ton de r glage de la vapeur 4 sur la position aucune vapeur Placez le socle 8 du produit sur une surface plane et stable 3 D branchez la fiche de secteur 7 de la prise de courant 4 Laissez refroidir l...

Page 32: ...ttendez que le produit ait chauff et que le voyant de contr le 9 du processus de chauffe s teigne 7 Maintenez le produit horizontalement au dessus d un vier 8 Maintenez le bouton d auto nettoyage 11 e...

Page 33: ...faites par le vendeur par le producteur ou par son repr sentant notamment dans la publicit ou l tiquetage 2 Ou s il pr sente les caract ristiques d finies d un commun accord par les parties ou tre pr...

Page 34: ...toute demande Le num ro de r f rence de l article est indiqu sur la plaque d identification grav sur la page de titre de votre manuel en bas gauche ou sur un autocollant appos sur la face arri re ou...

Page 35: ...egevens Pagina 38 Veiligheidstips Pagina 38 Voor het eerste gebruik Pagina 41 Bediening Pagina 41 Temperatuur instellen Pagina 41 Strijken Pagina 42 Watertank vullen Pagina 42 Met strijken stoppen Pag...

Page 36: ...STRIJKIJZER Inleiding Hartelijk gefeliciteerd met de aankoop van uw nieuwe product U heeft voor een hoogwaardig product gekozen De gebruiksaanwijzing is een deel van het product Deze bevat belangrijke...

Page 37: ...ORGEEFT GEEF DAN OOK ALLE DOCUMENTEN MEE In geval van schade door het niet de hand houden aan deze gebruiksaanwijzing vervalt uw garantieaanspraak Wij zijn niet aansprakelijk voor gevolgschade Wij zij...

Page 38: ...product op een of andere wijze te veranderen Dit product mag door kinderen vanaf 8 jaar alsmede door personen met verminderde fysieke sensorische of geestelijke vermogens of gebrek aan ervaring en ke...

Page 39: ...roduct alleen in droge binnenruimtes Er hoeven door de gebruiker geen maatregelen te worden getroffen om het product op 50 of 60 Hz in te stellen Het product stelt zich automatisch in op 50 of 60 Hz B...

Page 40: ...jn dan 8 jaar als deze aangesloten zijn of afkoelen Voor het eerste gebruik Verwijder het verpakkingsmateriaal Controleer of alle onderdelen meegeleverd zijn Strijk om eventuele productie of transport...

Page 41: ...stopcontact voordat u de watertank vult m OPGELET Vul de watertank met leidingwater of gedistilleerd water zonder andere stoffen toe te voegen Gebruik indien het water in uw regio hard is gedistillee...

Page 42: ...oomregelaar 4 op de stand geen stoom Plaats het voetstuk 8 van het product op een vlak en stabiel oppervlak 3 Trek de netstekker 7 uit het stopcontact 4 Laat het product afkoelen dit duurt ca 15 minut...

Page 43: ...uct opgewarmd is en het controlelampje voor het opwarmen 9 dooft 7 Houd het product loodrecht boven de gootsteen 8 Houd de toets voor het zelfreinigen 11 net zolang ingedrukt dat er geen stoom of koke...

Page 44: ...male slijtage en hierdoor als aan slijtage onderhevige onderdelen gelden bijv batterijen of voor beschadigingen aan breekbare onderdelen zoals bijv schakelaars accu s of dergelijke onderdelen die gema...

Page 45: ...nstrukcje bezpiecze stwa Strona 48 Przed pierwszym u yciem Strona 51 Obs uga Strona 51 Regulacja temperatury Strona 51 Prasowanie Strona 52 Nape nianie zbiornika wod Strona 52 Ko czenie prasowania Str...

Page 46: ...tulujemy Pa stwu zakupu nowego produktu Tym samym zdecydowali si Pa stwo na zakup produktu wysokiej jako ci Instrukcja obs ugi jest cz ci tego produktu Zawiera ona wa ne wskaz wki dotycz ce bezpiecze...

Page 47: ...ENTACJ Uszkodzenia powsta e w wyniku nieprzestrzegania niniejszej instrukcji obs ugi nie s obj te gwarancj Nie ponosimy adnej odpowiedzialno ci w przypadku wyst pienia szk d wt rnych Nie bierzemy odpo...

Page 48: ...instrukcj Nigdy nie pr bowa modyfikowa produktu Produkt ten mo e by u ywany przez dzieci w wieku powy ej 8 lat i os b o ograniczonych zdolno ciach fizycznych zmys owych lub umys owych lub braku do wi...

Page 49: ...uszkodzony Produkt stosowa tylko w pomieszczeniach suchych Ze strony u ytkownika nie jest wymagane adne dzia anie aby dostosowa produkt do cz stotliwo ci 50 lub 60 Hz Produkt automatycznie dostosowuje...

Page 50: ...trzyma w miejscu niedost pnym dla dzieci w wieku poni ej 8 lat Przed pierwszym u yciem Usun opakowanie Upewni si e wszystkie elementy s dost pne W celu usuni cia pozosta o ci poprodukcyjnych lub trans...

Page 51: ...anie zbiornika wod NIEBEZPIECZE STWO Niebezpiecze stwo pora enia pr dem Przed nape nieniem zbiornika 7 zawsze wyjmowa wtyczk kabla zasilania z gniazdka sieciowego m UWAGA Zbiornik nape nia wod z kranu...

Page 52: ...skaz wek zegara ustawiaj c na pozycji MIN 2 Regulator ilo ci pary 4 ustawi w pozycji brak pary Podstaw produktu 8 nale y ustawi na stabilnej i p askiej powierzchni 3 Wtyczk 7 wyj z gniazdka sieciowego...

Page 53: ...stawi na wytwarzanie maksymalnej ilo ci pary 6 Zaczeka a produkt si nagrzeje i wska nik 9 zga nie 7 Trzyma produkt poziomo nad zlewem 8 Przytrzyma wci ni ty przycisk samoczyszczenia 11 dop ki nie wydo...

Page 54: ...wykonanych ze szk a Zgodnie z Kodeksem Cywilnym art 581 1 wraz z wymian urz dzenia lub wa nej cz ci czas gwarancji rozpoczyna si na nowo Spos b post powania w przypadku naprawy gwarancyjnej Aby zapew...

Page 55: ...Technick daje Strana 58 Bezpe nostn pokyny Strana 58 P ed prvn m pou it m Strana 61 Obsluha Strana 61 Nastaven teploty Strana 61 ehlen Strana 62 Napln n n dobky na vodu Strana 62 Ukon en ehlen Strana...

Page 56: ...n za n sledek mal nebo lehk zran n Nebezpe riziko razu elektrick m proudem NAPA OVAC EHLI KA vod Blahop ejeme V m ke koupi nov ho v robku Rozhodli jste se pro kvalitn produkt N vod k obsluze je sou st...

Page 57: ...MI POKYNY KDY P ED V TE TENTO V ROBEK JIN M LIDEM P EDEJTE JIM I V ECHNY DOKUMENTY V p pad po kozen v d sledku nedodr en tohoto n vodu k obsluze se Va e z ruka ru Za n sledn kody se nep eb r dn odpov...

Page 58: ...hradn podle tohoto n vodu Nepokou ejte se v robek n jak m zp sobem m nit Tento v robek mohou pou vat d ti star 8 let i osoby se sn en mi fyzick mi smyslov mi i ment ln mi schopnostmi nebo s nedostatk...

Page 59: ...ek jen v such ch vnit n ch prostor ch Ze strany u ivatele nejsou zapot eb dn opat en aby se v robek nastavil na 50 nebo 60 Hz V robek se automaticky nastav na 50 nebo 60 Hz Nepou vejte v robek s mokr...

Page 60: ...ne 8 let v ku pokud je p ipojena nebo kdy se ochlazuje P ed prvn m pou it m Odstra te ve ker balic materi ly Zkontrolujte zda jsou v echny d ly k dispozici Chcete li odstranit zbytky z v roby i p epra...

Page 61: ...s ovou z str ku 7 ze z suvky ne napln te n dr ku na vodu m V STRAHA Napl te n dr ku na vodu vodou z vodovodu nebo destilovanou vodou bez p sad Pokud je ve sv m regionu tvrd voda pou ijte destilovanou...

Page 62: ...e parn regul tor 4 do polohy bez p ry Postavte v robek z kladnou 8 na rovn a stabiln povrch 3 Vyt hn te s ovou z str ku 7 ze z suvky 4 Nechte v robek ochladit to trv cca 15 minut Nenech vejte v robek...

Page 63: ...ek 5 Nastavte regul tor p ry 4 do maxim ln parn polohy 6 Po kejte a v robek zah eje a kontrolka oh evu 9 zhasne 7 Dr te v robek vodorovn nad umyvadlem 8 Podr te tla tko pro samo i t n 11 stisknut tak...

Page 64: ...materi lu a v robn vady Tato z ruka se nevztahuje na d ly v robku podl haj c opot eben nap na baterie d le na po kozen k ehk ch choulostiv ch d l nap vyp na akumul tor nebo d l zhotoven ch ze skla Po...

Page 65: ...aje Strana 68 Bezpe nostn upozornenia Strana 68 Pred prv m pou it m Strana 71 Obsluha Strana 71 Nastavenie teploty Strana 71 ehlenie Strana 72 Naplnenie n dr e na vodu Strana 72 Ukon enie ehlenia Stra...

Page 66: ...lebo stredne a k zranenie Nebezpe enstvo razu elektrick m pr dom NAPAROVACIA EHLI KA vod Blaho el me V m ku k pe V ho nov ho v robku Rozhodli ste sa pre ve mi kvalitn v robok N vod na obsluhu je s as...

Page 67: ...LEJ ODOVZDAJTE AJ KOMPLETN DOKUMENT CIU K PRODUKTU V pr pade po kodenia z d vodu nedodr ania tejto pou vate skej pr ru ky zanik n rok na z ruku Za n sledne vzniknut kody nepreber me iadnu z ruku V pr...

Page 68: ...ukt pou vajte v lu ne pod a tohto n vodu Nepok ajte sa produkt iadnym sp sobom meni Tento produkt m u pou va deti od 8 rokov a star ie ako aj osoby so zn en mi fyzick mi zmyslov mi alebo du evn mi sch...

Page 69: ...Na strane pou vate a sa nevy aduje iadna innos pri nastavovan produktu na 50 alebo 60 Hz Produkt sa na 50 resp 60 Hz nastav automaticky Produkt nepou vajte s mokr mi rukami alebo vtedy ke stoj te na m...

Page 70: ...ahu det ktor s mlad ie ako 8 rokov ak je zapnut alebo sa chlad Pred prv m pou it m Odstr te obalov materi l Skontrolujte i boli dodan v etky diely Na odstr nenie eventu lneho po kodenia z v roby alebo...

Page 71: ...v z str ku 7 v dy vytiahnite zo z suvky ak idete plni vodu do n dr ky m OPATRNE Napl te n dr na vodu vodou z vodovodu alebo destilovanou vodou bez pr sad Ak m te vo va om regi ne tvrd vodu pou ite des...

Page 72: ...pary 4 do polohy iadna para P tku 8 produktu postavte na rovn a stabiln povrch 3 Vytiahnite sie ov z str ku 7 zo z suvky 4 Produkt nechajte vychladn to trv cca 15 min t Produkt nenech vajte bez dozor...

Page 73: ...z 5 Nastavte regul tor pary 4 na maxim lnu paru 6 Po kajte a na produkt nahreje a kontrolka pre proces nahrievania 9 zhasne 7 Produkt podr te vo vodorovnej polohe nad um vadlom 8 Tla idlo na samo iste...

Page 74: ...e na asti produktu ktor s vystaven norm lnemu opotrebovaniu a preto ich je mo n pova ova za opotrebovate n diely napr bat rie alebo na po kodenia na rozbitn ch dieloch napr na sp na i akumul torov ch...

Page 75: ...ina 78 Indicaciones de seguridad P gina 78 Antes del primer uso P gina 81 Funcionamiento P gina 81 Ajuste de temperatura P gina 81 Planchado P gina 82 Llenado del dep sito de agua P gina 82 Finalizaci...

Page 76: ...escarga el ctrica PLANCHA DE VAPOR Introducci n Enhorabuena por la adquisici n de su nuevo producto Ha optado por un producto de alta calidad El manual de instrucciones forma parte de este producto Co...

Page 77: ...ENTO SI TRANSFIERE ESTE PRODUCTO H GALO CON TODA LA DOCUMENTACI N Queda anulada su garant a en el caso de da os por la no contemplaci n de este manual de instrucciones No se asumir ninguna responsabil...

Page 78: ...cciones Nunca intente modificar el producto en modo alguno Este producto puede ser utilizado por ni os a partir de los 8 a os y personas con capacidades f sicas mentales o sensoriales reducidas siempr...

Page 79: ...el producto solo en espacios interiores secos El usuario no necesita adoptar ninguna medida para ajustar el producto a 50 o 60 Hz El producto se ajusta autom ticamente a 50 o 60 Hz No maneje el produc...

Page 80: ...menores de 8 a os siempre que est conectada o se est enfriando Antes del primer uso Retire por completo el material de embalaje Compruebe la totalidad de las piezas Para eliminar los posibles restos d...

Page 81: ...arga el ctrica Desconecte siempre el enchufe 7 de la toma de corriente antes de llenar el dep sito de agua m ATENCI N Llene el dep sito de agua con agua potable o agua destilada sin aditivos Si el agu...

Page 82: ...posici n MIN 2 Coloque el regulador de vapor 4 en la posici n sin vapor Coloque la base 8 del producto sobre una superficie horizontal y estable 3 Desconecte el enchufe 7 de la toma de corriente 4 Dej...

Page 83: ...tado y se apague la luz de control del proceso de calentamiento 9 7 Mantenga el producto horizontalmente sobre un fregadero 8 Mantenga pulsado el bot n de autolimpieza 11 hasta que deje de salir vapor...

Page 84: ...abricaci n Esta garant a no cubre aquellos componentes del producto sometidos a un desgaste normal y que por ello puedan considerarse piezas de desgaste por ej las pilas Tampoco cubre da os de compone...

Page 85: ...data Side 88 Sikkerhedsanvisninger Side 88 F r f rste ibrugtagning Side 91 Betjening Side 91 Indstilling af temperatur Side 91 Strygning Side 92 P fyldning af vandtank Side 92 Afslutning af strygning...

Page 86: ...lektrisk st d DAMPSTRYGEJERN Indledning Hjerteligt tillykke med k bet af deres nye produkt Du har besluttet dig for et produkt af h j kvalitet Brugervejledningen er en del af dette produkt Den indehol...

Page 87: ...HVIS PRODUKTET OVERLADES TIL TREDJEMAND SKAL ALLE DOKUMENTER MEDF LGE Hvis der opst r skader som f lge af at brugsanvisningen ikke f lges bortfalder garantiforpligtelserne Leverand ren p tager sig in...

Page 88: ...g ikke at ndre produktet under nogen form Dette produkt kan anvendes af b rn fra 8 r og opefter samt af personer med reducerede fysiske sensoriske eller mentale f rdigheder eller mangel p erfaring og...

Page 89: ...vend kun produktet indend rs i t rre lokaler Brugere beh ver ikke at foretage sig noget for at ndre produktet mellem 50 og 60 Hz Produktet tilpasser sig selv for b de 50 og 60 Hz Produktet m ikke betj...

Page 90: ...r r kkevidde af b rn der er yngre end 8 r n r det er tilsluttet eller n r det afk ler F r f rste ibrugtagning Fjern emballagen Kontroll r at alle dele er komplette For at fjerne eventuelle produktions...

Page 91: ...e for elektrisk st d Tr k altid netstikket 7 ud af stikkontakten f r vandtanken fyldes m OBS Vandtanken fyldes med brugsvand eller destilleret vand uden tils tningsstoffer Hvis vandet i dit omr de er...

Page 92: ...mpregulatoren 4 p position ingen damp Anbring produktets fod 8 p et plant og stabilt underlag 3 Tr k netstikket 7 ud af stikkontakten 4 Lad produktet afk le dette varer ca 15 minutter Produktet m ikke...

Page 93: ...er varmt og kontrollampen for opvarmning 9 slukker 7 Hold produktet vandret over en h ndvask 8 Hold knappen til selvrensning 11 nedtrykt indtil der ikke slipper mere damp eller kogende og forurenet va...

Page 94: ...le eller fabrikationsfejl Denne garanti d kker ikke produktdele som er udsat for normalt slid og derfor kan betragtes som normale sliddele f eks batterier eller ved skader p skr belige dele f eks kont...

Page 95: ...IAN 353419_2007 OWIM GmbH Co KG Stiftsbergstra e 1 74167 Neckarsulm GERMANY Model No HG06892C HG06892D Version 12 2020...

Reviews: