

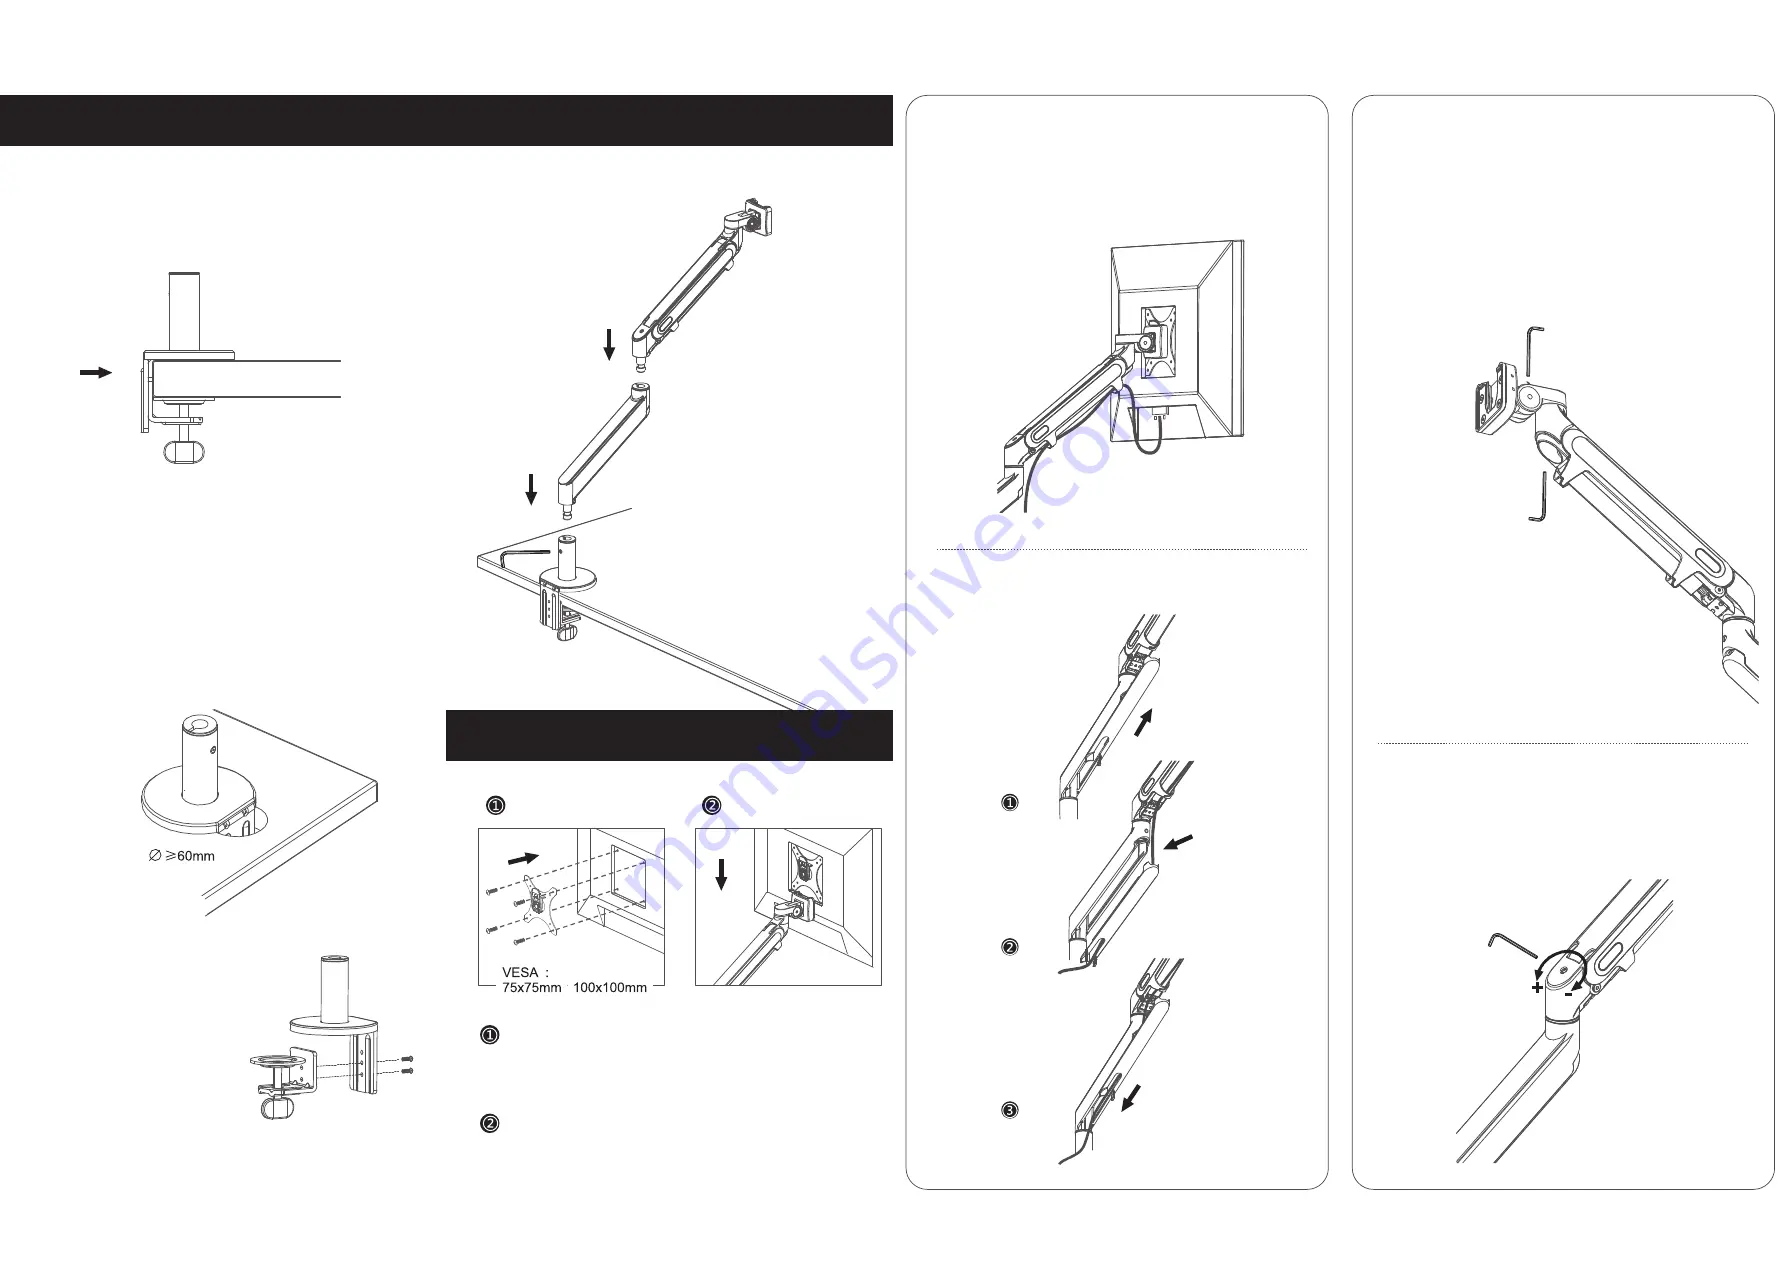
STEP 1:
Installing the base
STEP 2:
Installing the arm
STEP 3:
Mounting the monitor
Mount the base to your table top. If the default clamp size is
not suitable for you, it can be made larger or smaller by
adjusting its bottom plate.
Method 1: Installing on the open edge of the
table top
Method 2: Installing through a grommet hole
Detach the bottom clamp before
installing the base stem
Once the arm is put in place,
secure it in place by
tightening the screw.
Install the VESA plate to the back of your monitor. Make
sure you install the clip facing upwards. Our VESA plate
is compatible with both 75x75mm and 100x100mm
mounts.
You can easily slide down the monitor with VESA plate
into the arm bracket.
To remove, press the clip at the top while pulling the
monitor up.
Cable Management
Use the built-in cable management to tidy up your cables.
Removing the cover plate may need some force, be careful
not to damage it while doing so.
Adjustments
The default adjustments work for most use cases. You may
look into these finer adjustments to make them suit your
needs.
Adjusts the tightness of verticle
tilt
Adjusts the tightness of horizontal tilt
If your monitor seems too heavy or too light to easily adjust
its height, tightening the weight screw may help.
Important:
Unlike other screws, turning this screw anti-
clockwise will make it tighter, requiring more weight to
move the monitor up or down.


