background image


Praktika T-02(К) turnstile 

 8 

•  Remove  two  self-tapping  screws  using  a  crosshead  screwdriver  with  a 
magnetic tip (Fig. 4) 
CAUTION!  Make  sure  that  the  fittings  do  not  fall  into  the  turnstile 
mechanism. 
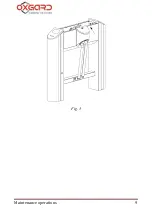
• slide the turnstile cover in the direction indicated by Fig. 5, and lift  
it up. 


Fig. 4 

Summary of Contents for Praktika T-02

Page 1: ...MAINTENANCE OPERATIONS www oxgard com info oxgard com Tel 7 812 366 15 94 Praktika T 02 К turnstile ...

Page 2: ......

Page 3: ... Contents 1 General information 4 2 Conditions for maintenance 5 3 Partial disassemble of the turnstile 5 4 Checking turnstile parts 15 5 Lubrication of moving parts 16 6 Assembling and performance checking of the turnstile 16 ...

Page 4: ...s Should there be any failure MO should be performed immediately after repair works 1 3 During MO it is recommended to carry out the work by two qualified mechanical and electrical engineers acquainted with the manual 1 4 MO includes the following scope of work partial disassemble of the turnstile cleaning of load bearing frame checking of parts and units fixation lubrication of subject to wear pa...

Page 5: ...nel Otherwise the manufacturer will void the product warranty CAUTION It is not recommended to adjust the limitation units of solenoid stroke Hall sensor bracket and spring tension These components are adjusted at the factory Violation of these adjustments may lead to failures of the whole electromechanical system 3 Partial disassemble of the turnstile To get access to all elements of the turnstil...

Page 6: ...raktika T 02 К turnstile 6 Fig 1 Press the button 4 on the RC panel Fig 2 and fold the arms The result is shown in Fig 3 3 2 Turn off turnstile power supply and disconnect it from the electrical network ...

Page 7: ...Maintenance operations 7 Fig 2 Fig 3 3 3 Open using the key and remove the cover with locks see Fig 1 3 4 Removing turnstile cover ...

Page 8: ...wo self tapping screws using a crosshead screwdriver with a magnetic tip Fig 4 CAUTION Make sure that the fittings do not fall into the turnstile mechanism slide the turnstile cover in the direction indicated by Fig 5 and lift it up Fig 4 ...

Page 9: ...Maintenance operations 9 Fig 5 ...

Page 10: ...Praktika T 02 К turnstile 10 Fig 6 ...

Page 11: ...Maintenance operations 11 Fig 7 Fig 8 ...

Page 12: ...Praktika T 02 К turnstile 12 Fig 9 ...

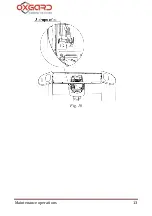
Page 13: ...Maintenance operations 13 Fig 10 ...

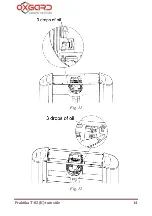
Page 14: ...Praktika T 02 К turnstile 14 Fig 11 Fig 12 ...

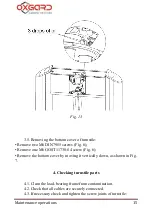
Page 15: ...ig 6 Remove one M6 GOST11738 84 screw Fig 6 Remove the bottom cover by moving it vertically down as shown in Fig 7 4 Checking turnstile parts 4 1 Clean the load bearing frame from contamination 4 2 Check that all cables are securely connected 4 3 If necessary check and tighten the screw joints of turnstile ...

Page 16: ...ion of lock pin and arms unblocking cams Fig 13 The operation shall be done for each arm Hole in Fig 13 is shown in the conventional manner 6 Assembling and performance checking of the turnstile 6 1 If any troubles or defects are found out during MO it is advised to contact our service department for advice contact details are available online www oxgard com 6 2 If it is necessary to repair damage...

Page 17: ...Maintenance operations 17 6 5 If there is no extraneous noise or any abnormality in the turnstile work it is ready for operation ...

Page 18: ...Praktika T 02 К turnstile 18 ...

Page 19: ...Maintenance operations 19 ...

Page 20: ...OOO Vozrozdenie 192289 Saint Petersburg Sofiyskaya st 66 Tel fax 7 812 366 15 94 www oxgard com info oxgard com ...

Reviews: