Page
3
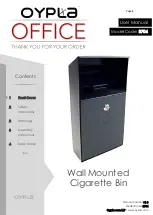
Manual Version: v1.0
Model Code: 3704
Oypla.com LLP / www.oypla.com
Parts List:
-
If you are missing any of the below parts, please contact
-
Please be aware that you will be referring to this parts list throughout the
assembly process.
1 x Cigarette Bin
1 x Metal Ash Bin
3 x Washer
1 x Key
3 x Screw
3 x Wall Plug
Drill the three holes needed in the desired wall/surface based on the
measurements on the next page. Once you
’
ve drilled the holes in the wall,
push the wall plugs inside so when the screws are added they
’
ll be secure.
*Note
–
do not use a drill bit which is too large. Compare drill bit to the wall
plug to ensure it will fit snug.
*Note
–
ensure to check for any hidden cables/pipes in the wall before
proceeding with drilling.
Open the cigarette bin using the key provided, taking out the metal ash bin.
After this, secure the washers onto the wall, making sure they line up with the
holes in the cigarette bin.
Once done, place a screw into one of the holes in the cigarette bin, ensuring
it goes through both the bin and into the washer. Drill the screw into the wall,
ensuring not to tighten the screw too much, to avoid damaging the product.
Repeat this step for the remaining two holes. This will secure the cigarette
bin against the wall.
Slide the metal ash bin back into place, ensuring it locks into place by
overlapping the metal folds of the metal ash bin and cigarette bin.
Once the metal ash bin is secure, push the front of the cigarette bin back into
place and lock it. Keep the key, as this will allow you to empty the metal ash
bin. You are now able to use the cigarette bin. To empty the cigarette bin,
take one of the keys provided and unlock the front panel to gain access to the
ashtray within. Slide the ashtray out of the cigarette bin wall mount, and
empty the ashtray in an environmentally friendly way.
Contents
1
Front Cover
-
2
Safety
Instructions
-
2
Warnings
-
3
Assembly
Instructions
-
4
Back Cover
End
Assembly Instructions
1
2
3
4
5


