9
MAT ASSEMBLY
Step 1
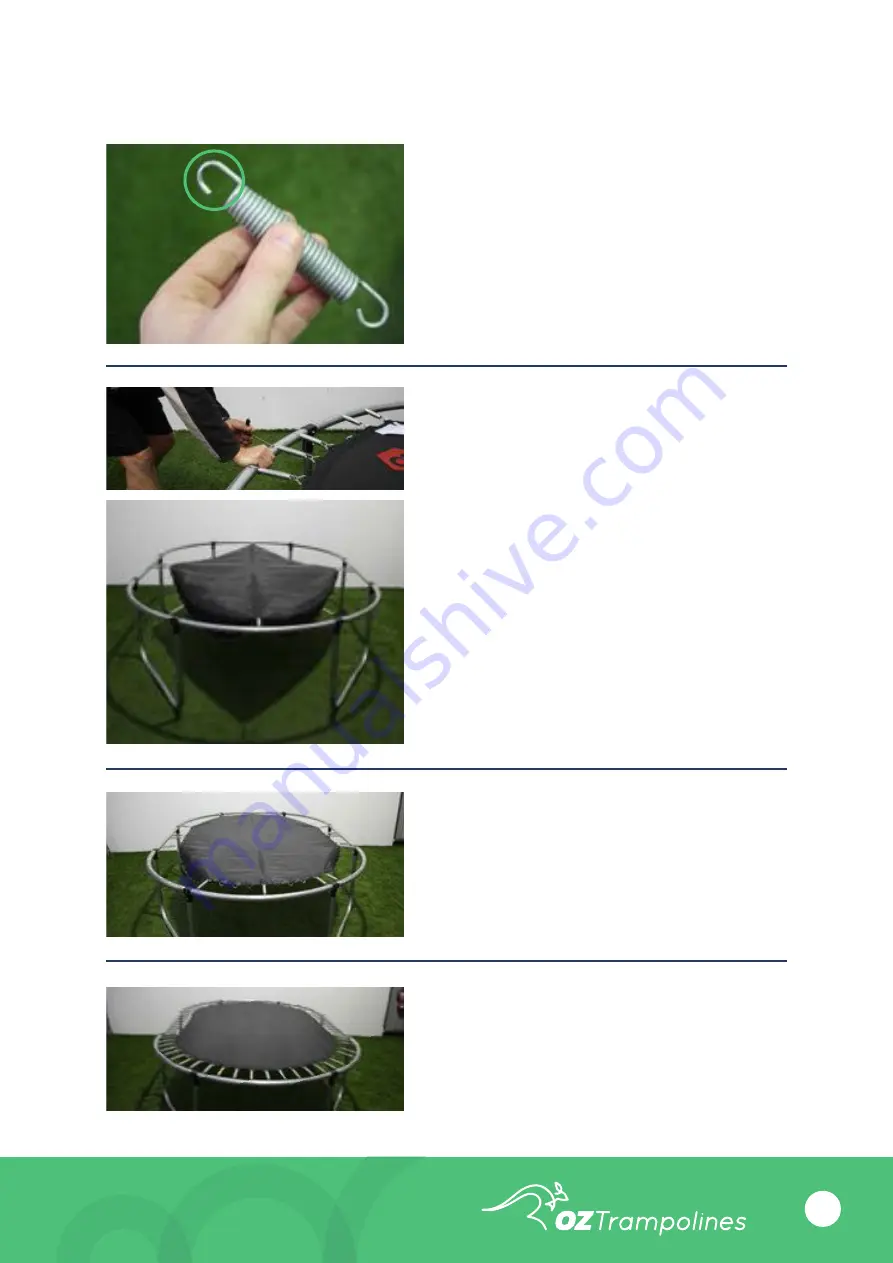
Ensure that you have counted your springs and have the
correct amount of springs for your trampoline.
Also take note that the end of the spring which looks like
the letter C, is the end that hooks into your trampoline
frame. When applying springs, please use your spring
tool provided.
Handy Hint
For ease of attaching the springs, place one hand on the
frame to pull the spring towards you, and place it in the
slot on the frame.
Step 2
Attach a spring to your trampoline mat at the top of the
frame (12 O’Clock). Then proceed to attach a spring to
the opposite end of the frame (6 O’Clock). This technique
allows for the best tension and is much safer.
Continue to attach the springs at 3 O’Clock and 9 O’Clock.
Again this helps to create the best tension on both the
mat and the frame.
Our video on our support page can help you align your
mat correctly if you are having difficulty.
oztrampolines.com.au/videos.asp
Step 3
Continue the process of attaching the springs to your
mat at 2 O’Clock, 8 O’Clock, 4 O’Clock and 10 O’Clock.
Ensure that each time you connect a spring to the mat,
you attach the opposite side to allow better tension and
pressure. Repeat this until all the springs are attached.
Mat: Finished Stage
Your mat and springs are now complete.
Well done!


