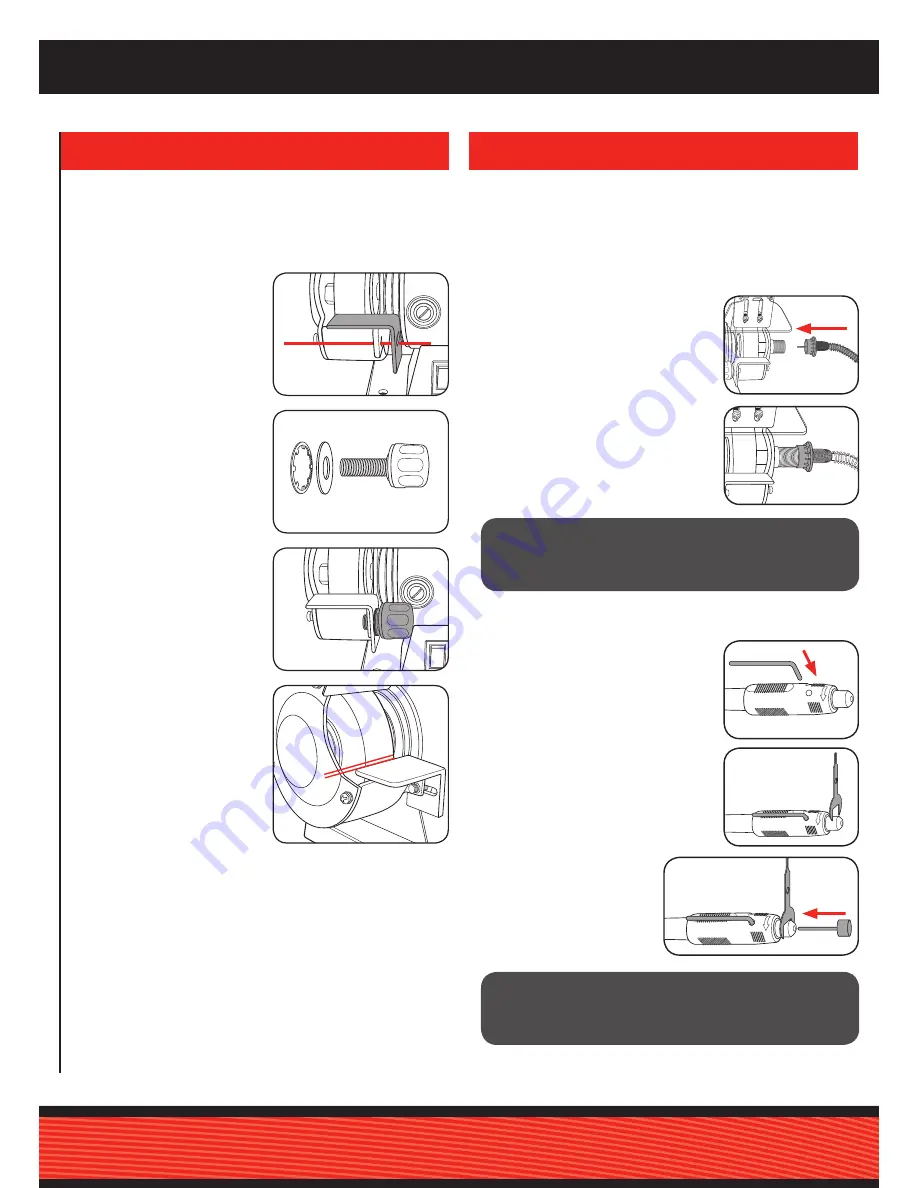
Fitting the Adjustable Tool Rest
The Bench Grinder comes with two adjustable tool rests that aid
the user in holding items steady as they are being applied to the
grinding wheels.
1. Align the slot in the tool rest
with the hole in the bottom of
the wheel guard cover.
2. Place the washers on the
threaded end of the star
screw.
3. Secure the adjustable tool rest
to the grinder using the star
screw. Do not fully tighten until
the final adjustments have
been made.
4. Adjust the tool rest so that the
distance between the grinding
wheel and the tool rest is as
small as possible and does
not exceed 2 mm. Tighten the
star screw.
NOTE:
Adjust the tool rest
periodically to compensate for
wear on the grinding wheel.
2. THE FLEXIBLE SHAFT
IMPORTANT!
WHEN YOU WORK WITH THE FLEXIBLE
DRIVE, THE SAFETY SHIELD MUST BE PLACED RIGHT UP
AGAINST THE ADJUSTABLE TOOL REST IN ORDER TO
PREVENT ACCIDENTAL TOUCHING OF THE WHEELS.
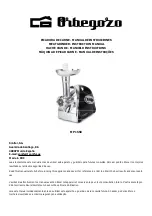
Installing the Flexible Drive
NOTE:
Fitting the accessory flexible drive shaft is optional and should
only be fitted when required.
The flexible drive is designed for the grinding, deburring, polishing,
engraving, cutting, milling and cleaning of wood, metal and plastic
in model making, in workshops and in the home. Use the tool and
its accessories only for the applications
described.
1. Insert the internal shaft of the flexible
drive into the guide shaft on the right
hand side of the grinder.
2. Secure the fastening nut of the flexible
drive to the equipment thread by hand
(left-hand thread).
Inserting the accessories
into the Flexible Drive
1. Press the supplied locking pin into the
hole in the flexible drive and turn the
shaft until the pin latches in place.
2. Undo the collet chuck nut with the
supplied spanner.
3. Insert the required
accessory into the sleeve
and tighten the collet chuck
nut.
IMPORTANT!
ALWAYS DETACH THE FLEXIBLE DRIVE FROM
THE GRINDER WHEN NOT IN USE. AN ATTACHED FLEXIBLE
DRIVE MAY WHIP ABOUT UNCONTROLLABLY IF IT IS NOT
BEING HELD.
2 mm
Max.


