
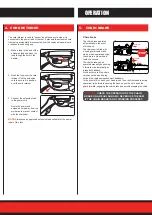


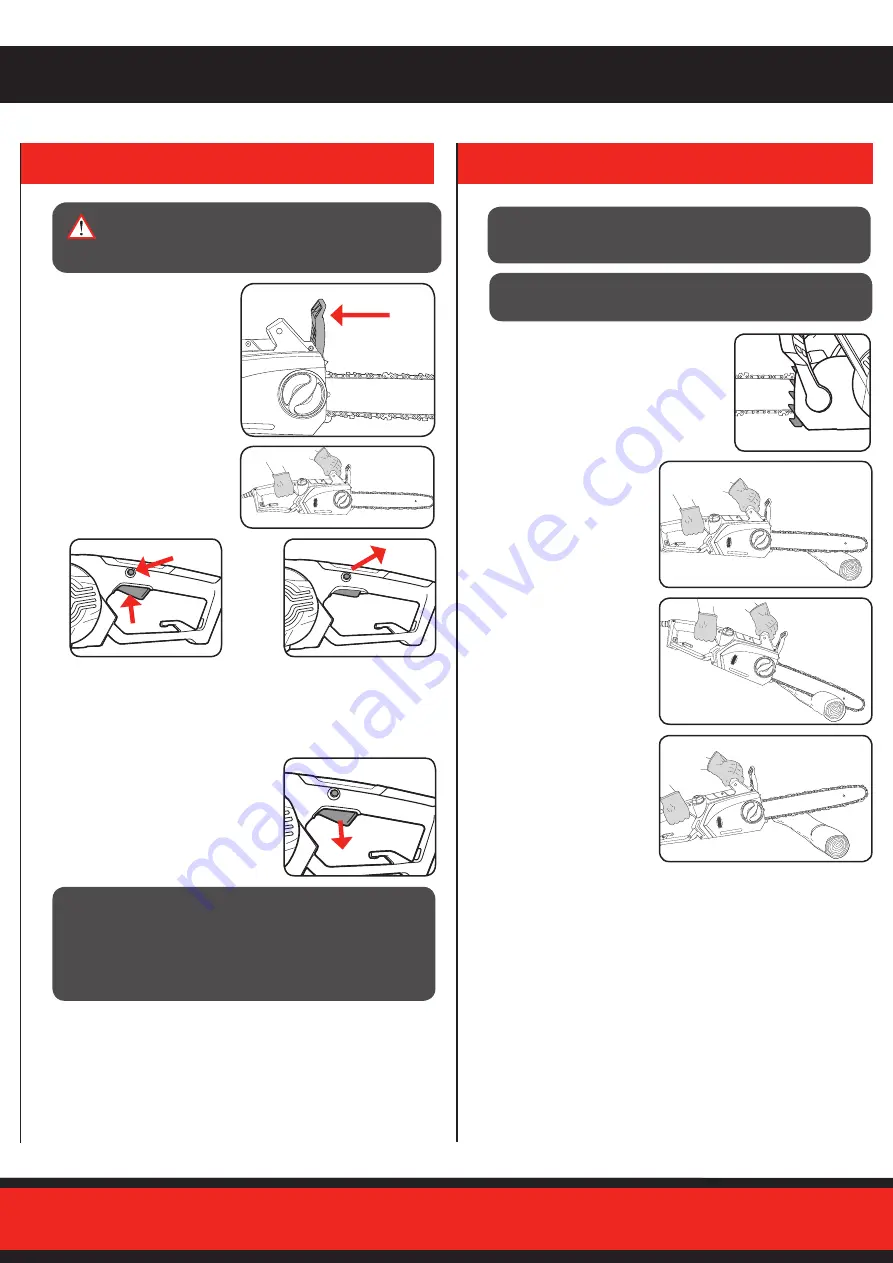
Switching on
1. Pull the hand guard/chain
brake towards you. The
brake may be stiff and may
require to be moved with
some force. If the brake is
engaged the chain will not
operate.
2. Hold the front handle with
your left hand and the rear
handle with your right hand.
3. Use the thumb of your right hand
to push the lock-off switch in and
squeeze the on/off trigger to start
the motor.
Switching off
1. Release the ON/OFF trigger. The
integrated brake will bring the
running chainsaw to a standstill
within a very short space of time.
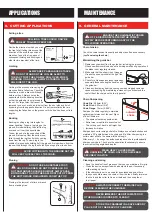
ECS-1835
6. SWITCHING ON/OFF
RUN
BRAKE OFF
BRAKE ON
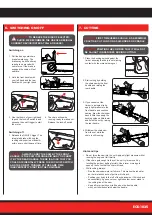
7. CUTTING
1. Press the bucking spikes against the
timber ensuring the chain is not making
contact with the material being cut.
2. Start cutting by holding
the chainsaw by the front
handle and raising the
rear handle.
3. If you cannot cut the
timber in a single stroke,
apply light pressure to the
front handle and continue
sawing, draw the chainsaw
back a little then apply the
bucking spikes a little lower
and finish the cut by raising
the rear handle.
4. Withdraw the chainsaw
from the cut while the
chain is still running.
CAUTION:
FIRST TIME USERS SHOULD, AS A MINIMUM
PRACTISE, CUT LOGS ON A SAW-HORSE OR CRADLE
CAUTION:
POSITION THE CORD SO THAT IT WILL NOT
BE CAUGHT IN BRANCHES DURING CUTTING
CAUTION!
TO REDUCE THE RISK OF ELECTRIC
SHOCK, WE RECOMMEND THE USE OF A RESIDUAL
CURRENT DEVICE (RATED AT 30mA OR LESS).
CAUTION:
ALWAYS CARRY THE SAW BY THE FRONT
HANDLE. IF THE SAW IS PLUGGED IN AND YOU CARRY
IT BY THE REAR HANDLE, THERE IS A RISK THAT YOU
COULD ACCIDENTALLY PRESS THE LOCK-OFF SWITCH
AND THE ON/OFF TRIGGER AT THE SAME TIME,
INADVERTENTLY STARTING THE CHAINSAW.
4. The chain will now be
running, ready to make a cut.
Release the lock-off switch.
Hints and tips
• Do not force the saw into the cut. Apply only light pressure whilst
running the engine at full throttle.
• If the chain gets caught in the cut, do not try to remove it by
twisting the guide or pulling forcibly. Use a lever or wedge to
open up the cut so that the chain is freed.
• While cutting, always:
– Run the chainsaw motor at full revs. This makes the job safer,
as there is less chance of pull-in or kick-back.
– Position your body to the left of the chainsaw so if it kicks back
uncontrollably, it goes over your right shoulder, never stand in
the cutting line of the saw.
– Keep a firm grip with your left hand on the front handle,
with your thumb securely below the handle.


