9
Dust Bag
Regularly check and empty the dust bag for best results.
Changing And Adjusting Blades
For best results, keep the blades clean and replace when necessary.
To Change Blades
Before you make any adjustments, make sure the power cord has been
disconnected from the electricity supply.
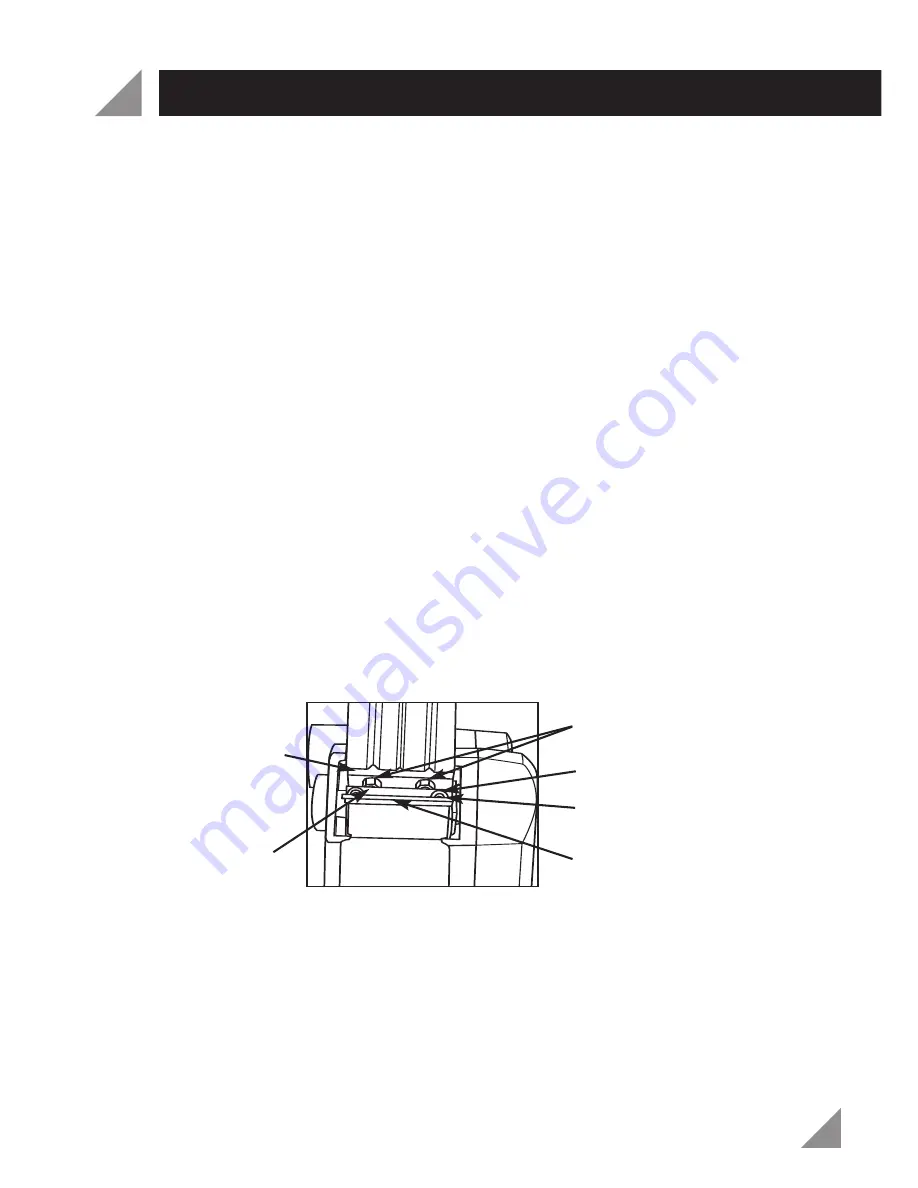
The blades that come standard with the tool are 50mm TCT reversible, slither
blades (D).
The planer drum (7) is fitted with two separate blades; both must be reversed
or replaced at the same time. Never replace only one blade.
•
Loosen (do not remove) the hex head bolts (B) with the 8 mm spanner (10)
provided.
•
With the two hex head bolts (B) loose, push the old blade out of the
blade block (F) with a screwdriver. The blades have two cutting edges on
them. If this is the first time you are changing blades, you need only to
turn the blades around to expose the fresh cutting edge, otherwise you
will have to replace the blades.
•
Install the new or reversed, blades by sliding the blades all the way back
into the blade block (F) until the end of them is flush with the edge of the
rear shoe.
•
Securely tighten the two hex head bolts (B) (repeat for both blades).
Fitting The Material Collection Bag
•
Secure the plastic sleeve on the end of the material collection bag (11) on
to the material extractor port (9) on the side of the palm planer.
Changing The Drive Belt
•
Remove the two screws on the drive belt cover (6) and remove the cover.
Remove the broken or damaged belt.
•
Place the new drive belt onto the smallest drive pulley first and while
turning the planer drum (7) anti-clockwise slip the new belt onto the larger
planer drum (7) drive pulley until the belt is fully located over all of the
pulley drive grooves.
TOOL OPERATION (cont.)
Fig. 1
7. Planer drum
F. Blade block
E. Blade Plate
D. TCT reversible slither blades
C. Allen key blade height adjuster screws
B. Hex head bolts


